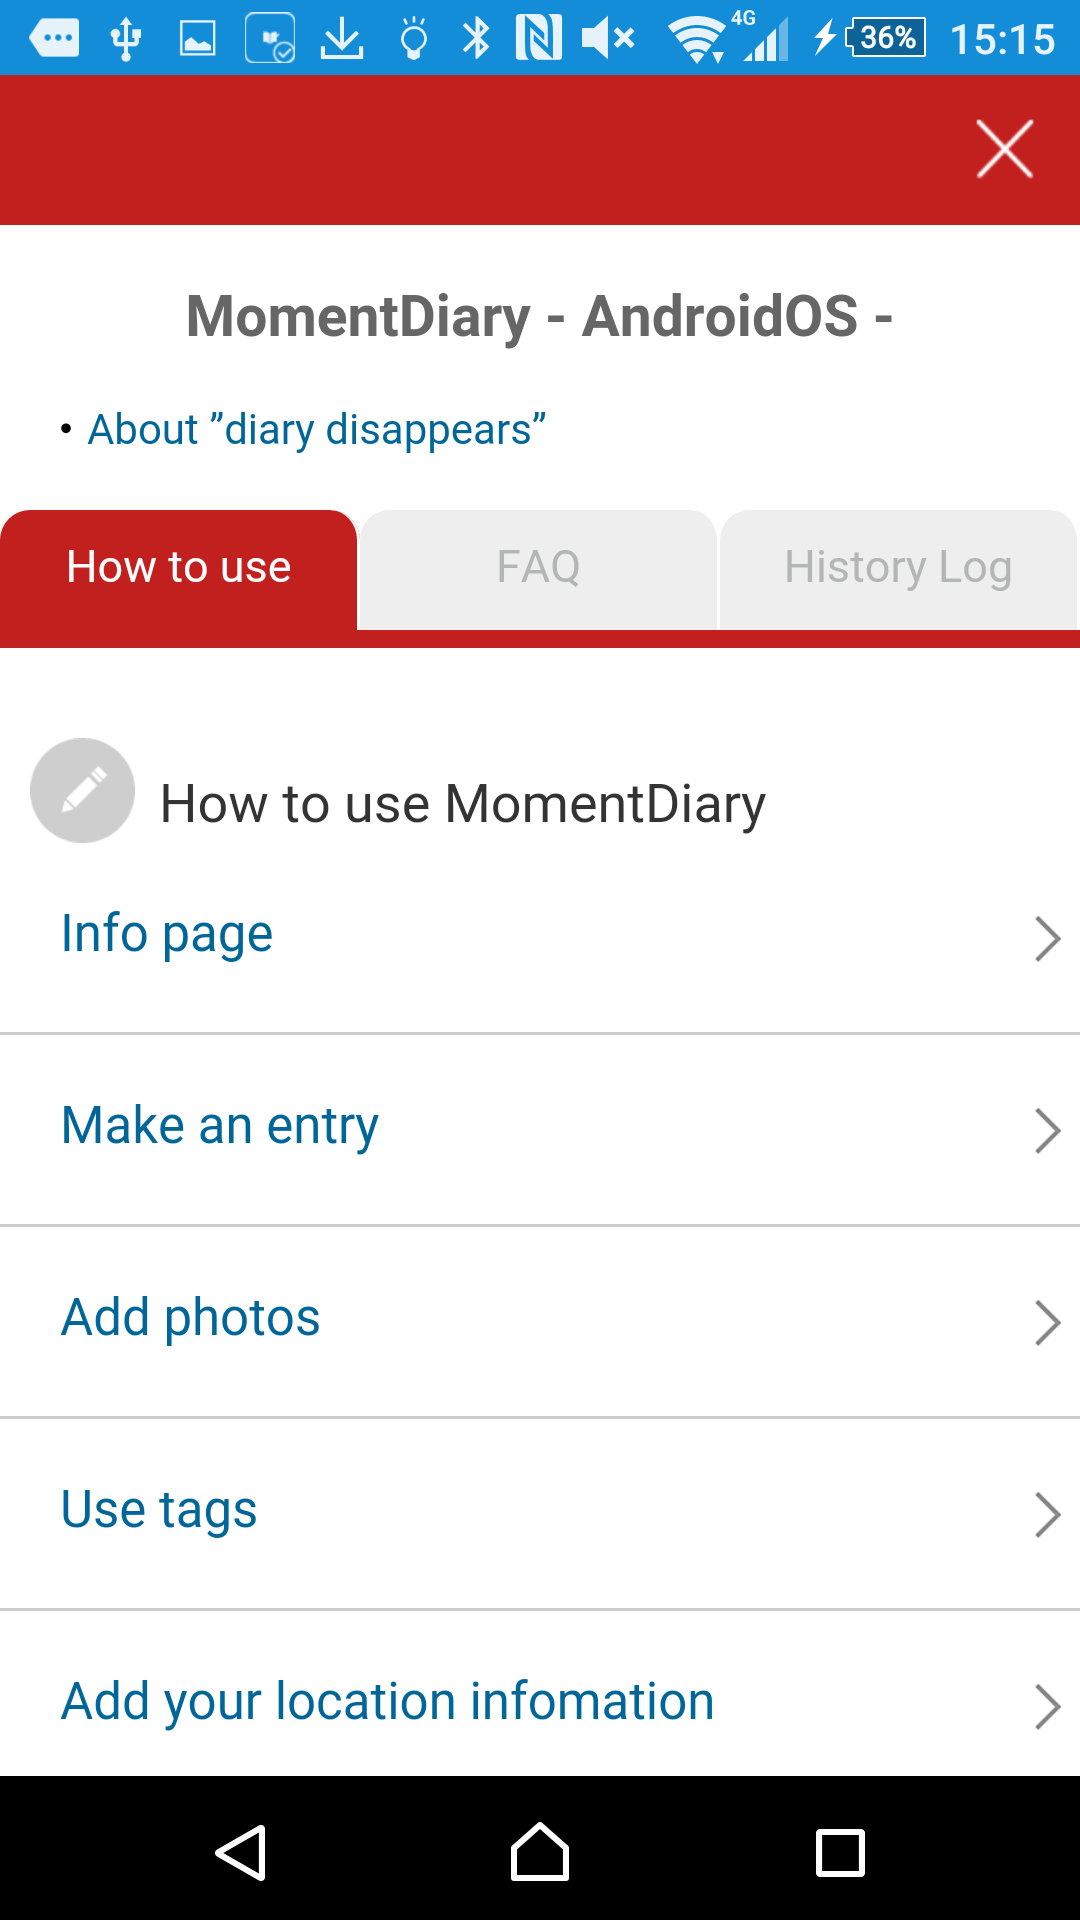
MomentDiary - AndroidOS -

How to use MomentDiary
- Info page -
- When you open the application for the first time, the information page appears.
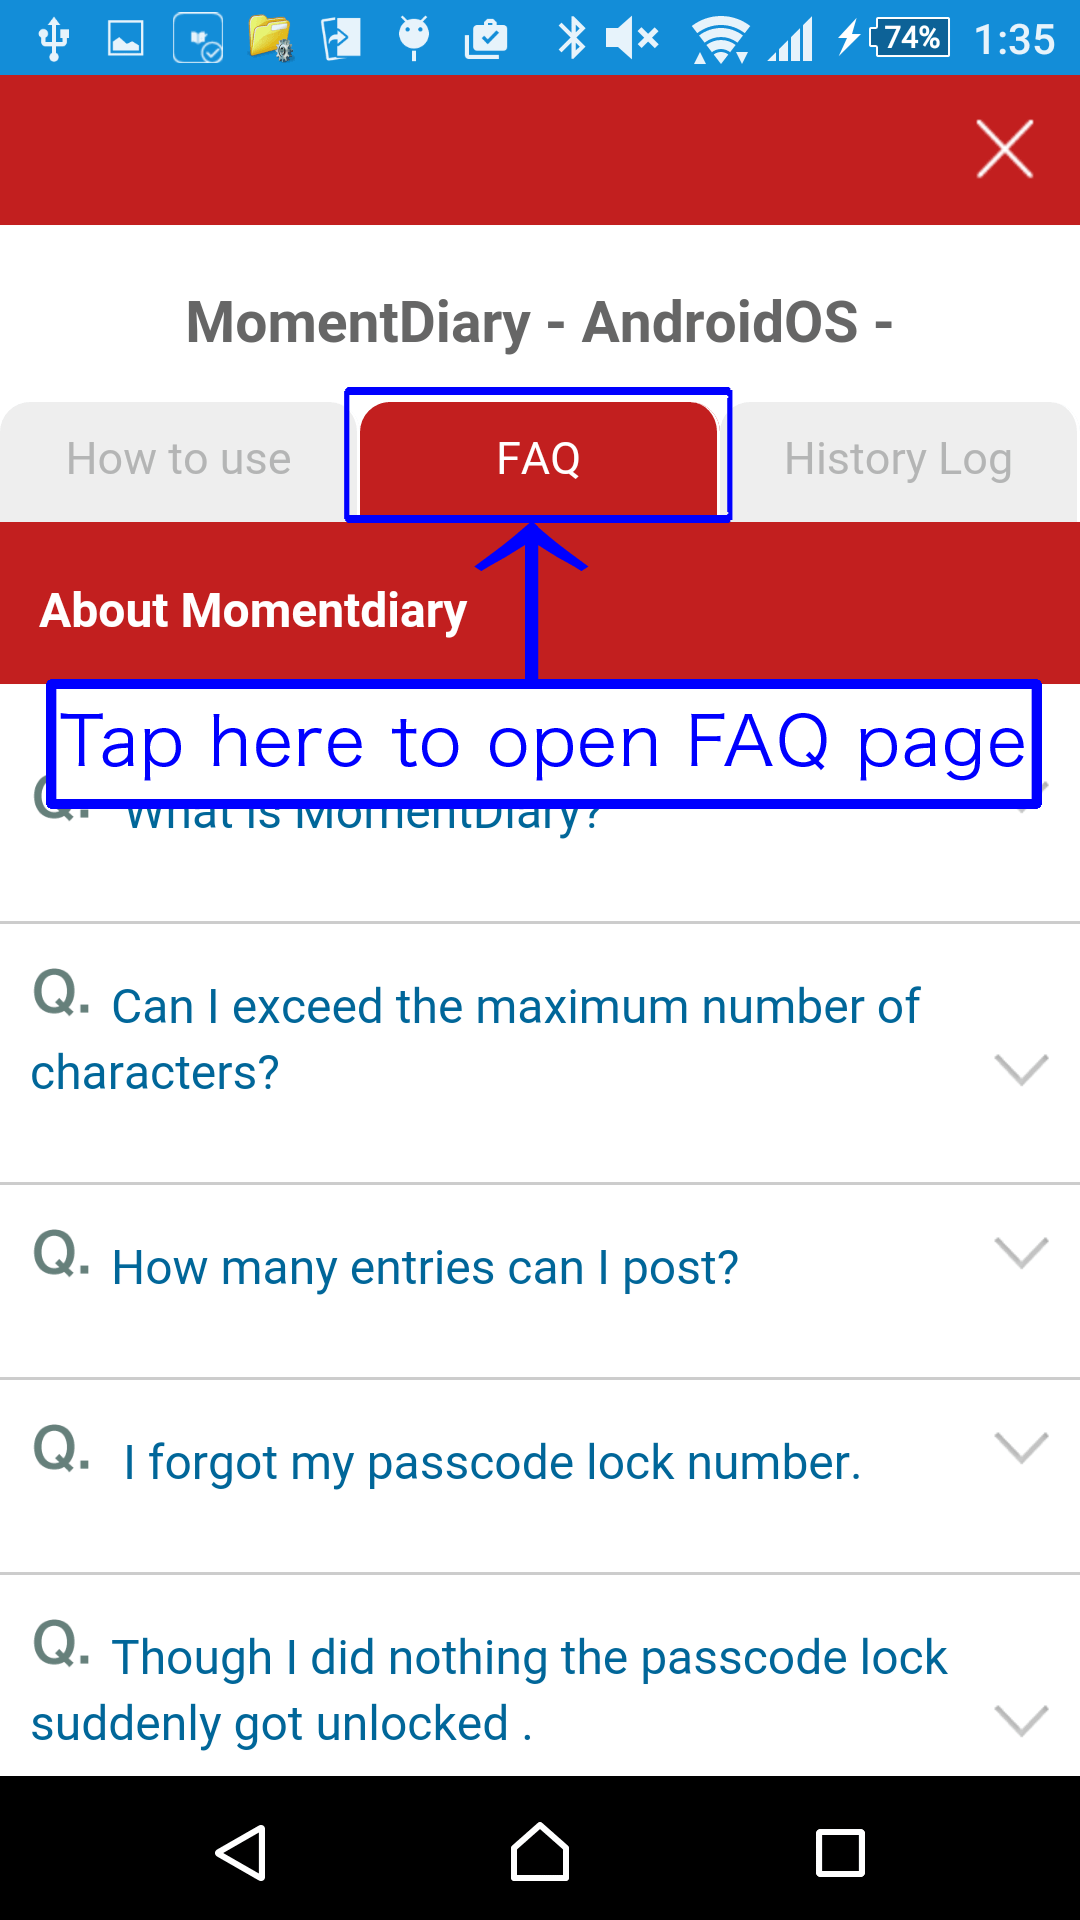
- In "Frequently Asked Question", there are listed questions and answers about MomentDiary. If you are having trouble, please refer to this page first.
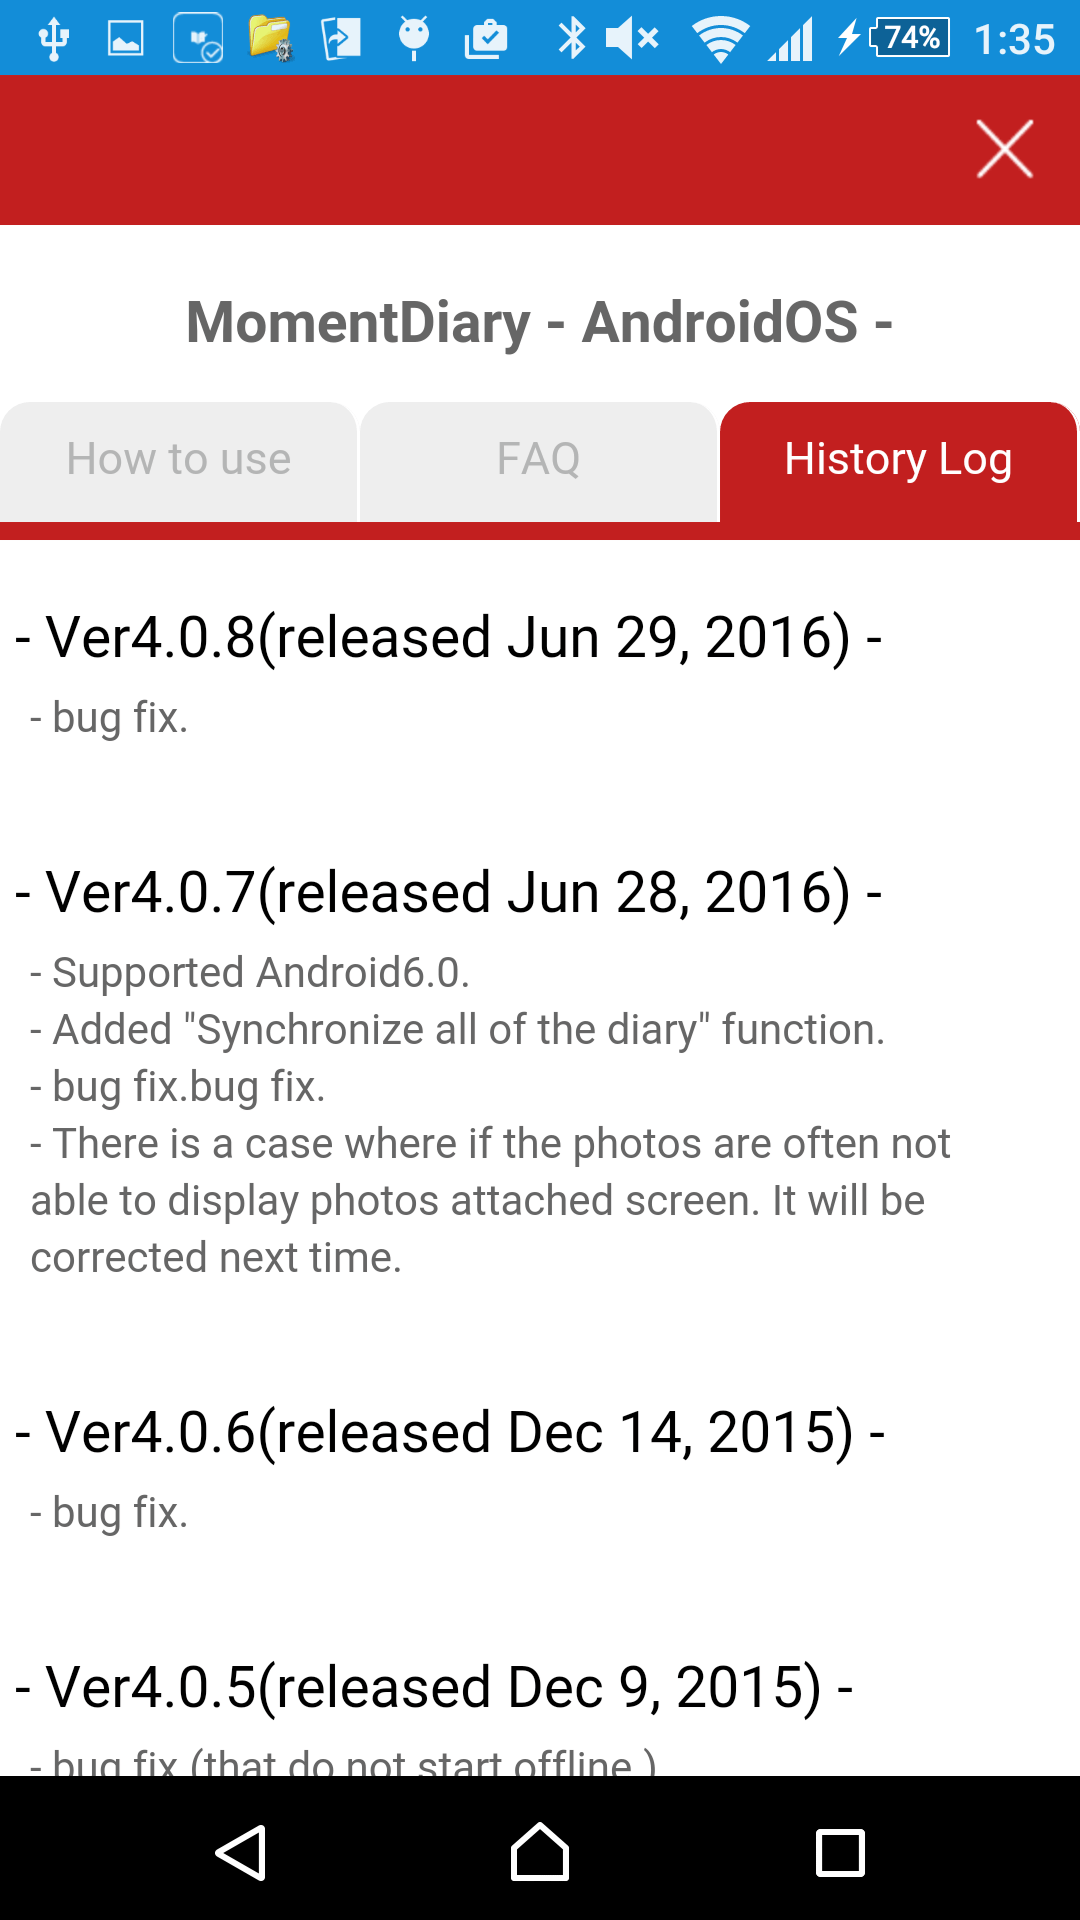
- In "History log" , you see the release information.
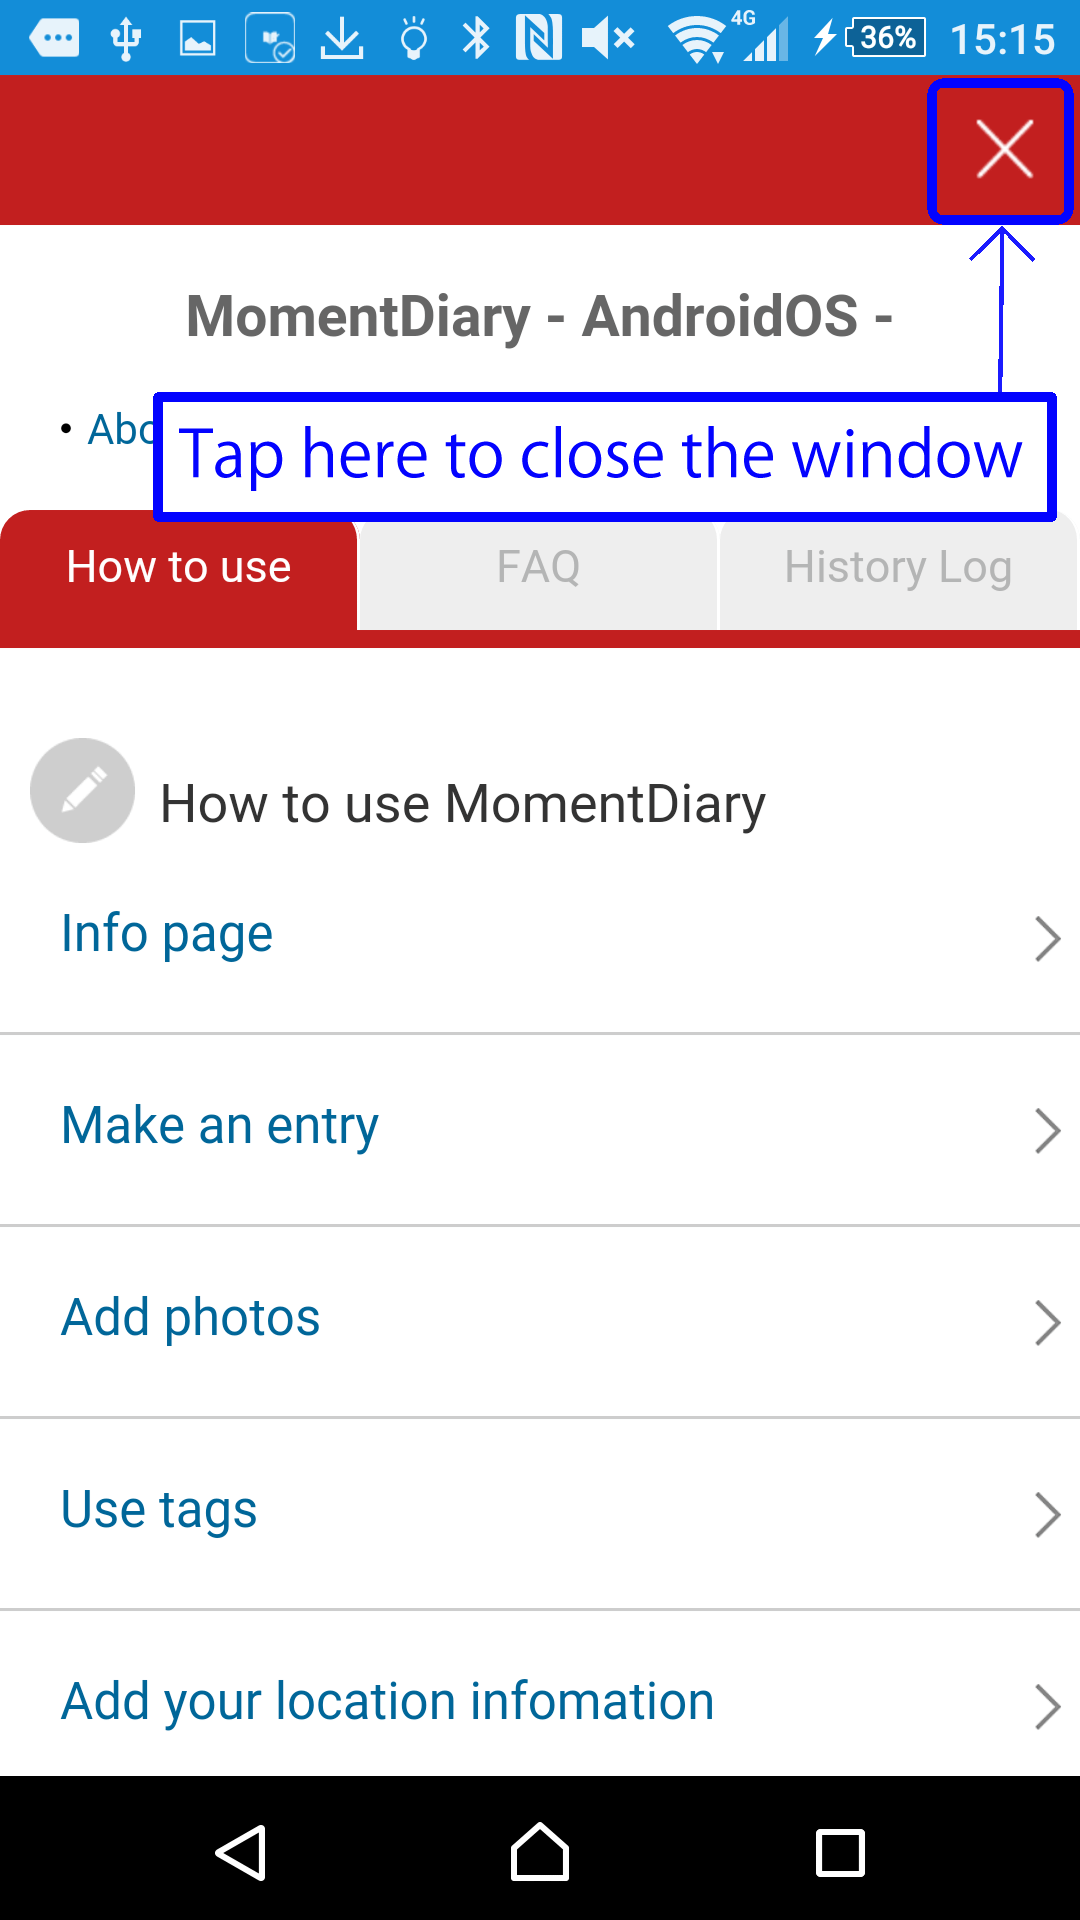
- You can close the page by tapping a "×" button.
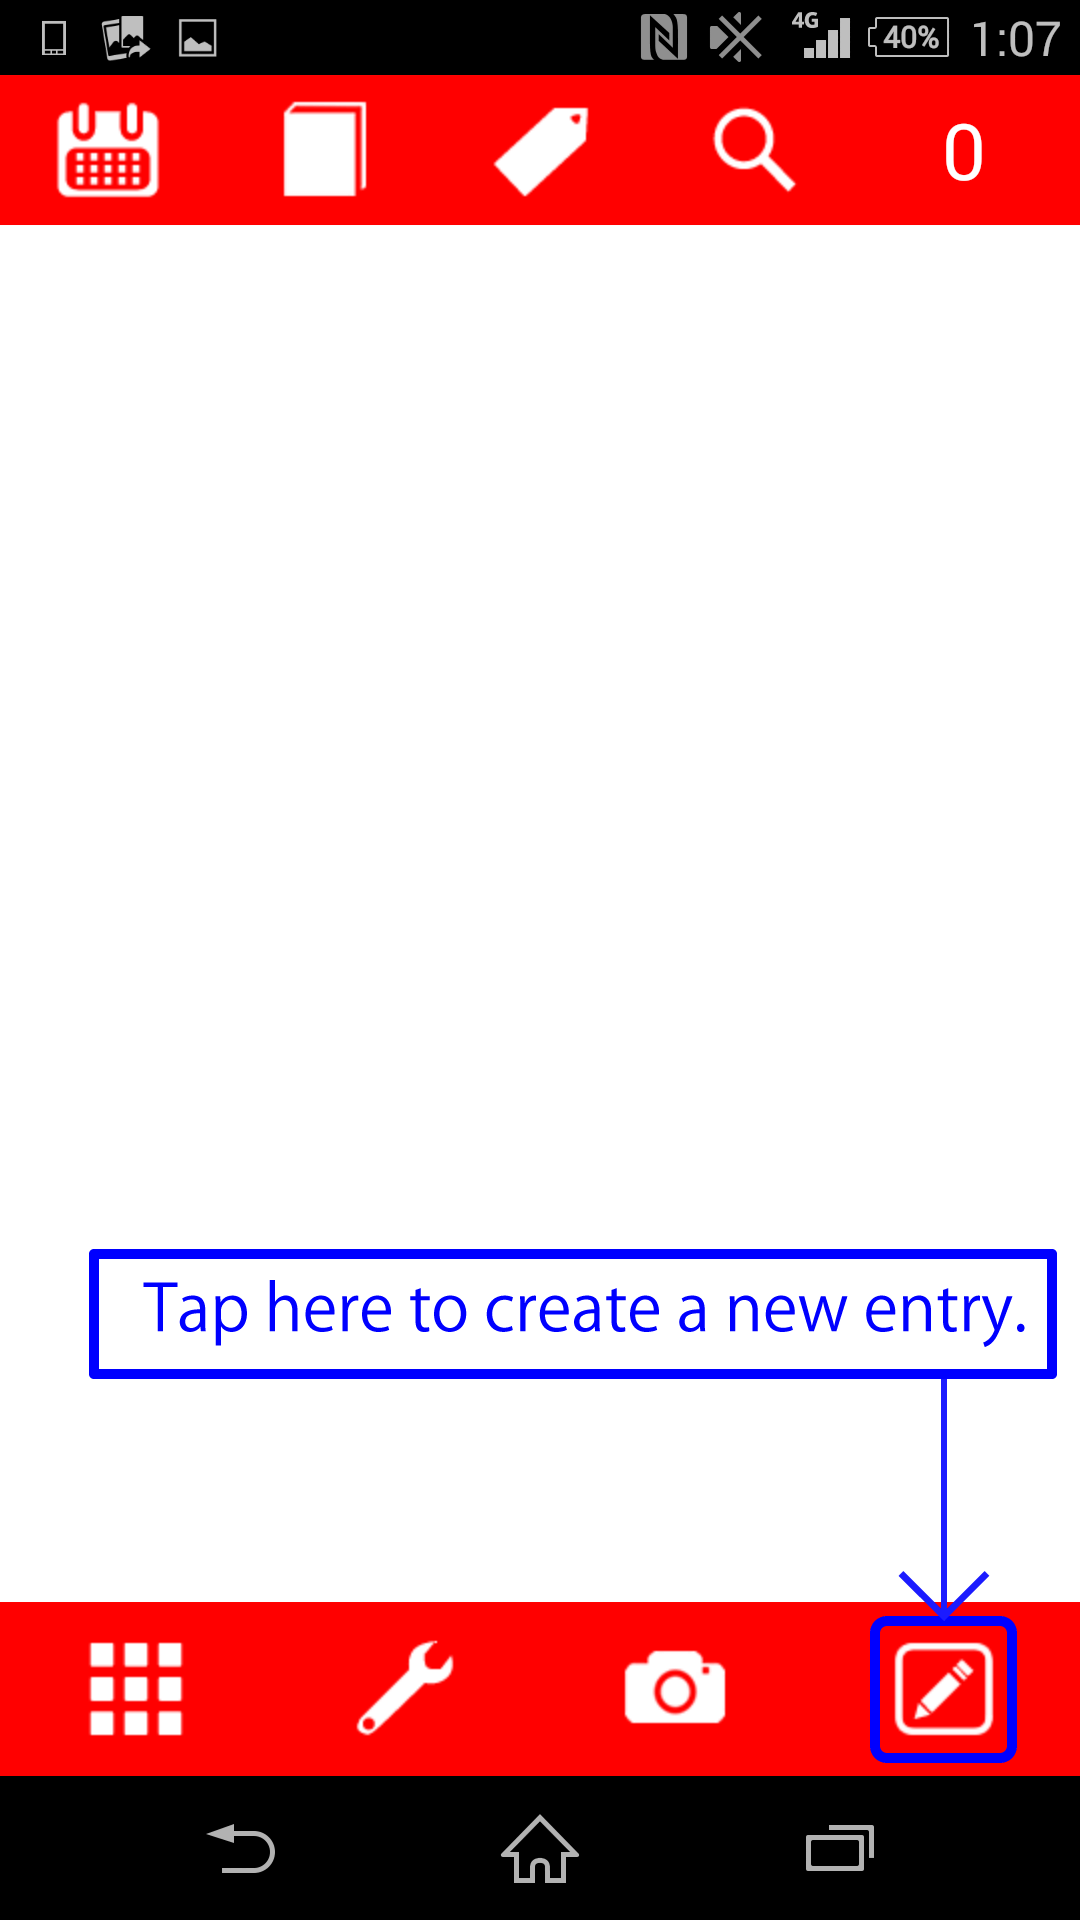
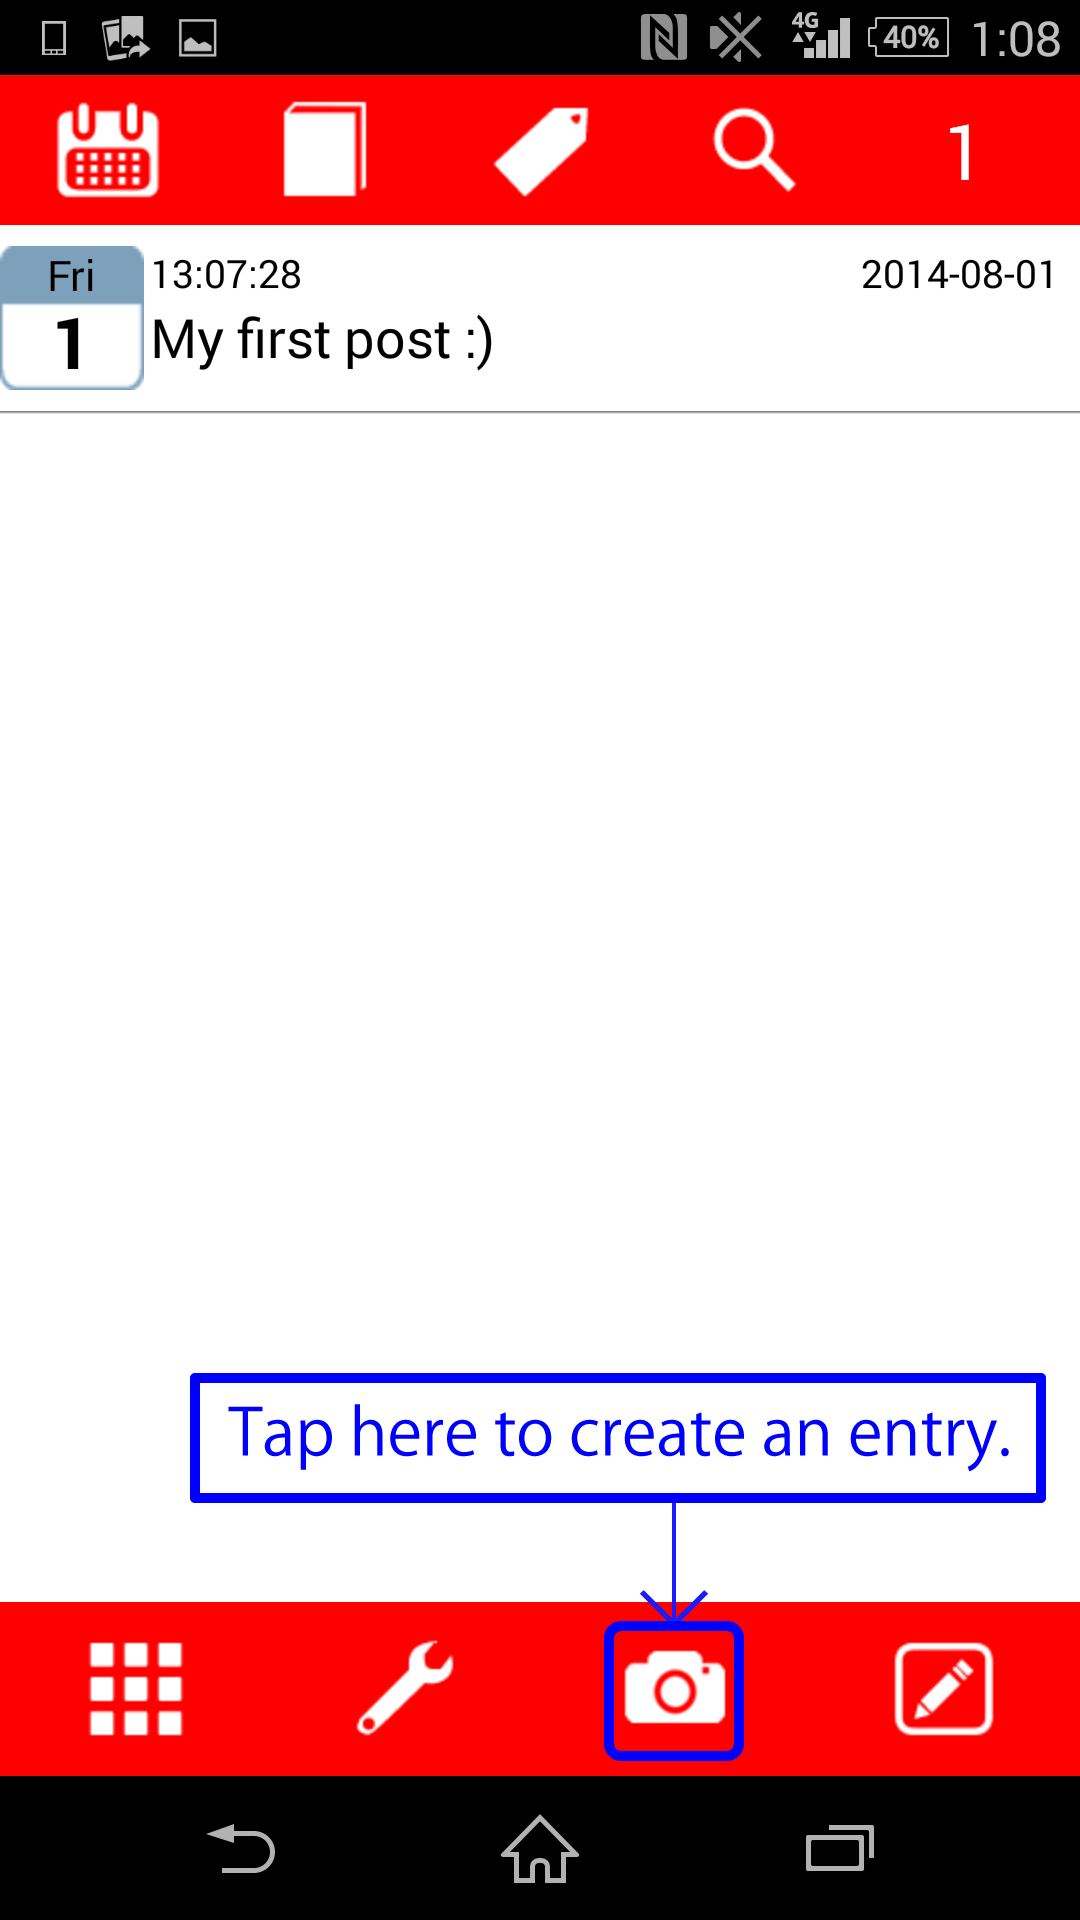
- Make an entry -
- You can create a new entry by tapping the post button.
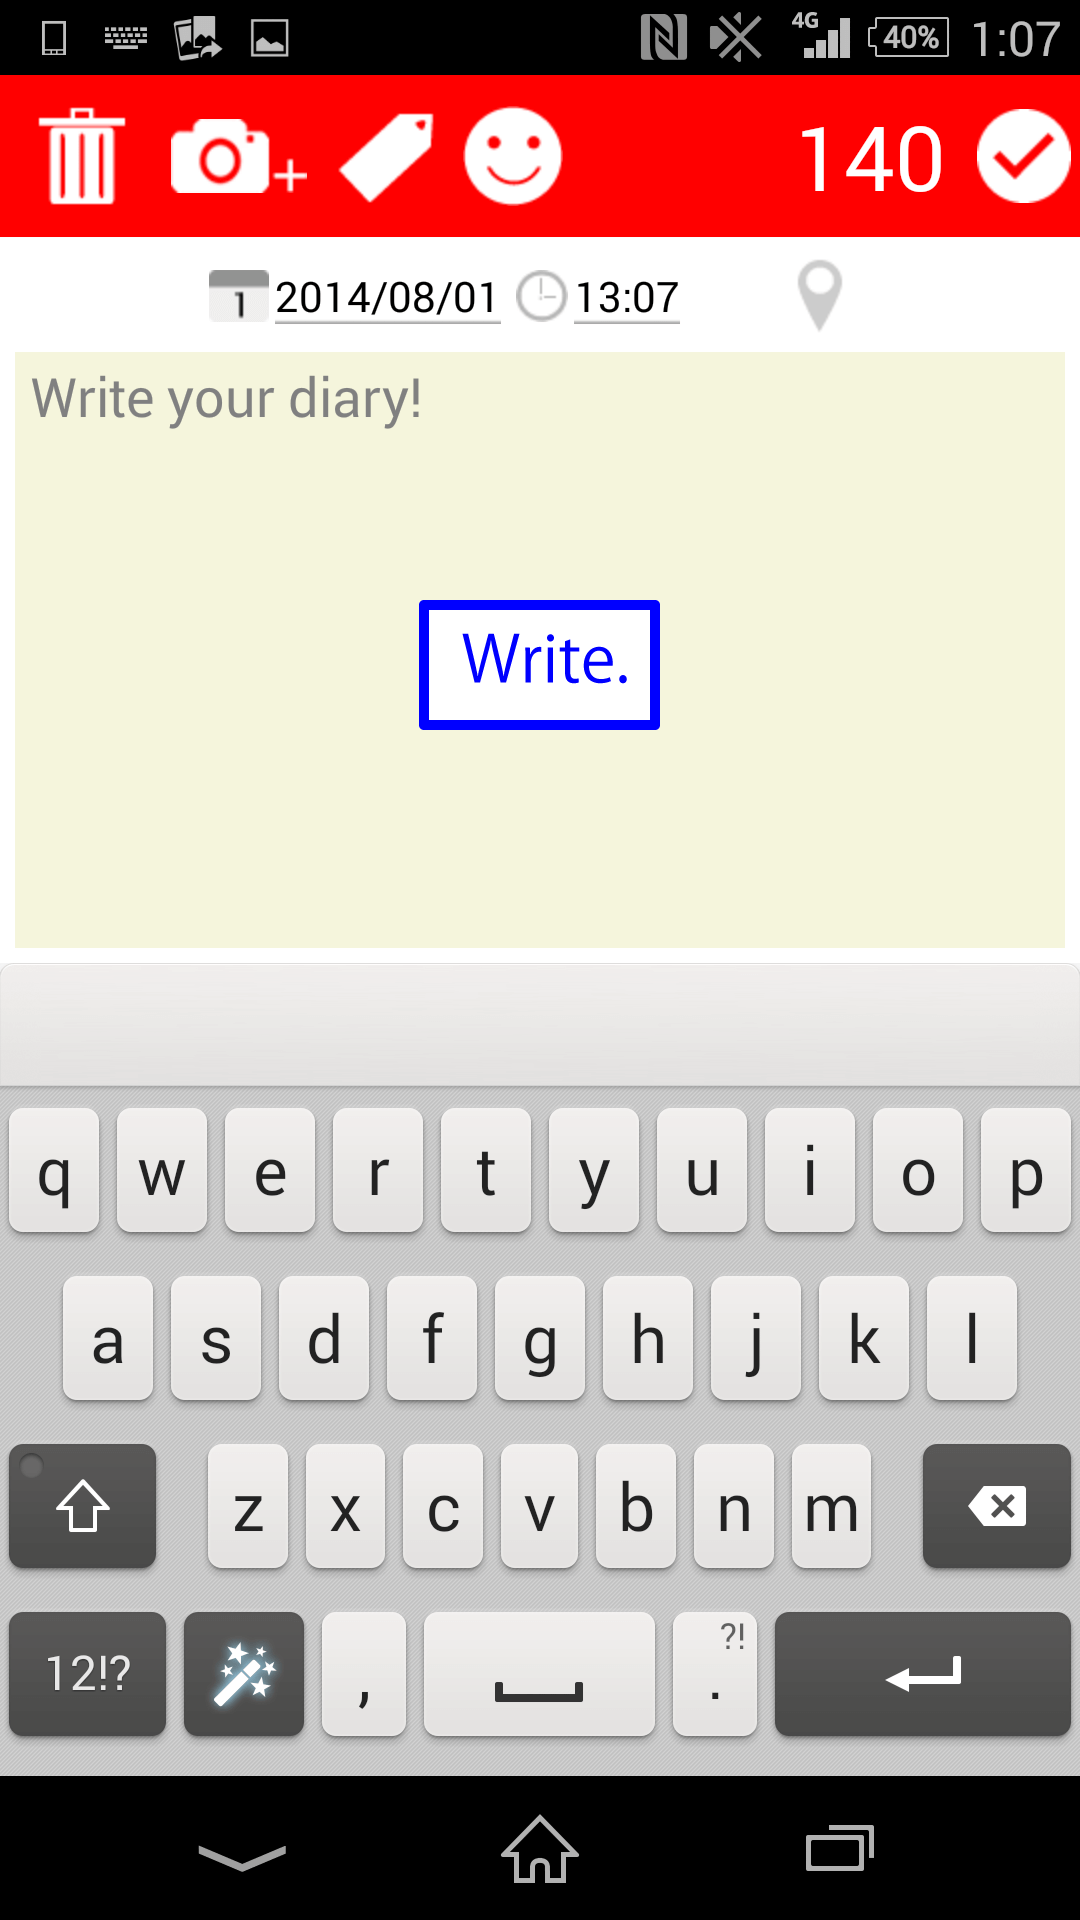
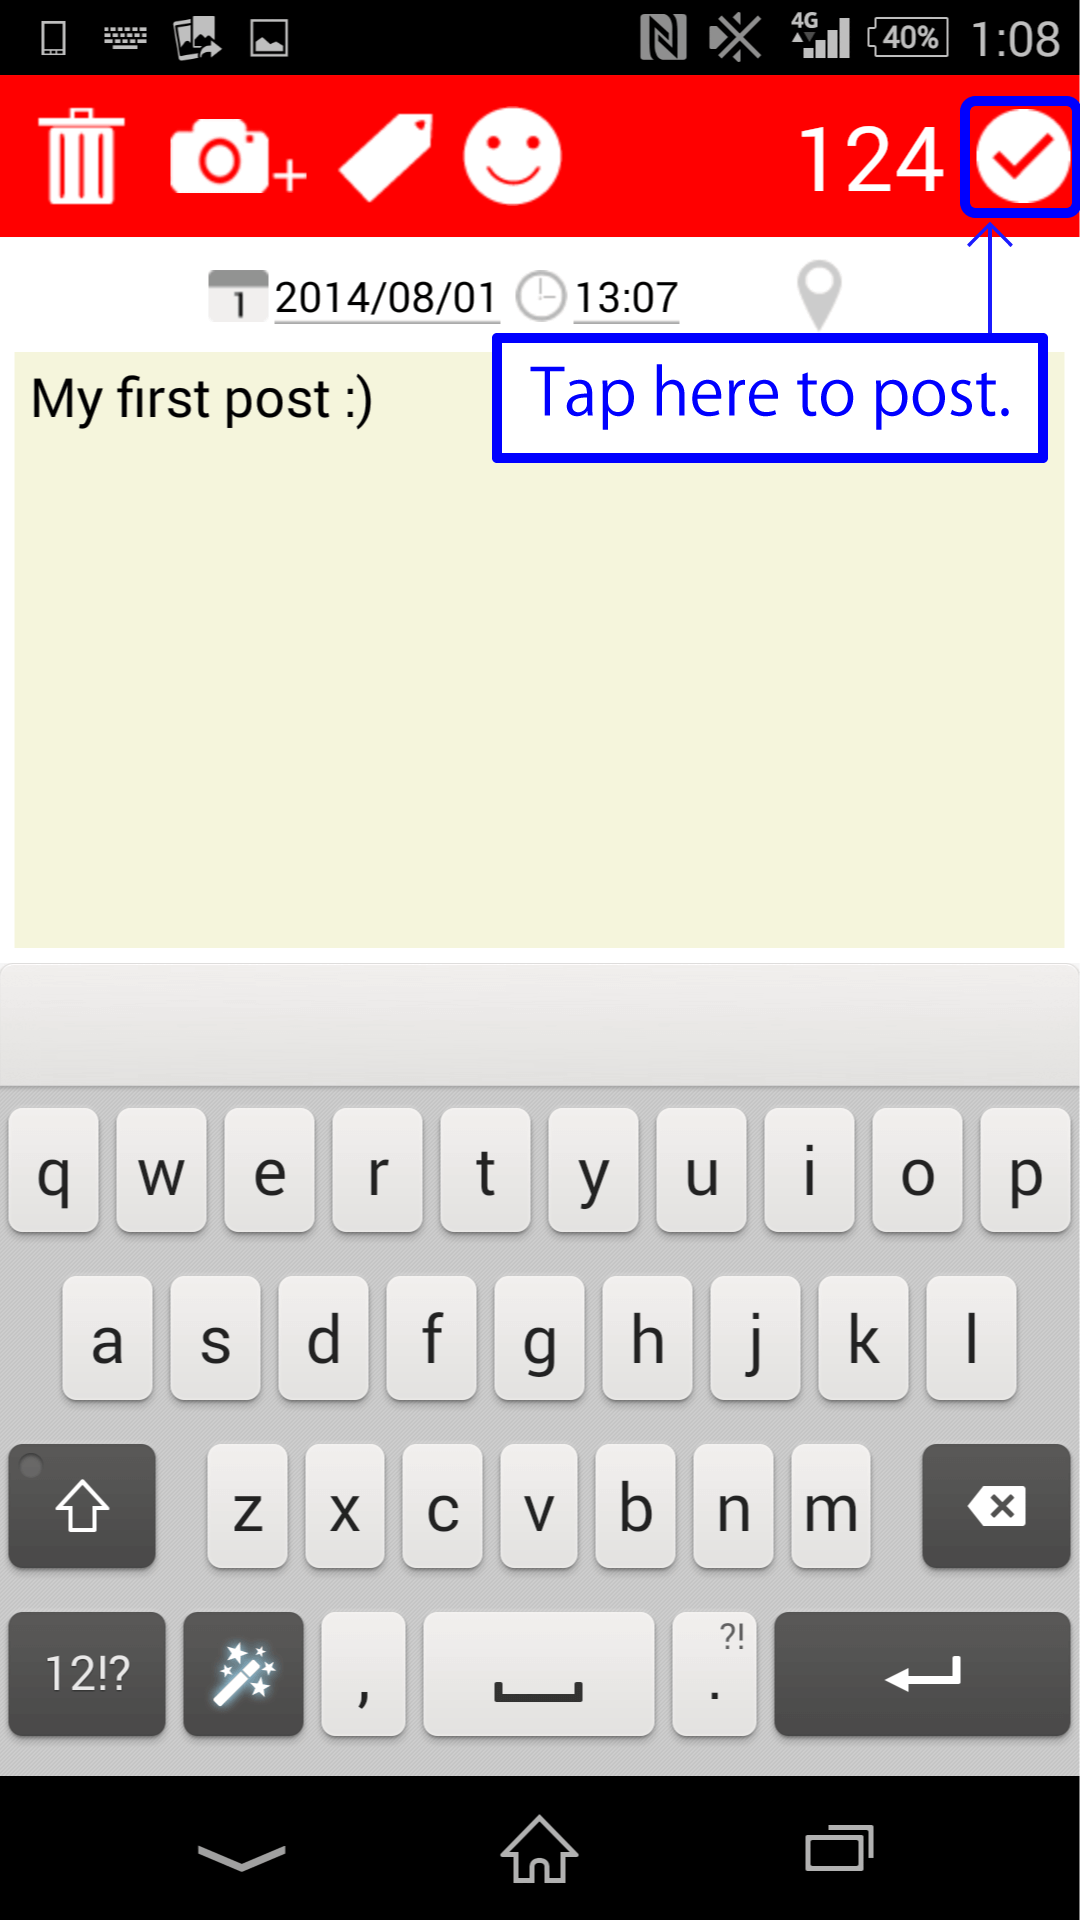
- After you have finished writing, tap the check button in the upper-right corner. The entry will be uploaded.
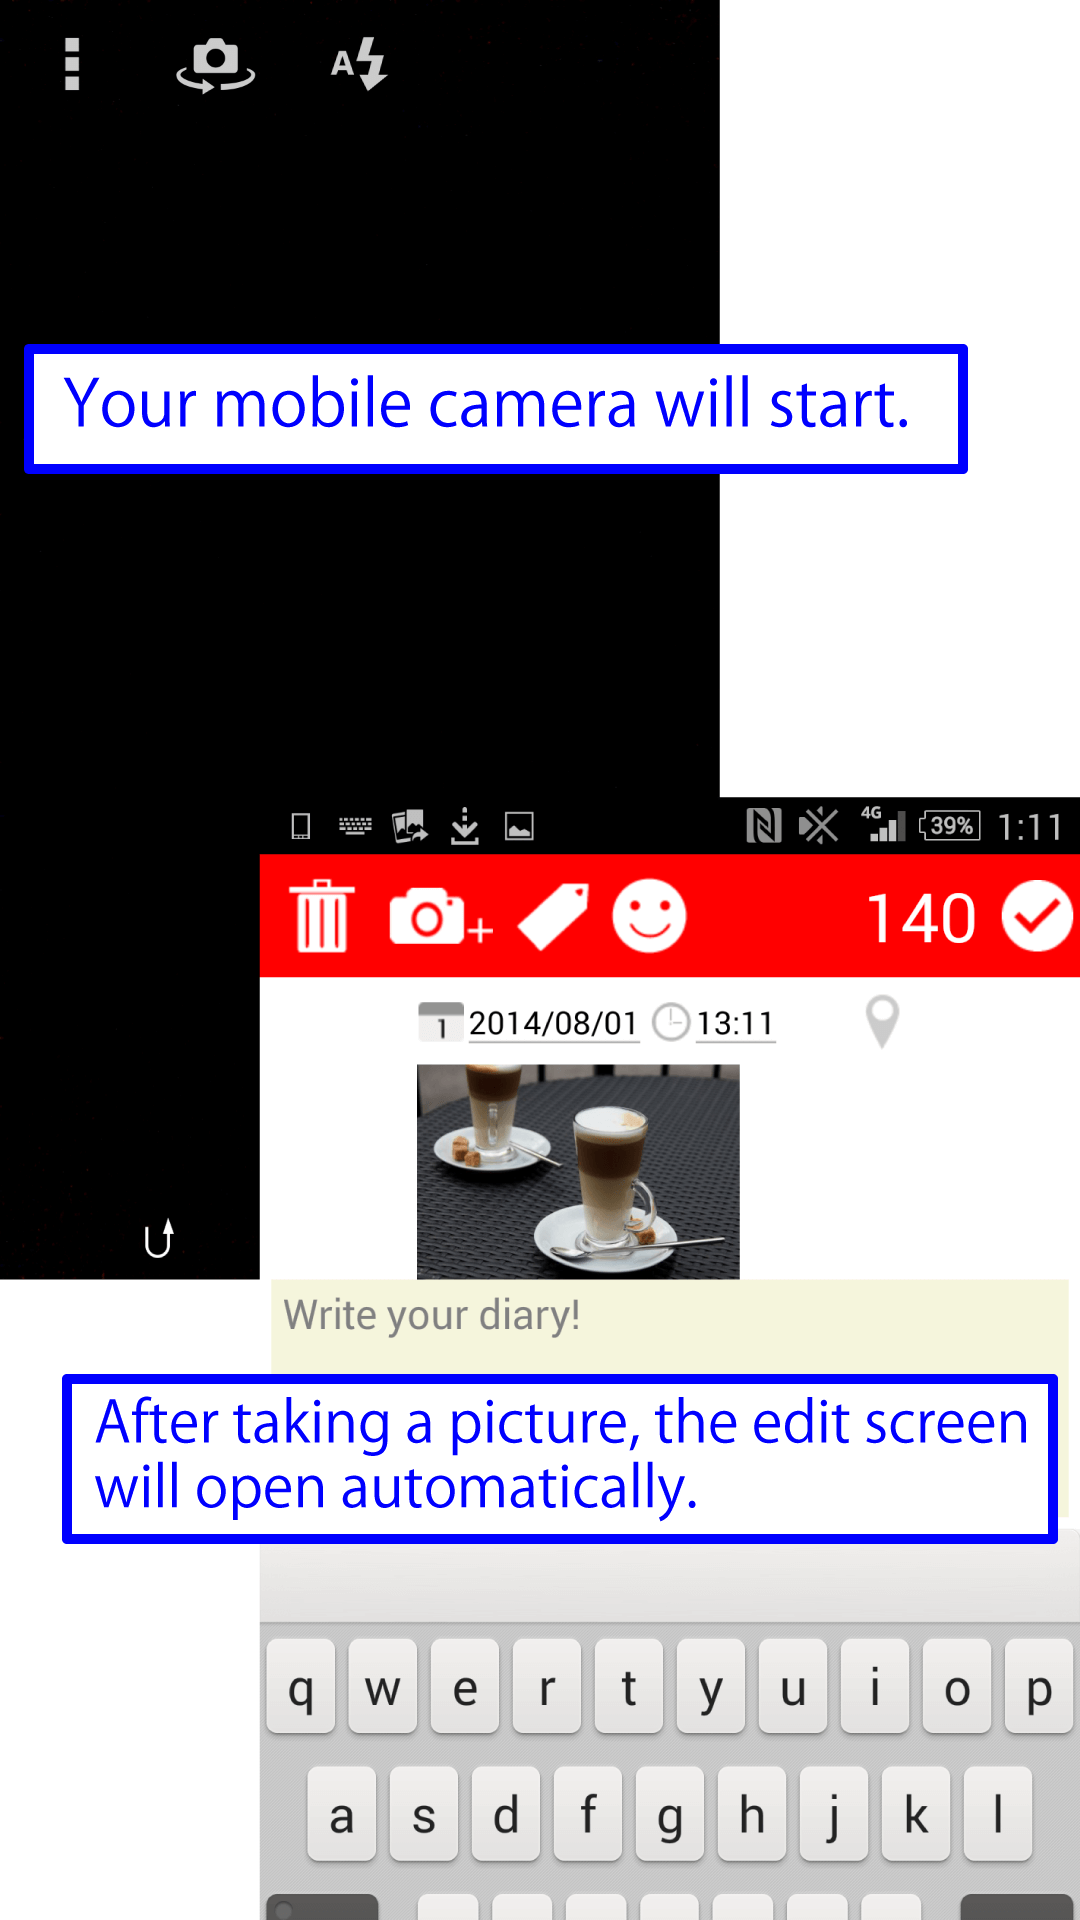
- Add photos -
- Tap the camera button. A camera application starts. You can take a picture and attach it to your post.
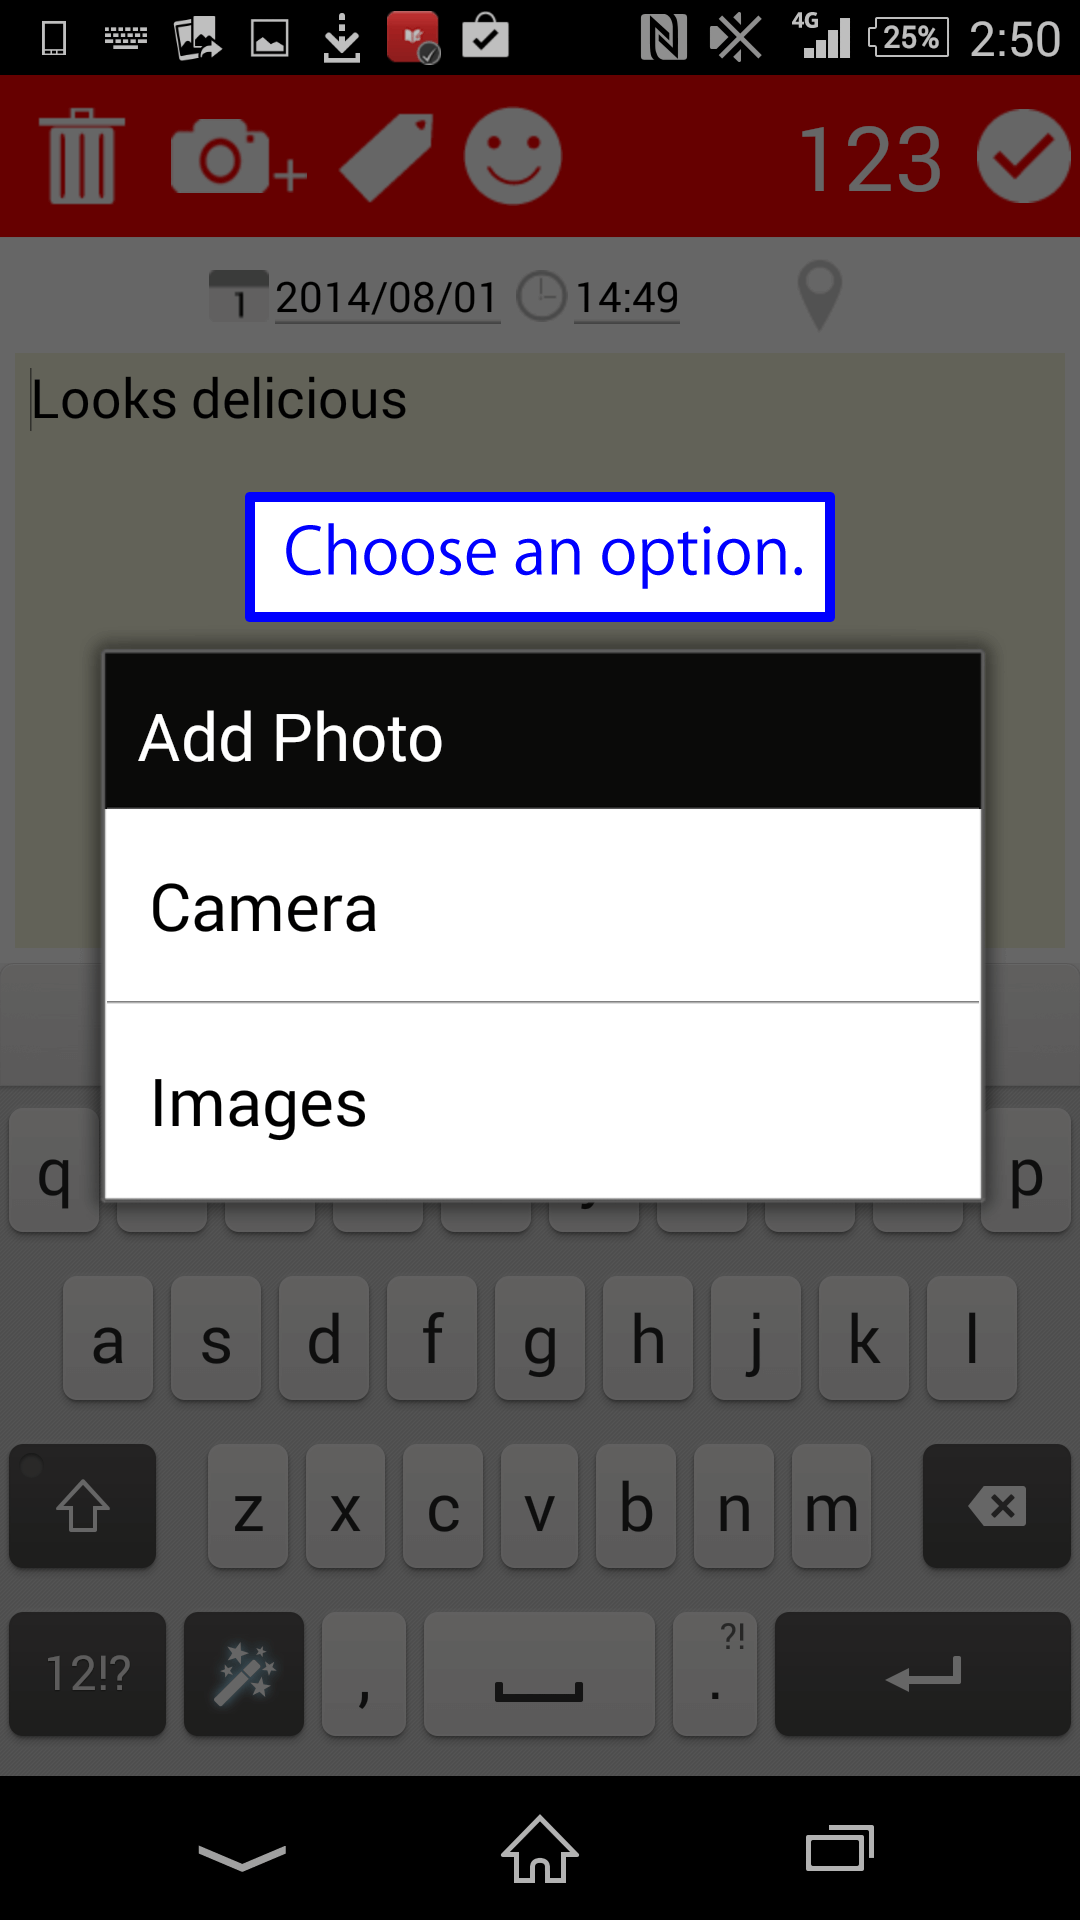
- You also can add your photos from your photo albumby touching a camera button in the upper-left corner while you are opening the edit screen.
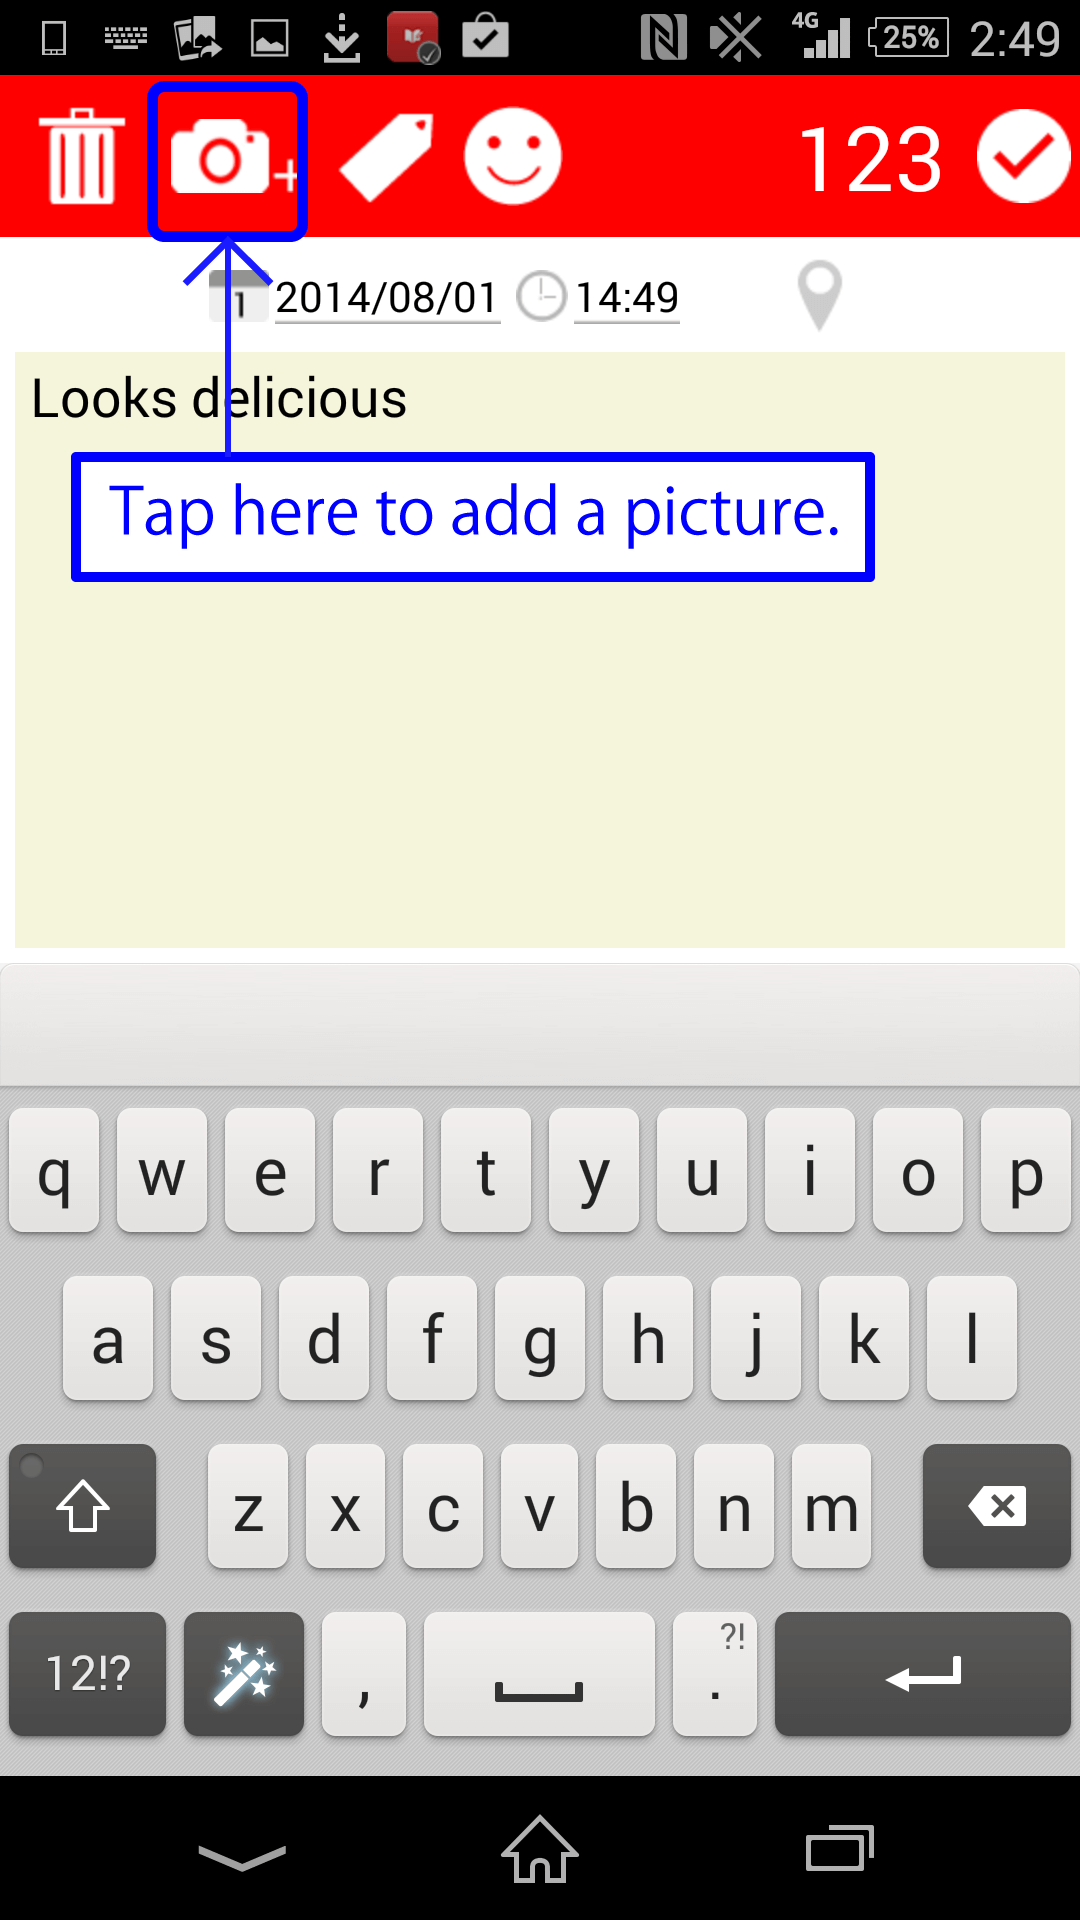
- You have 2 ways to add photos.
1.Take a photo and add it
2.Choose a photo from your photo gallery and add

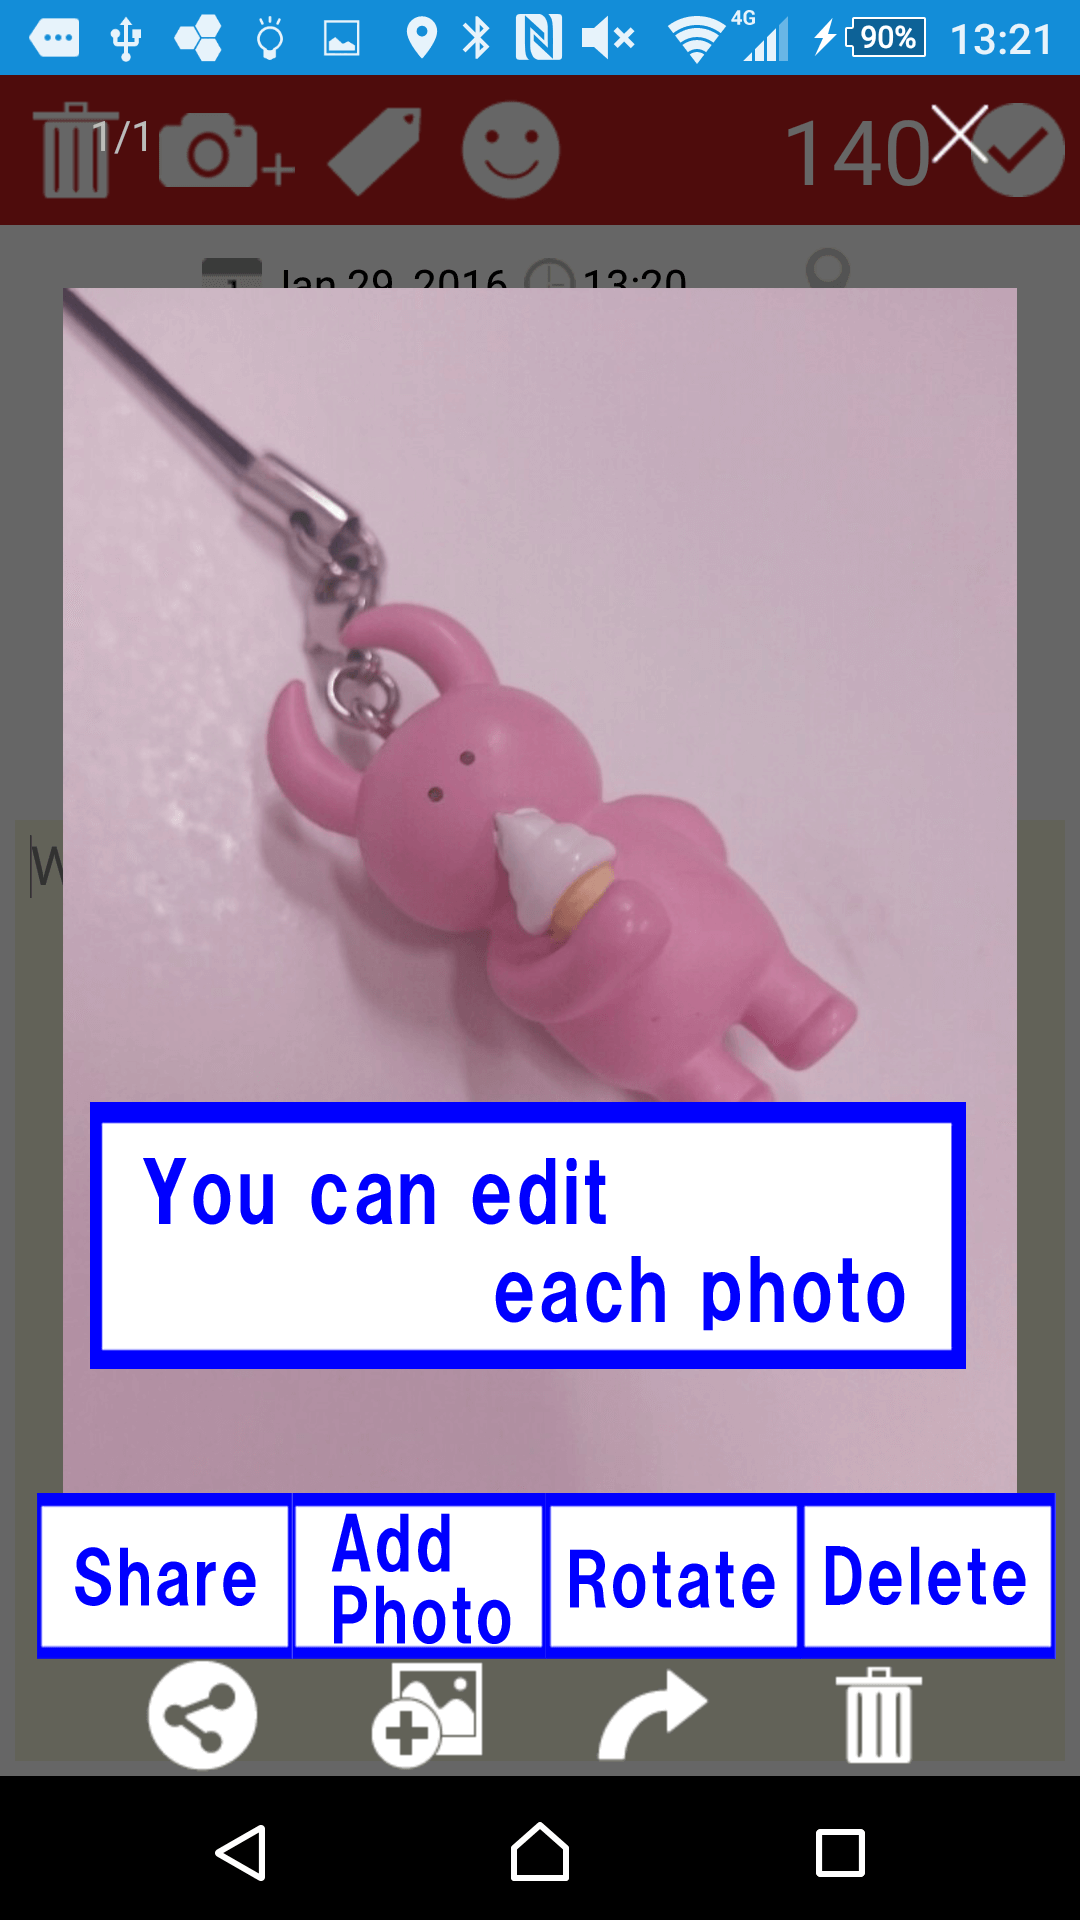
- Tap a photo and a menu page of photo appears. You can share the photo with other applications by touching "Share".
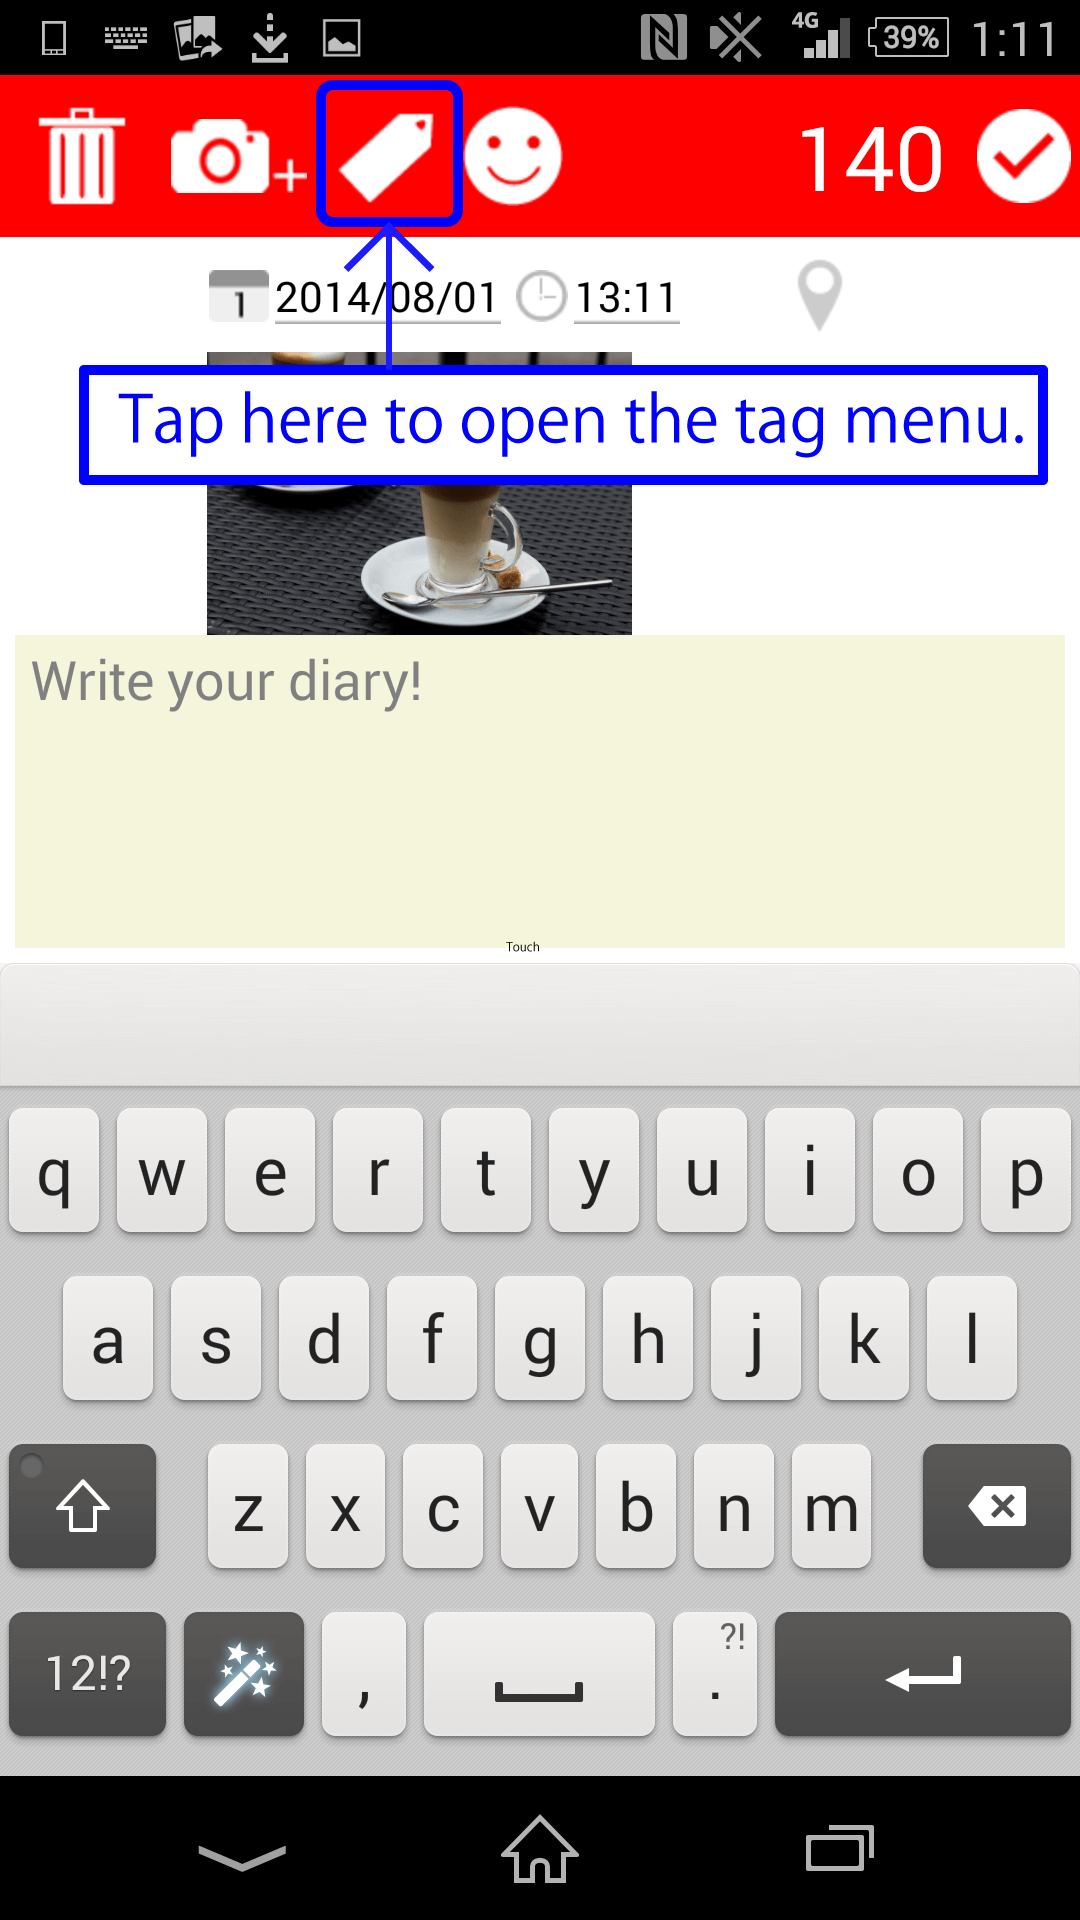
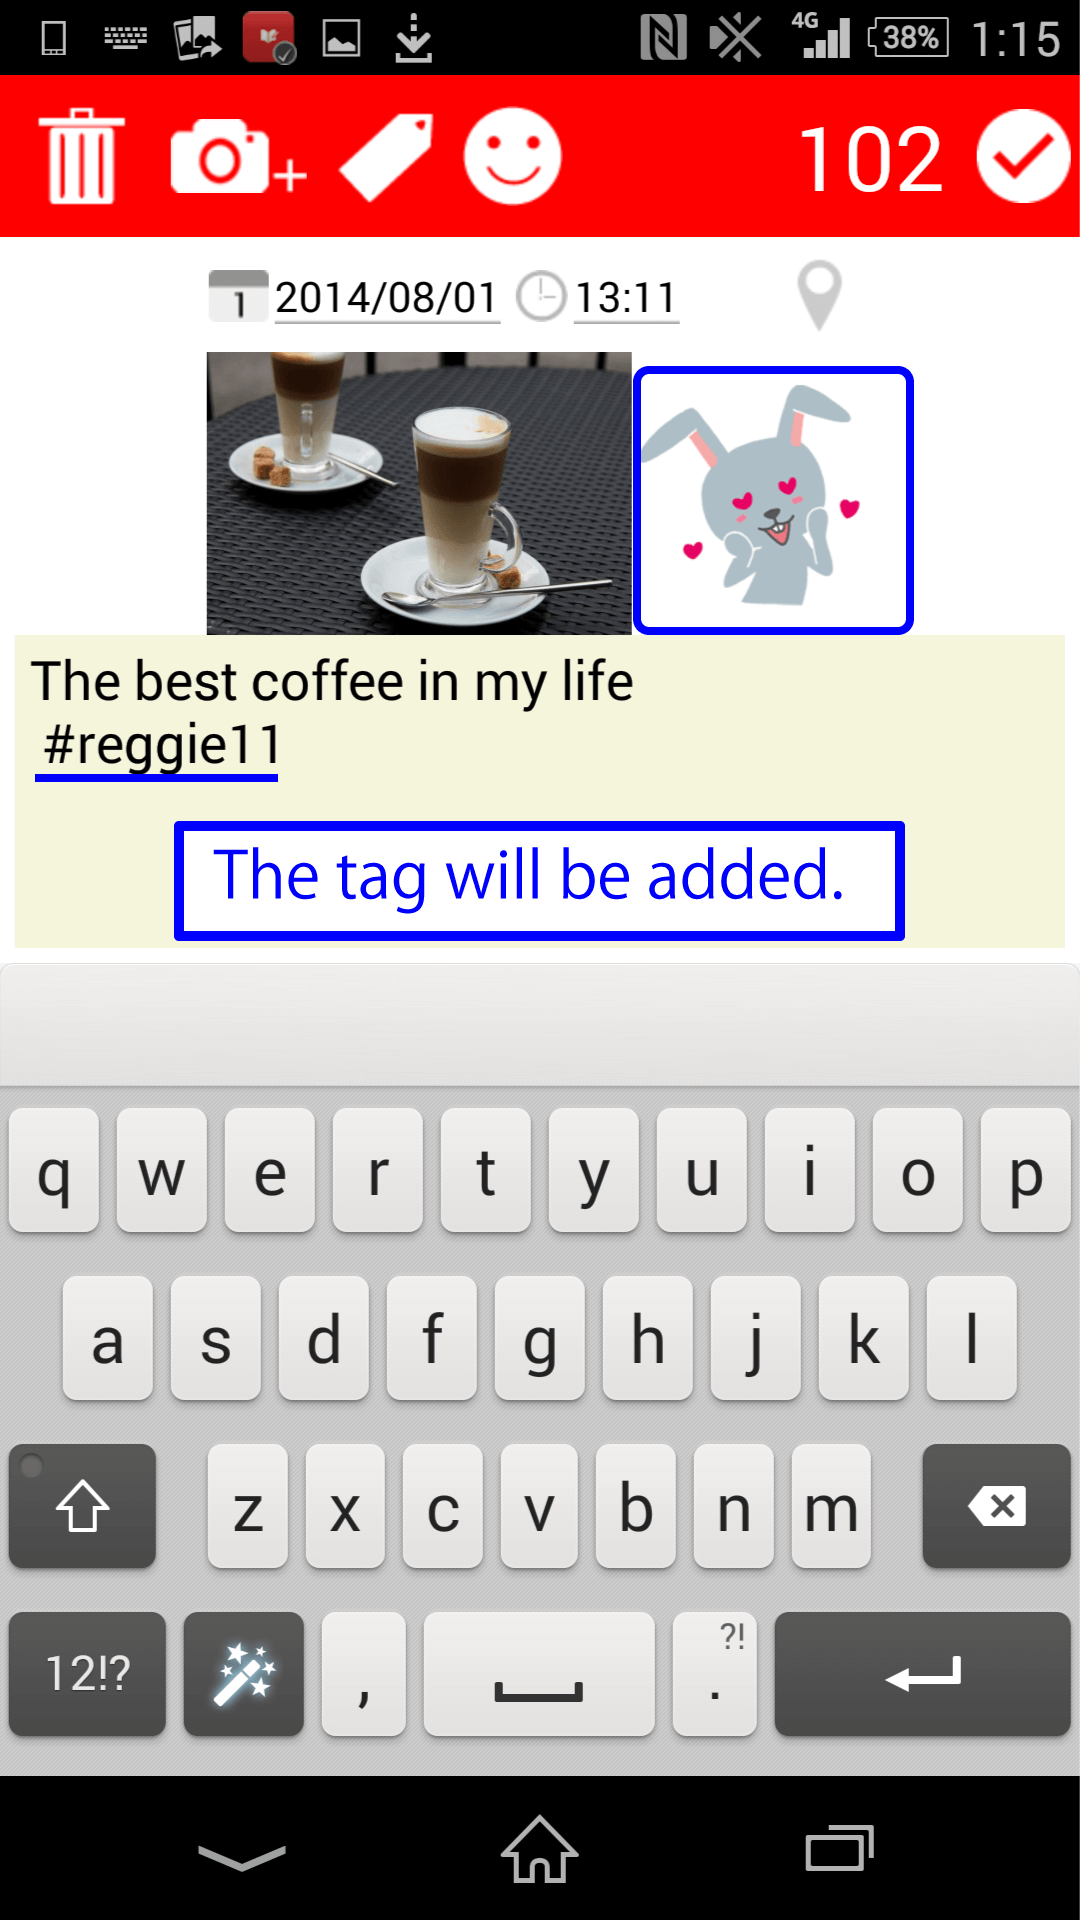
- Use tags -
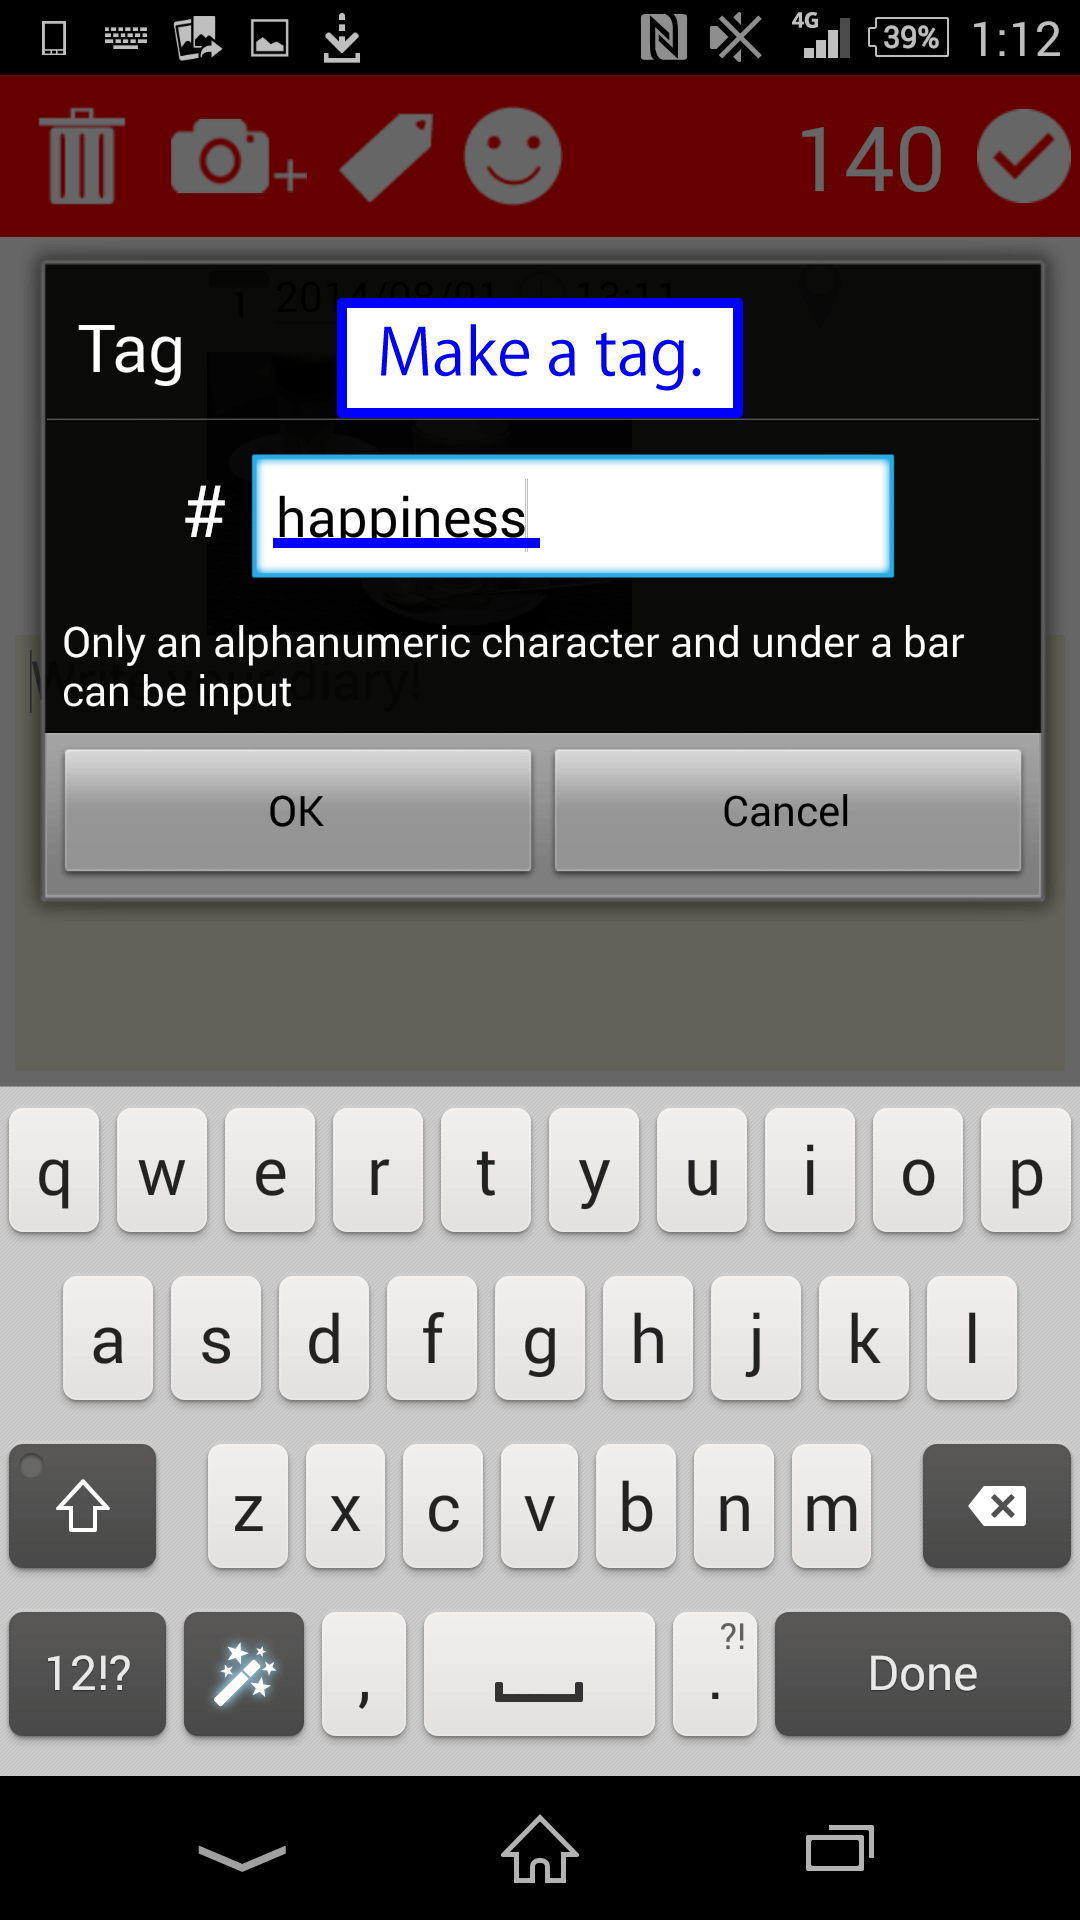
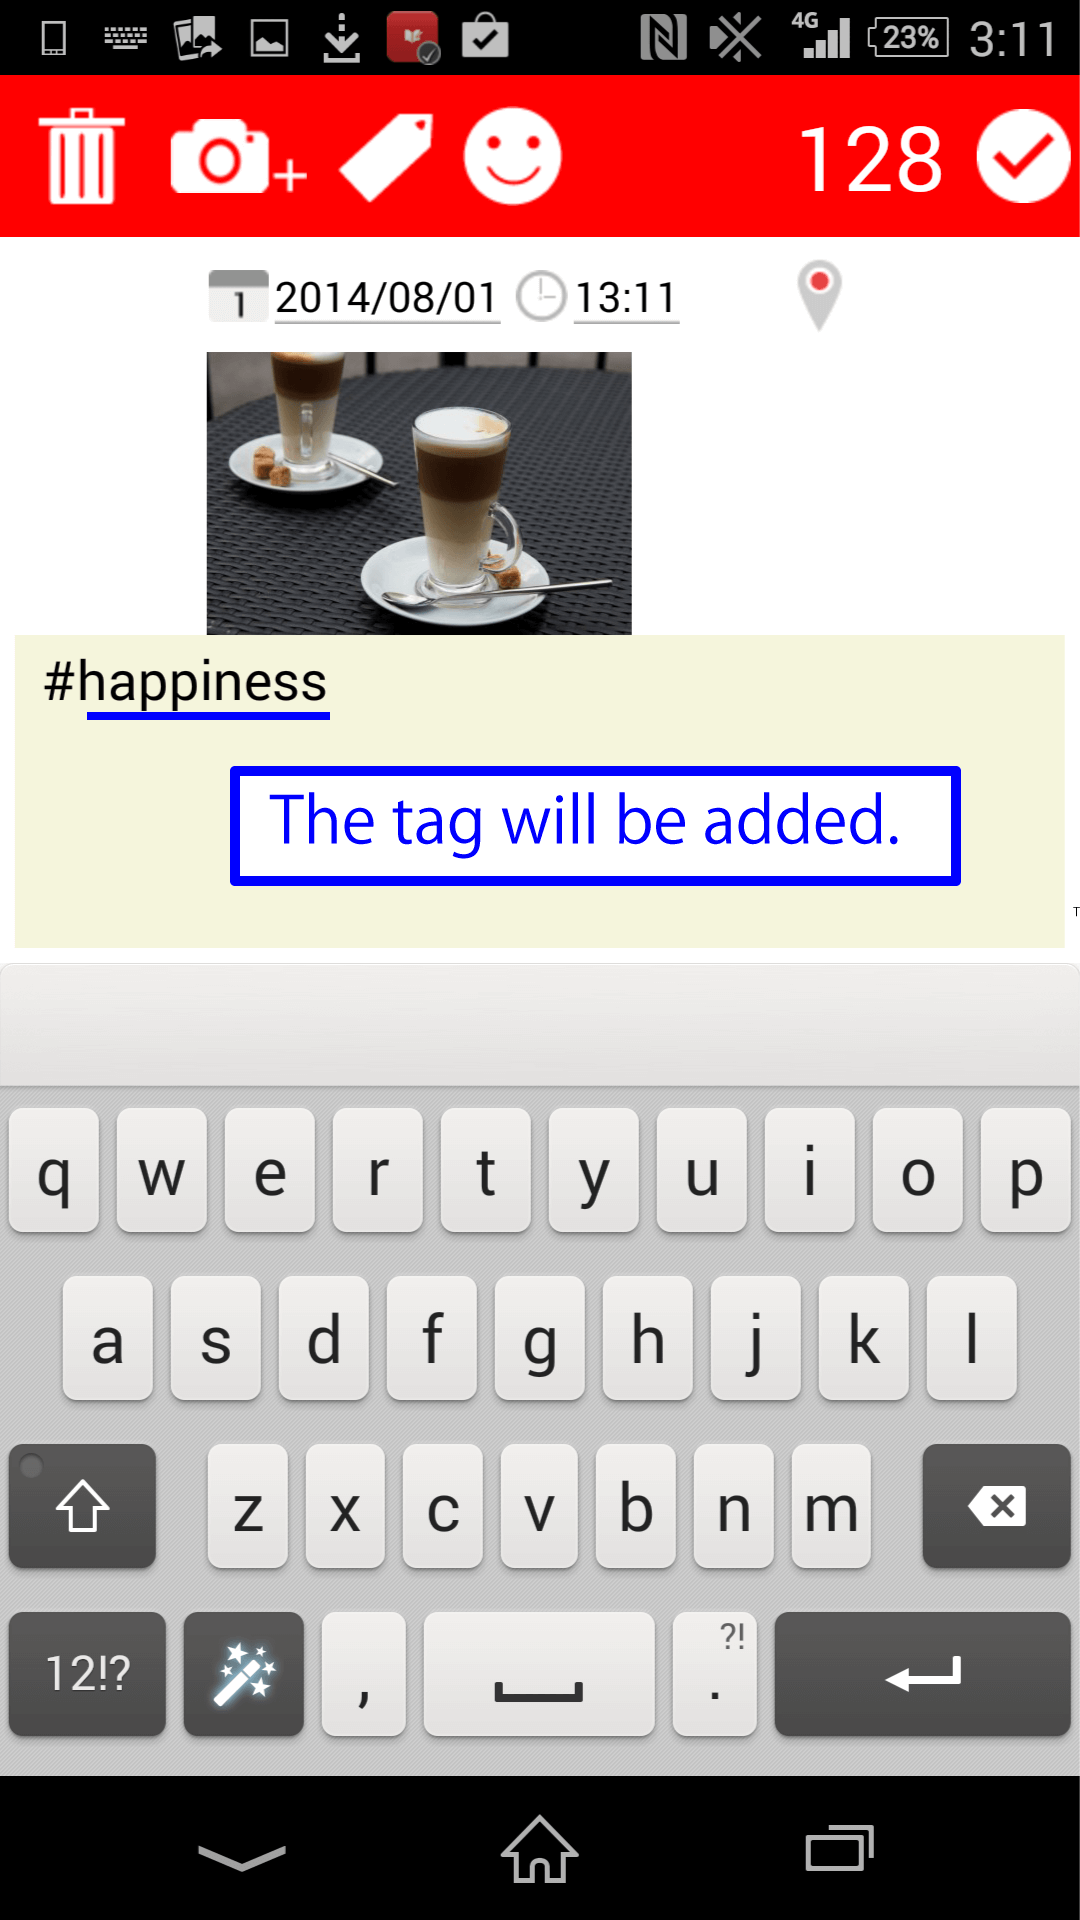
- Tap a tag button and a tag page opens.
- You can make your tag by filling in a form.
- Tap "Set Tag Sticker", and you can attach a tag sticker.
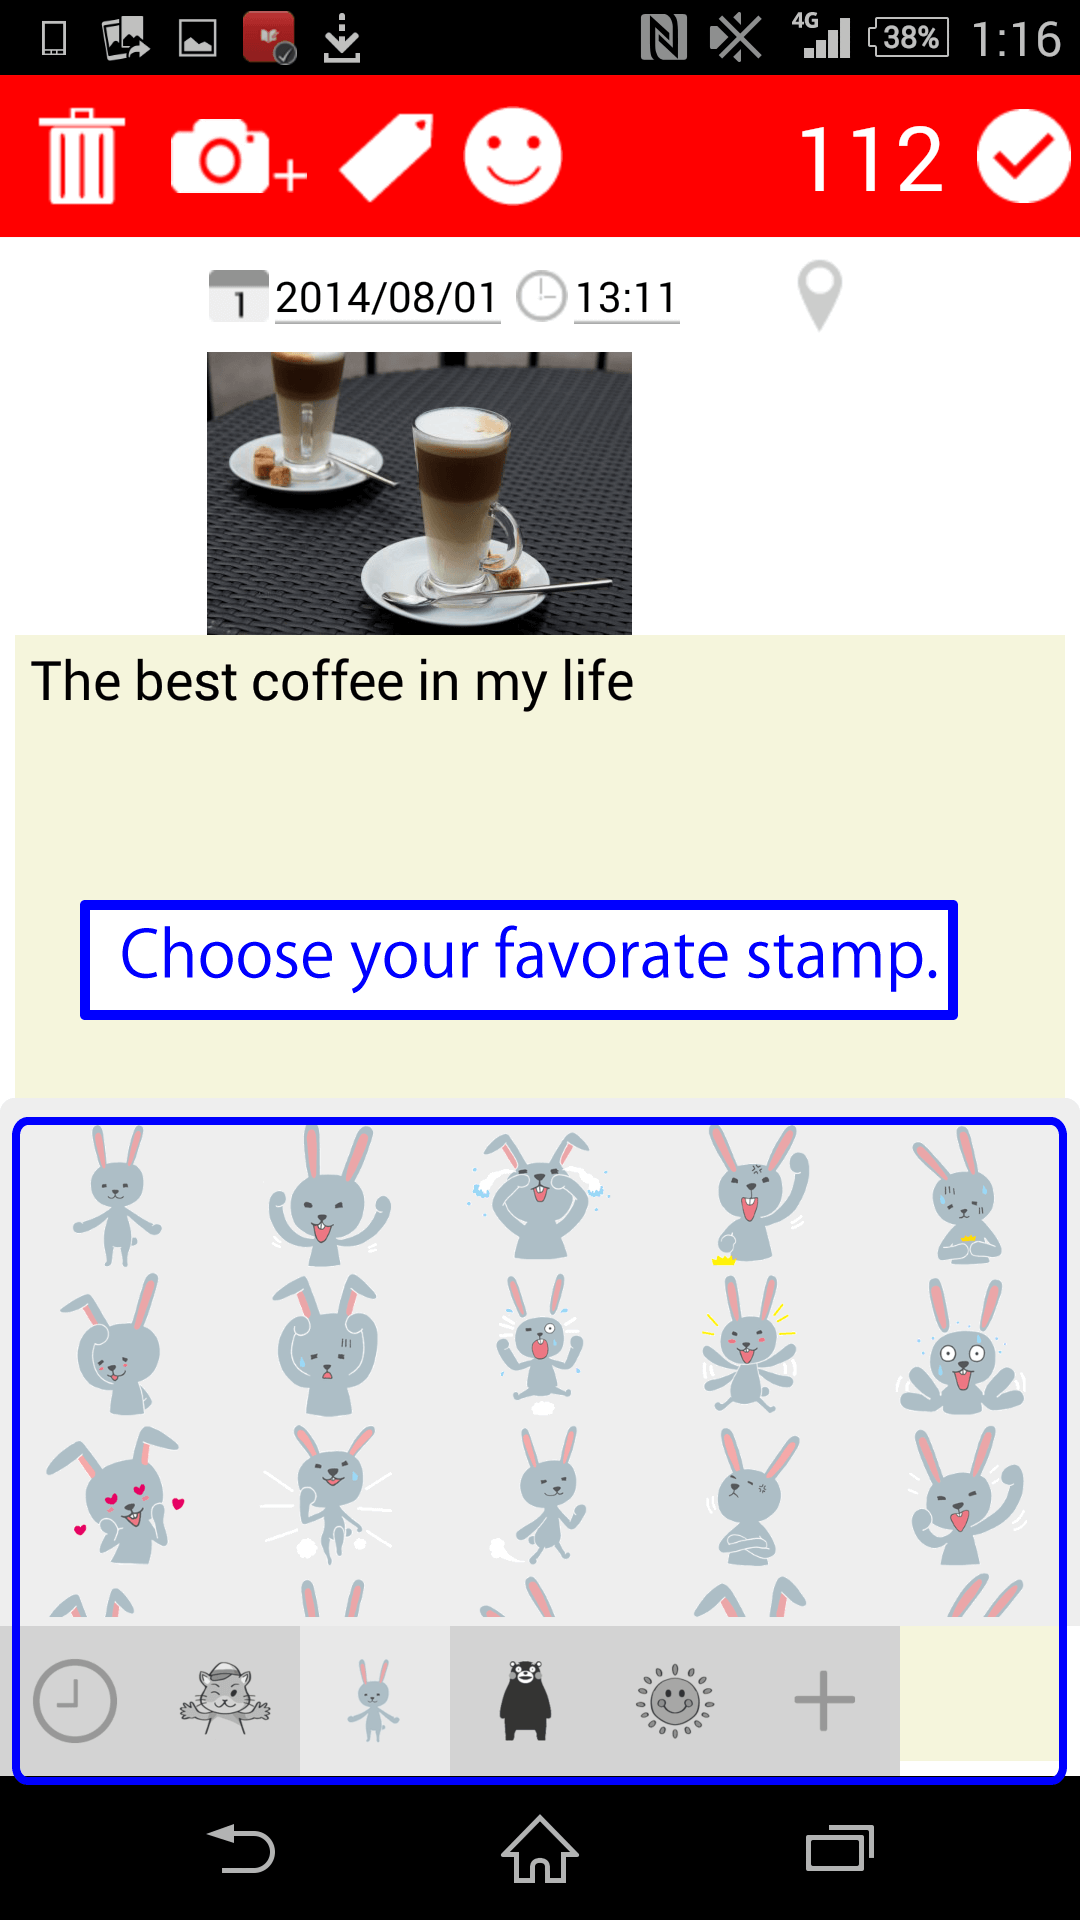
- ※How to smallen the sticker size
- You can make stickers smaller.
- Tap setting button shown bottom of the screen. Check "Mini Tag Stickers" to smallen stickers.
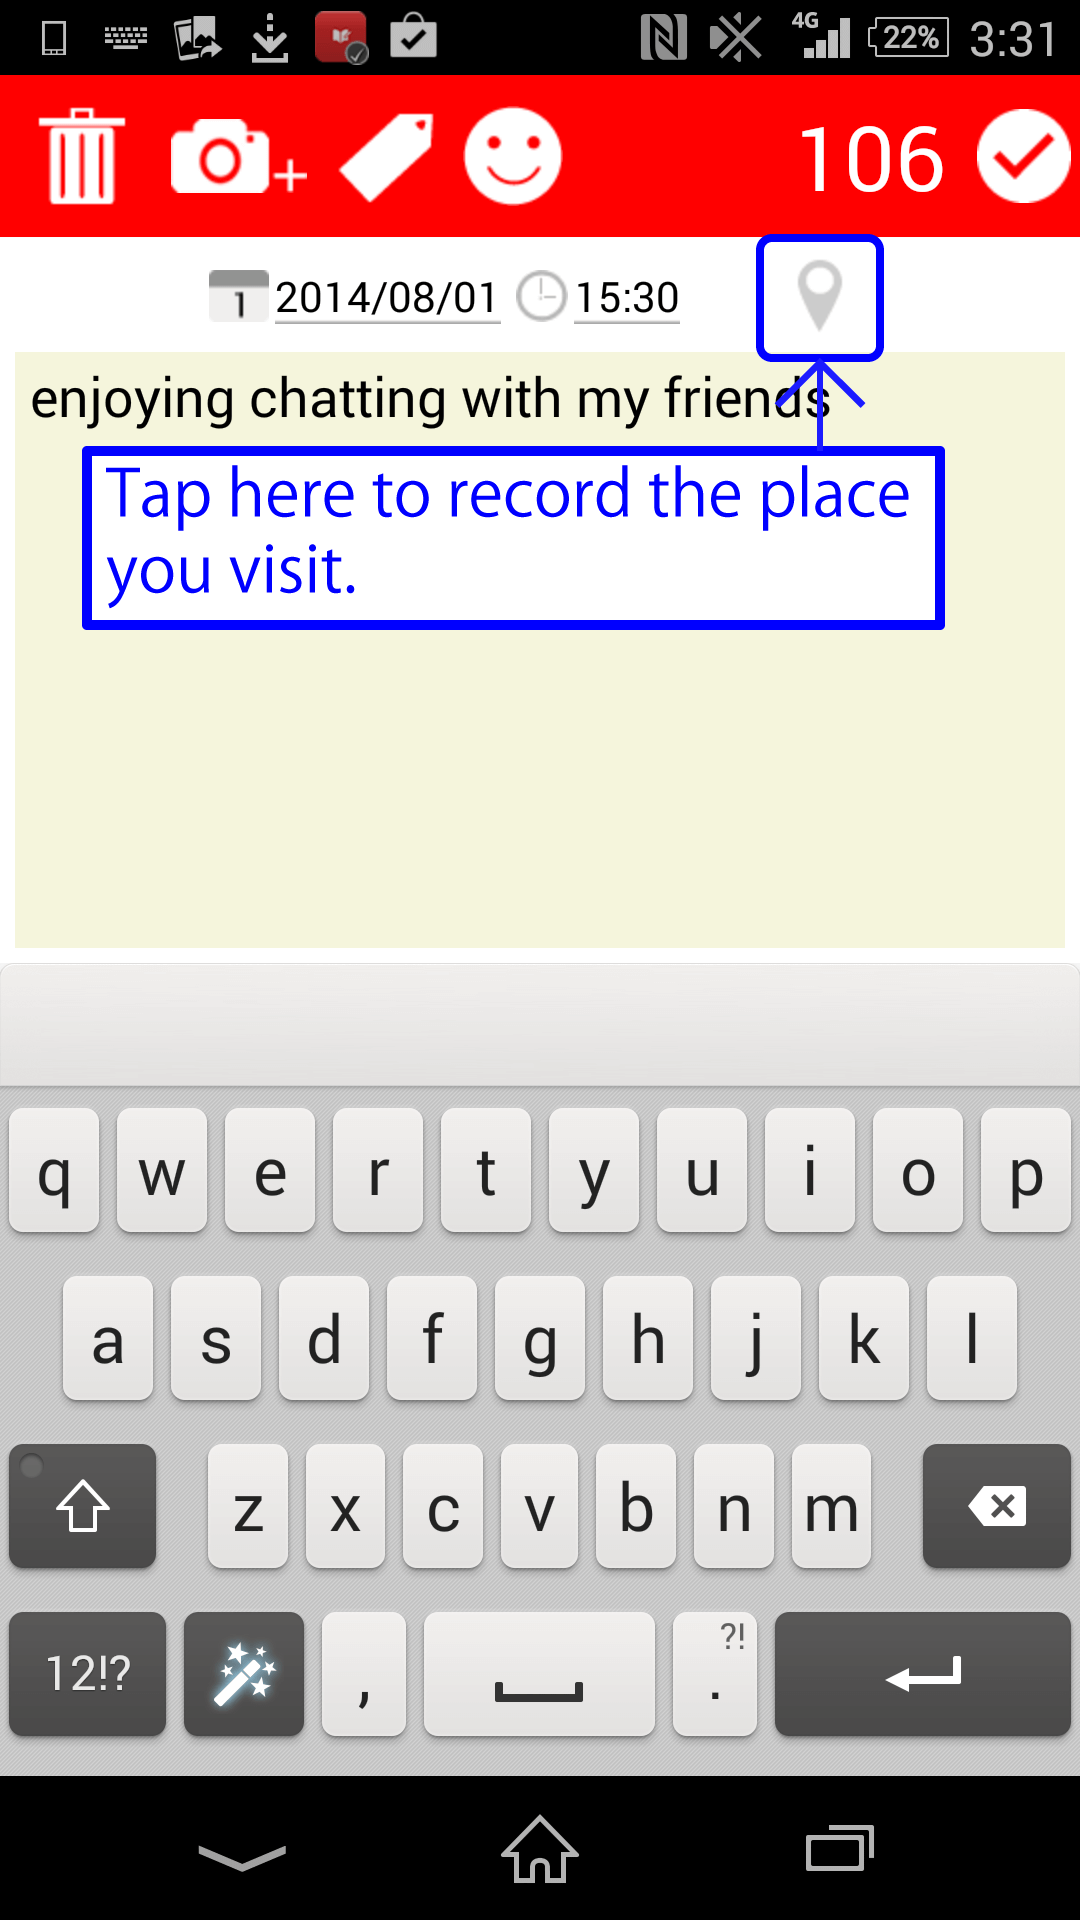
- Add location infomation. -
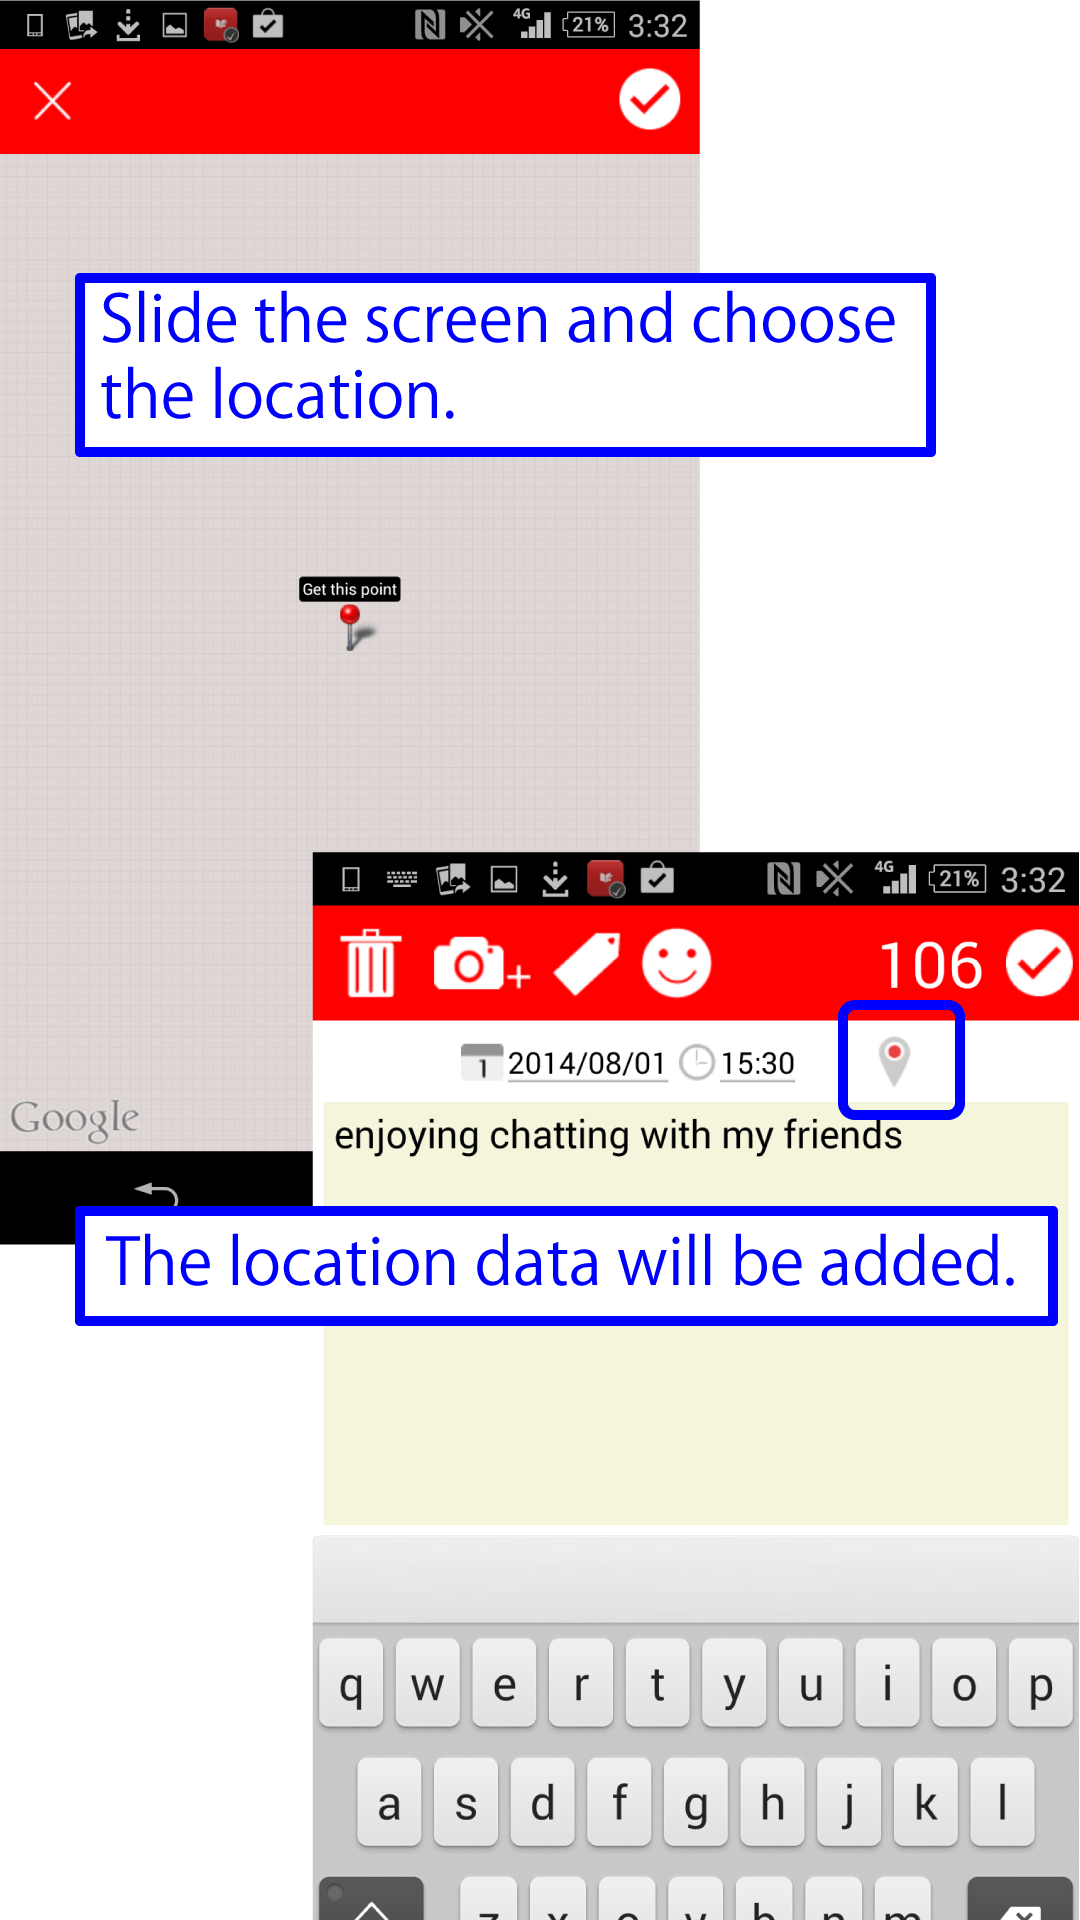
- Tap the map button in the right of the edit screen.
- Slide the screen and choose the location.
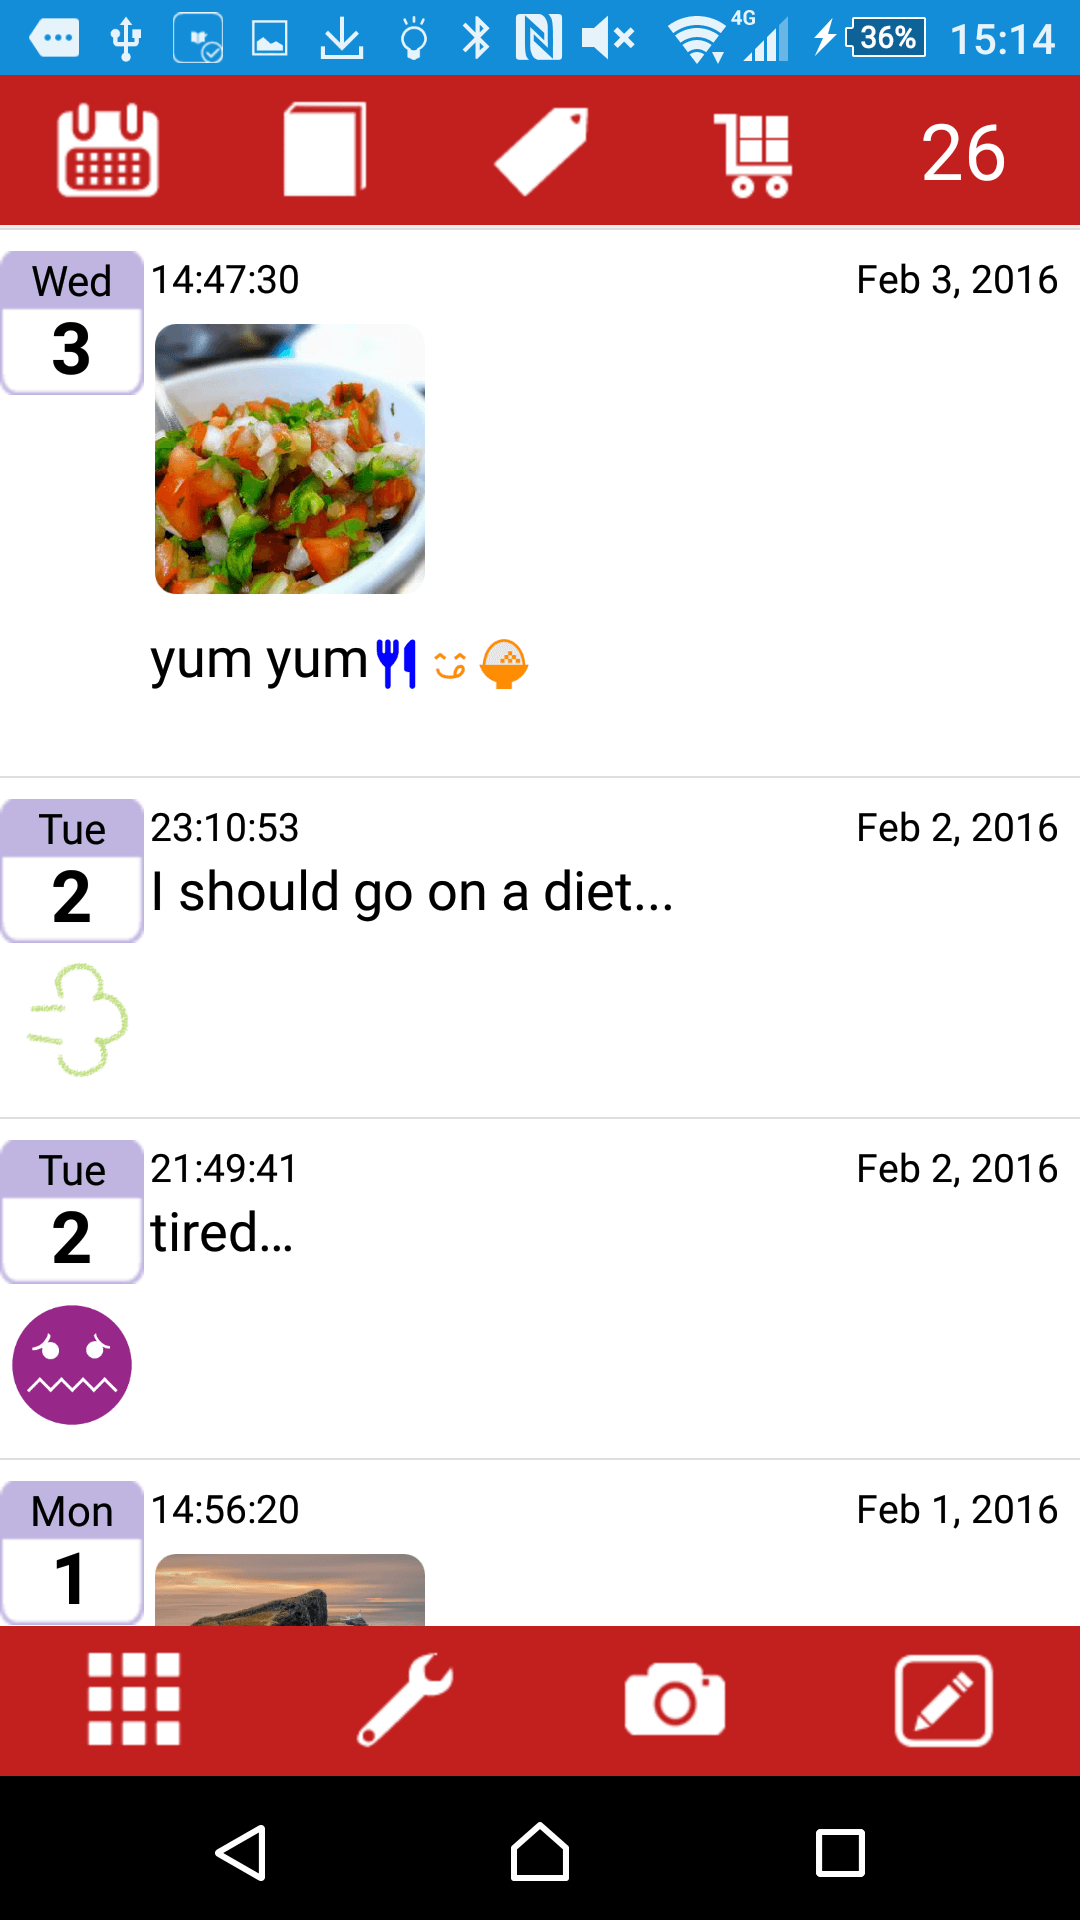
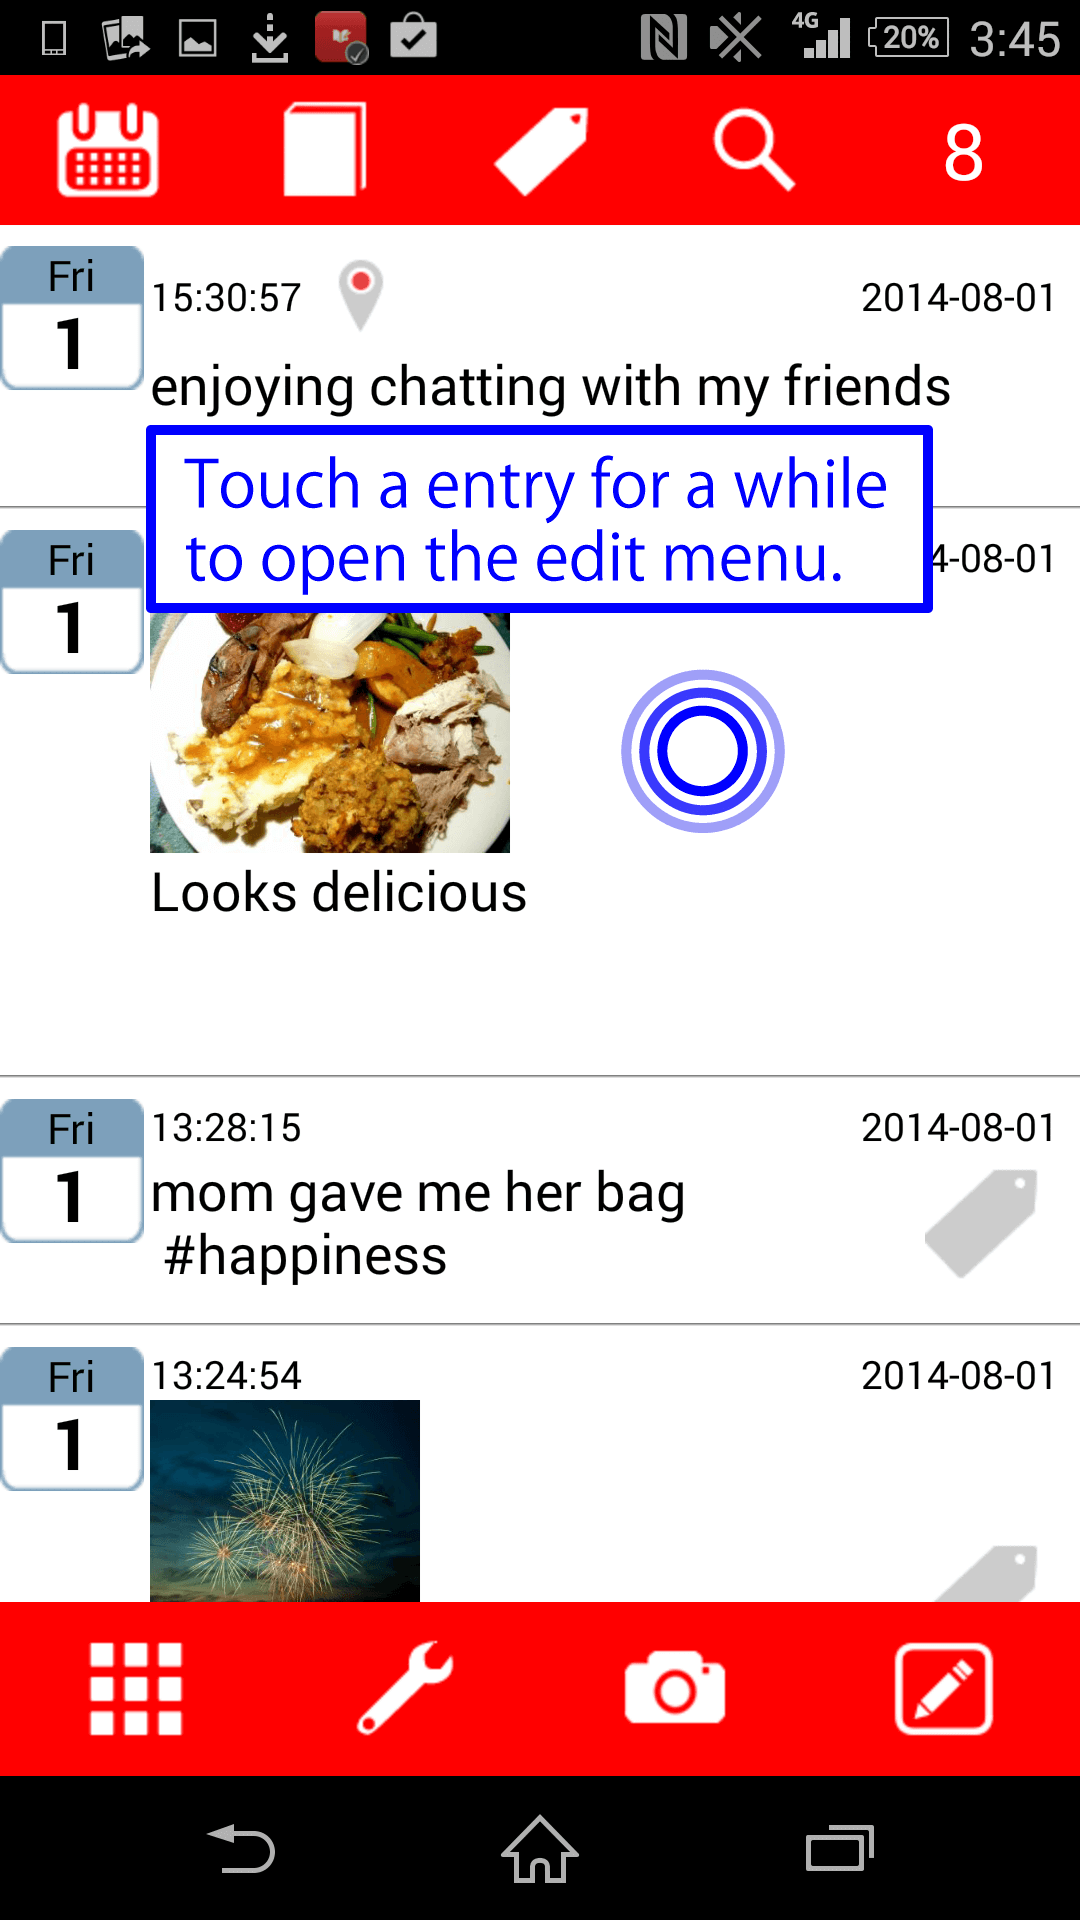
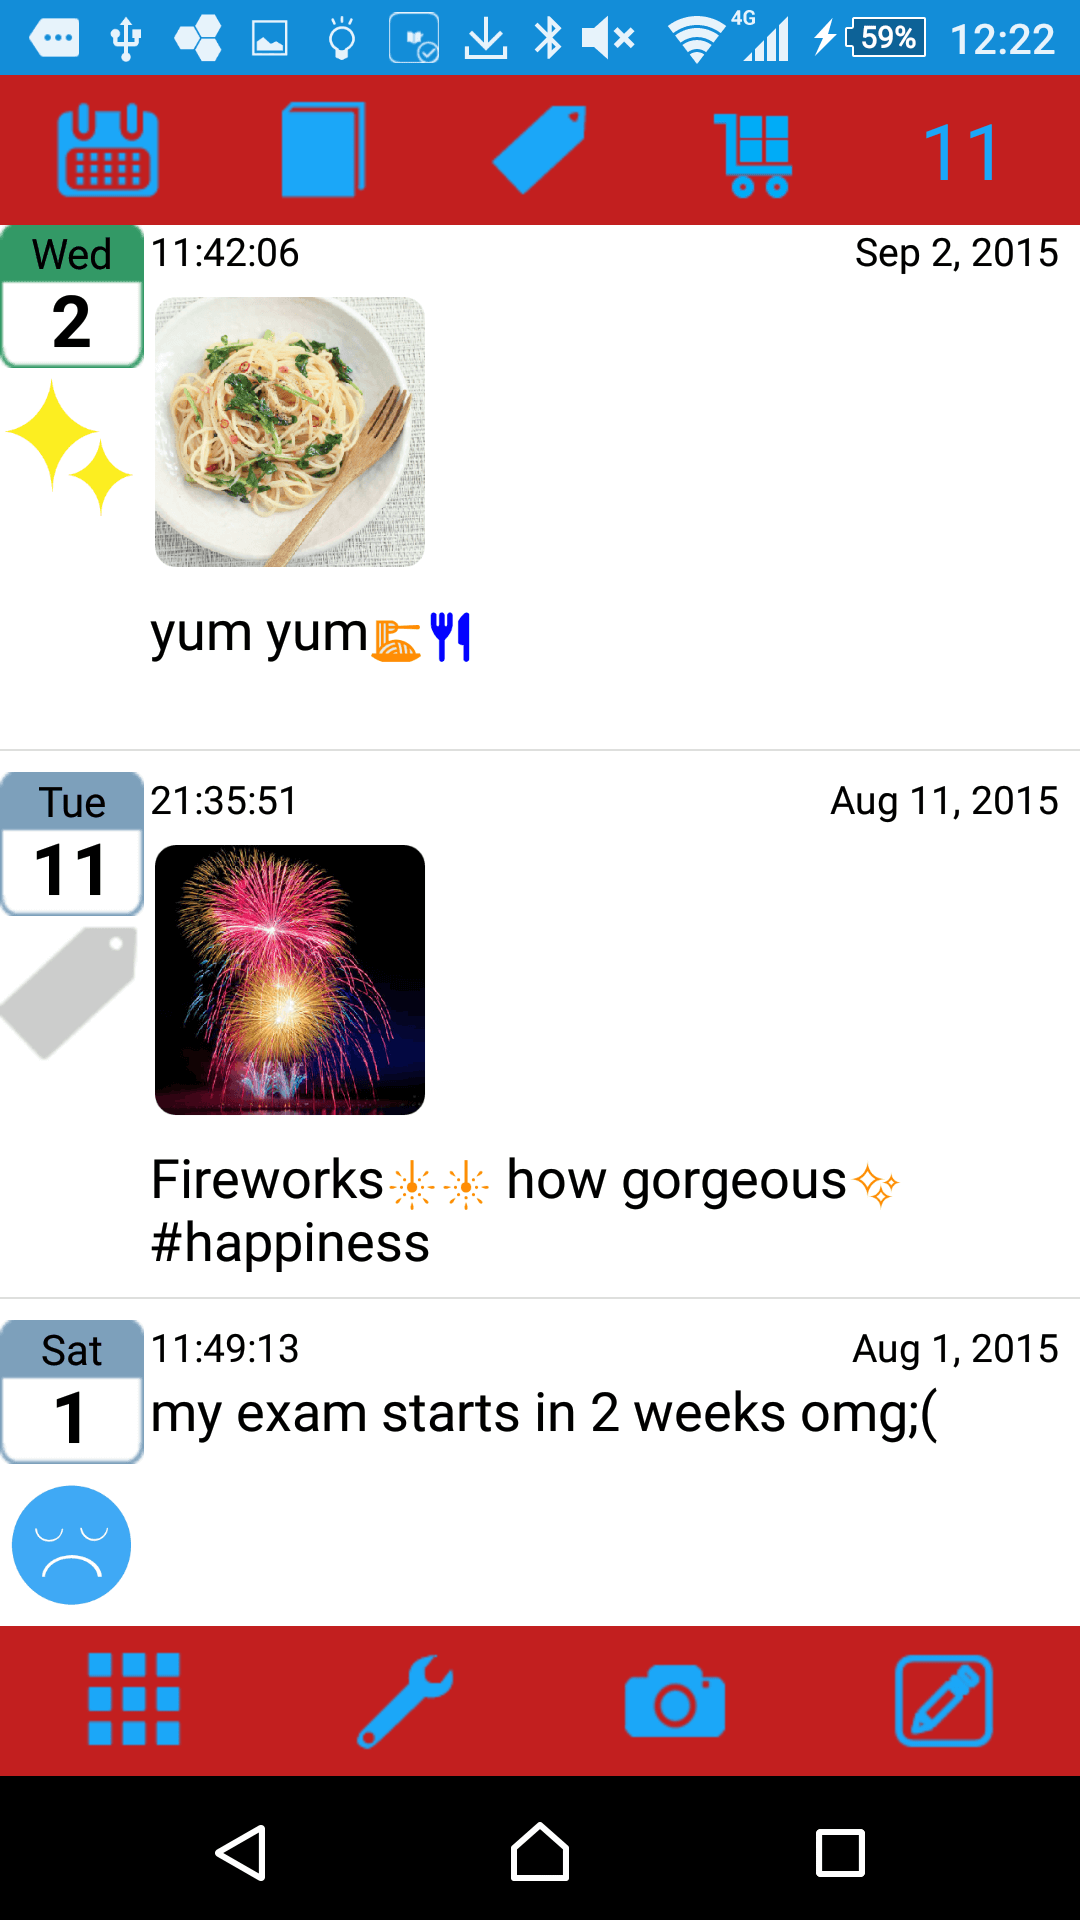
- List page(Long press) -
- Touch a entry for a while to open the edit menu.
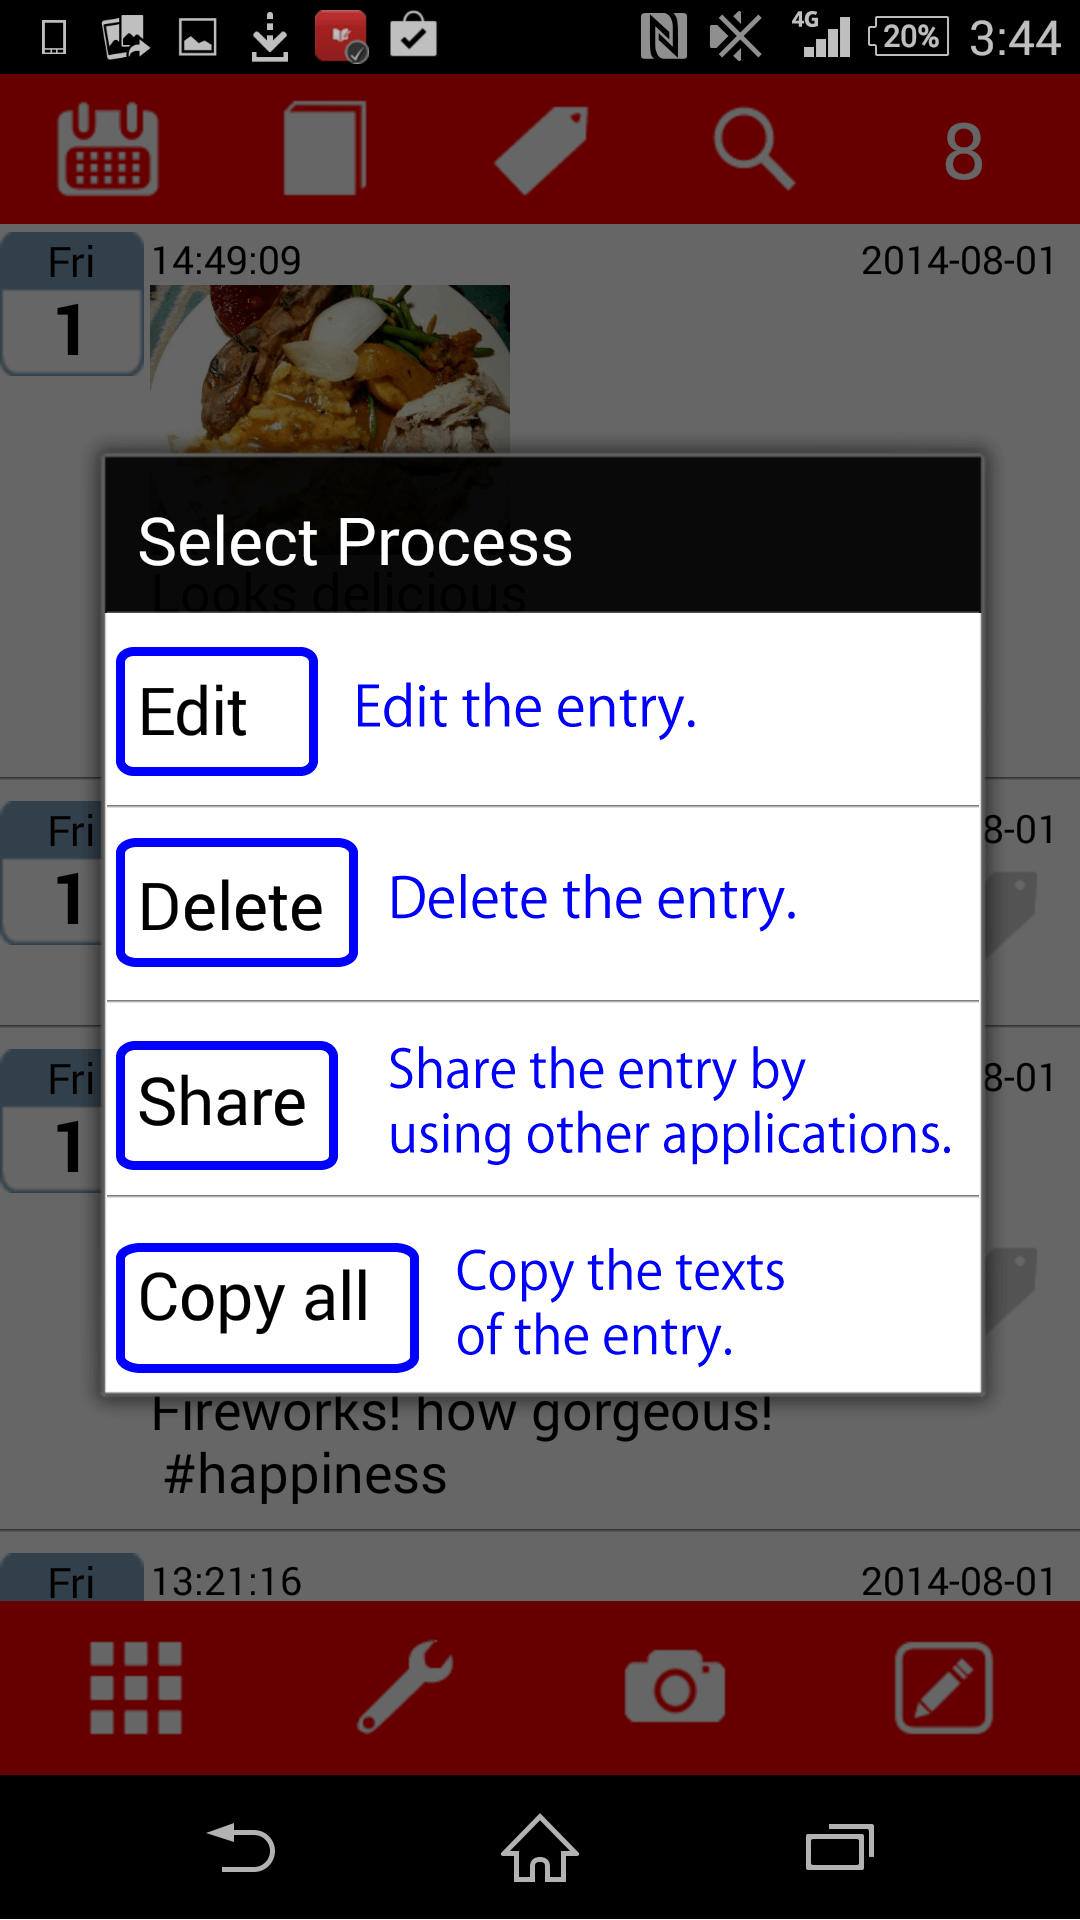
- There are four choices in the menu page.
- Tap"Edit" and you can edit the entry.
- Tap "Delete", and you can delete the entry.
- Tap"Share", and you can share the entry by using other applications.
- Tap "Copy", and you can copy the texts of the entries.
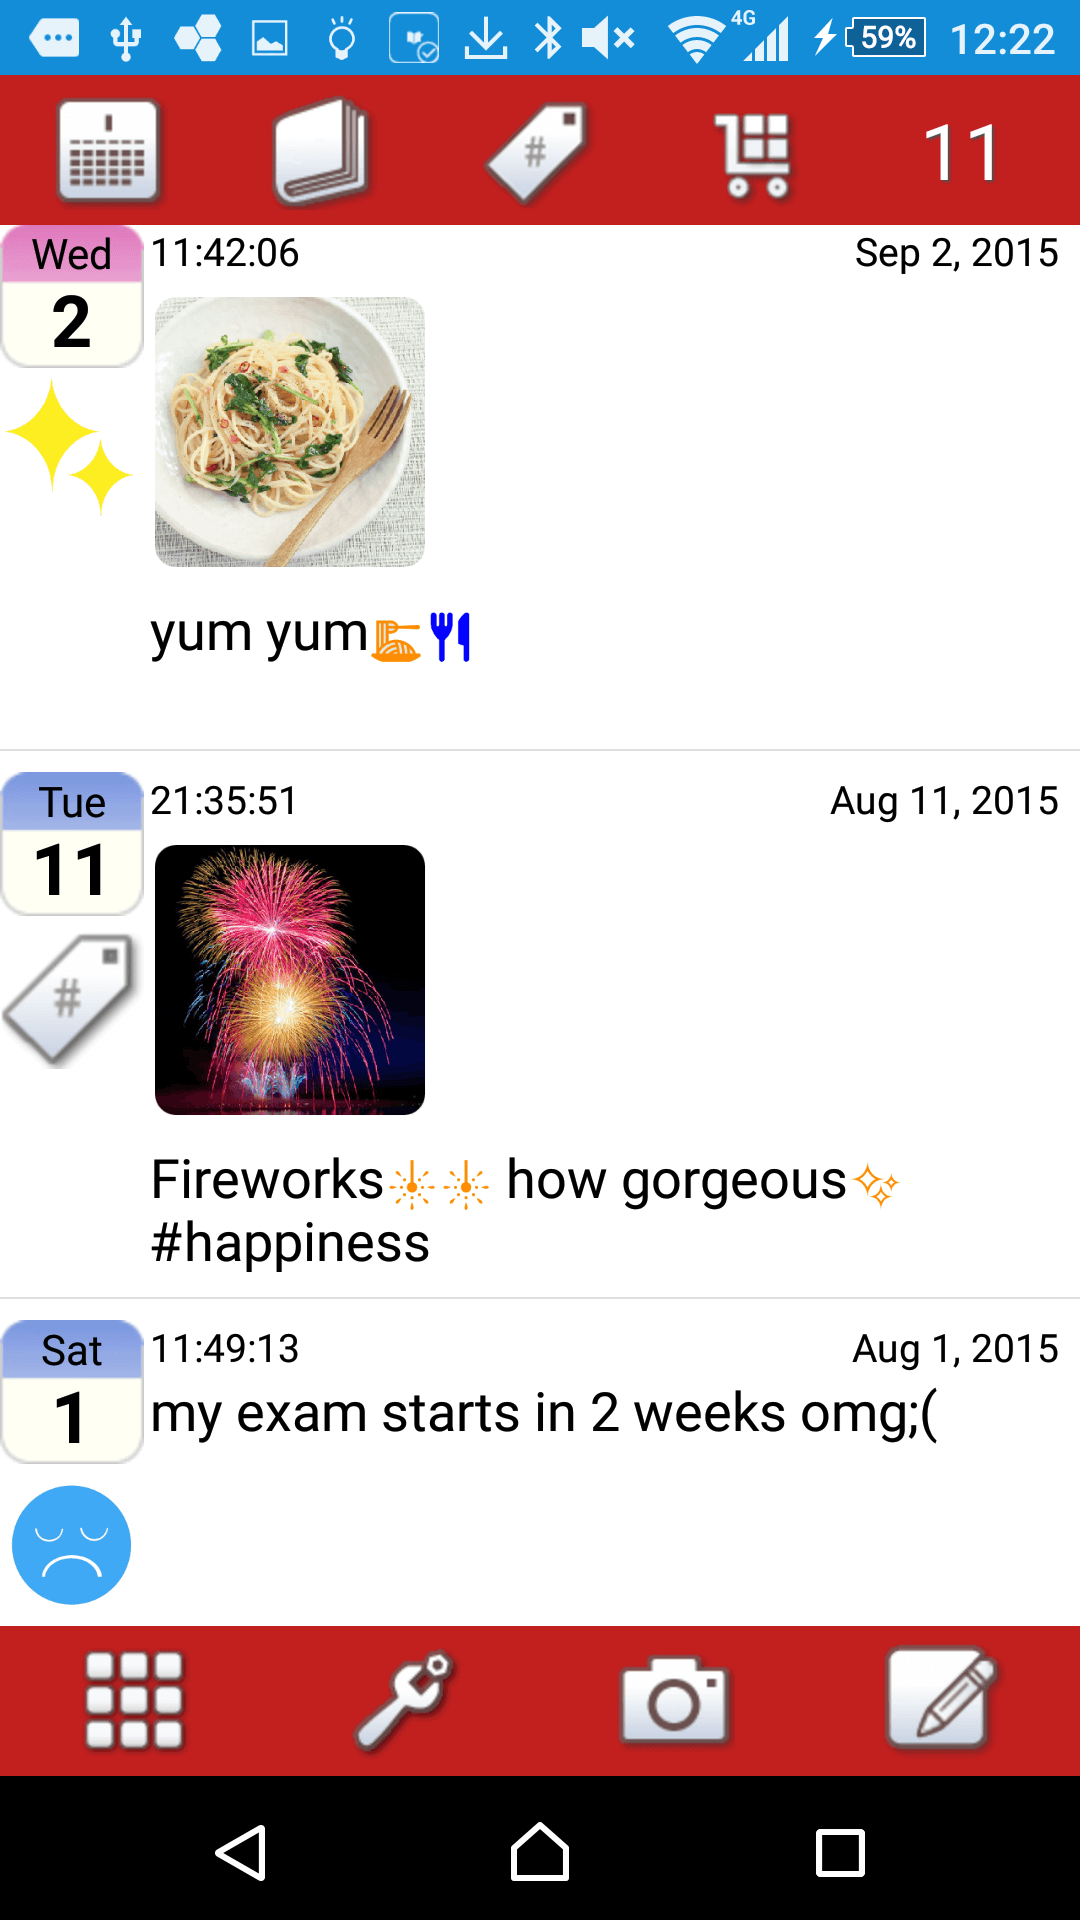
- List page(Tags) -
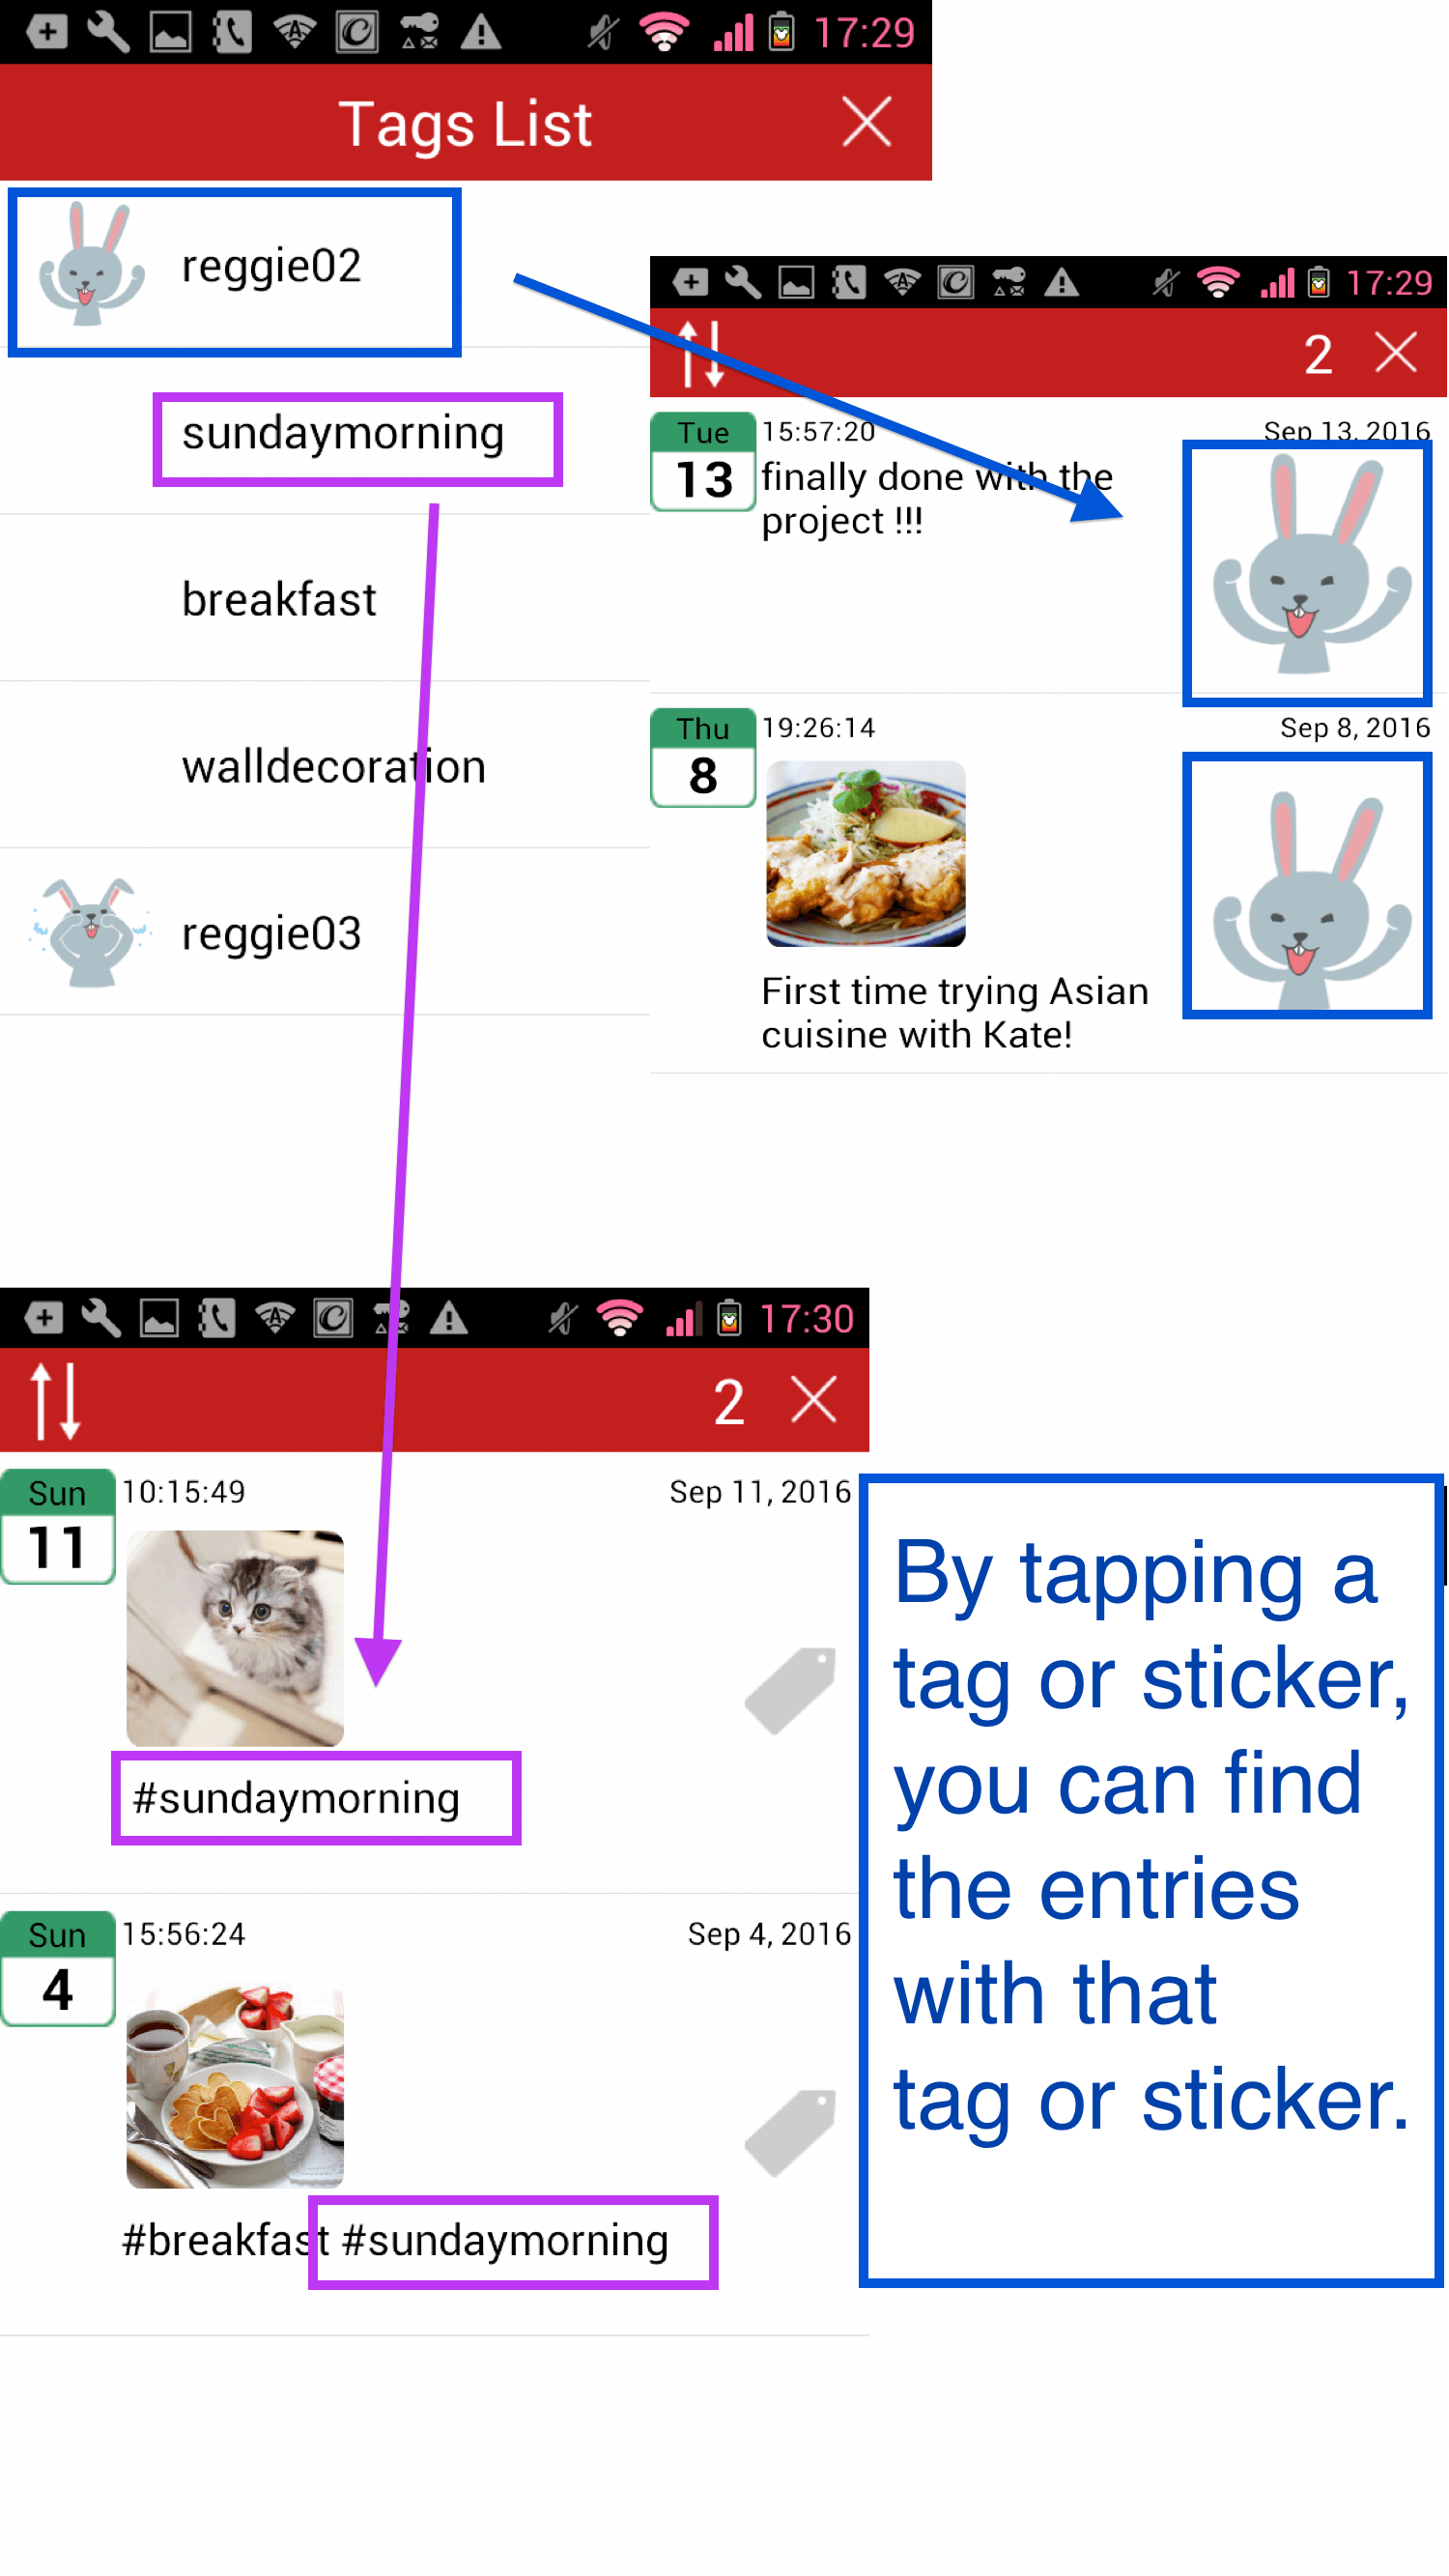
- By tapping a tag icon or a tag sticker, you can display the list of your entries that include the same tag.
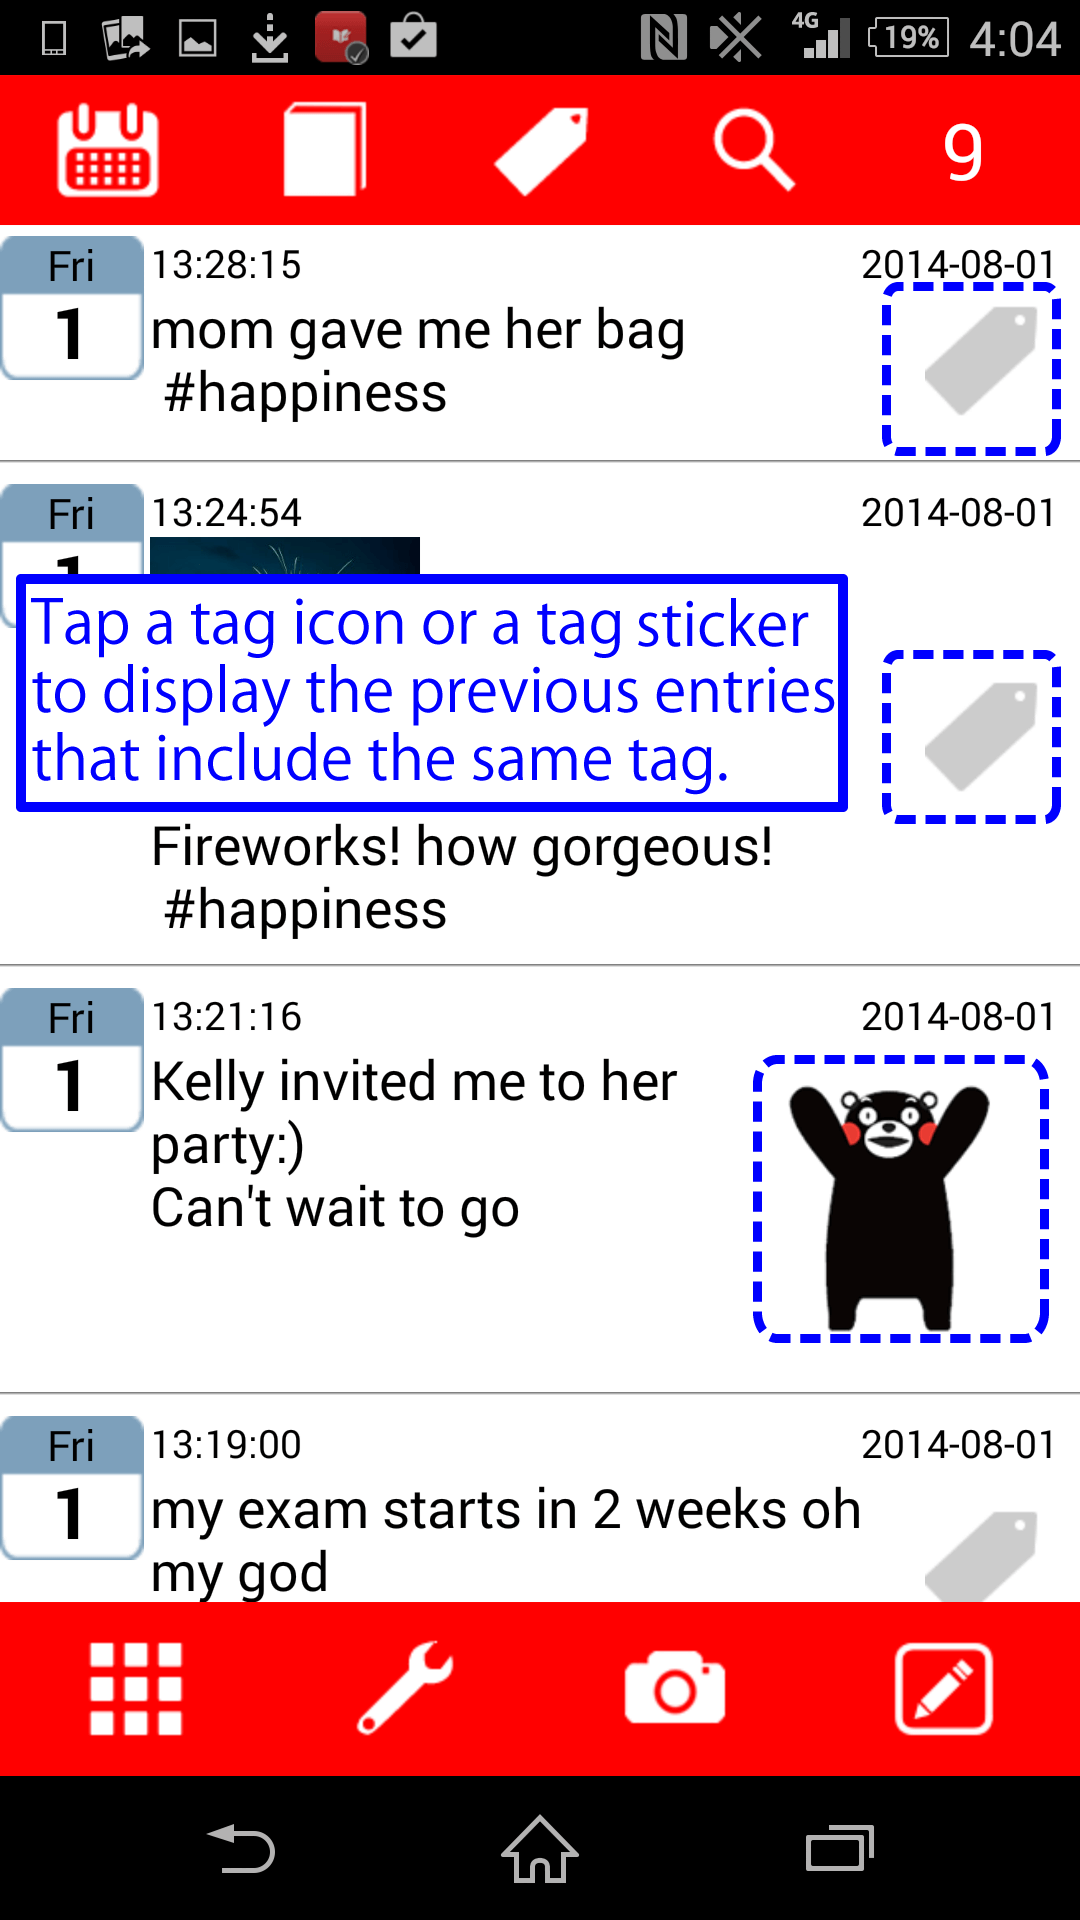
- If the entry has more than one tag, you can choose one from them.
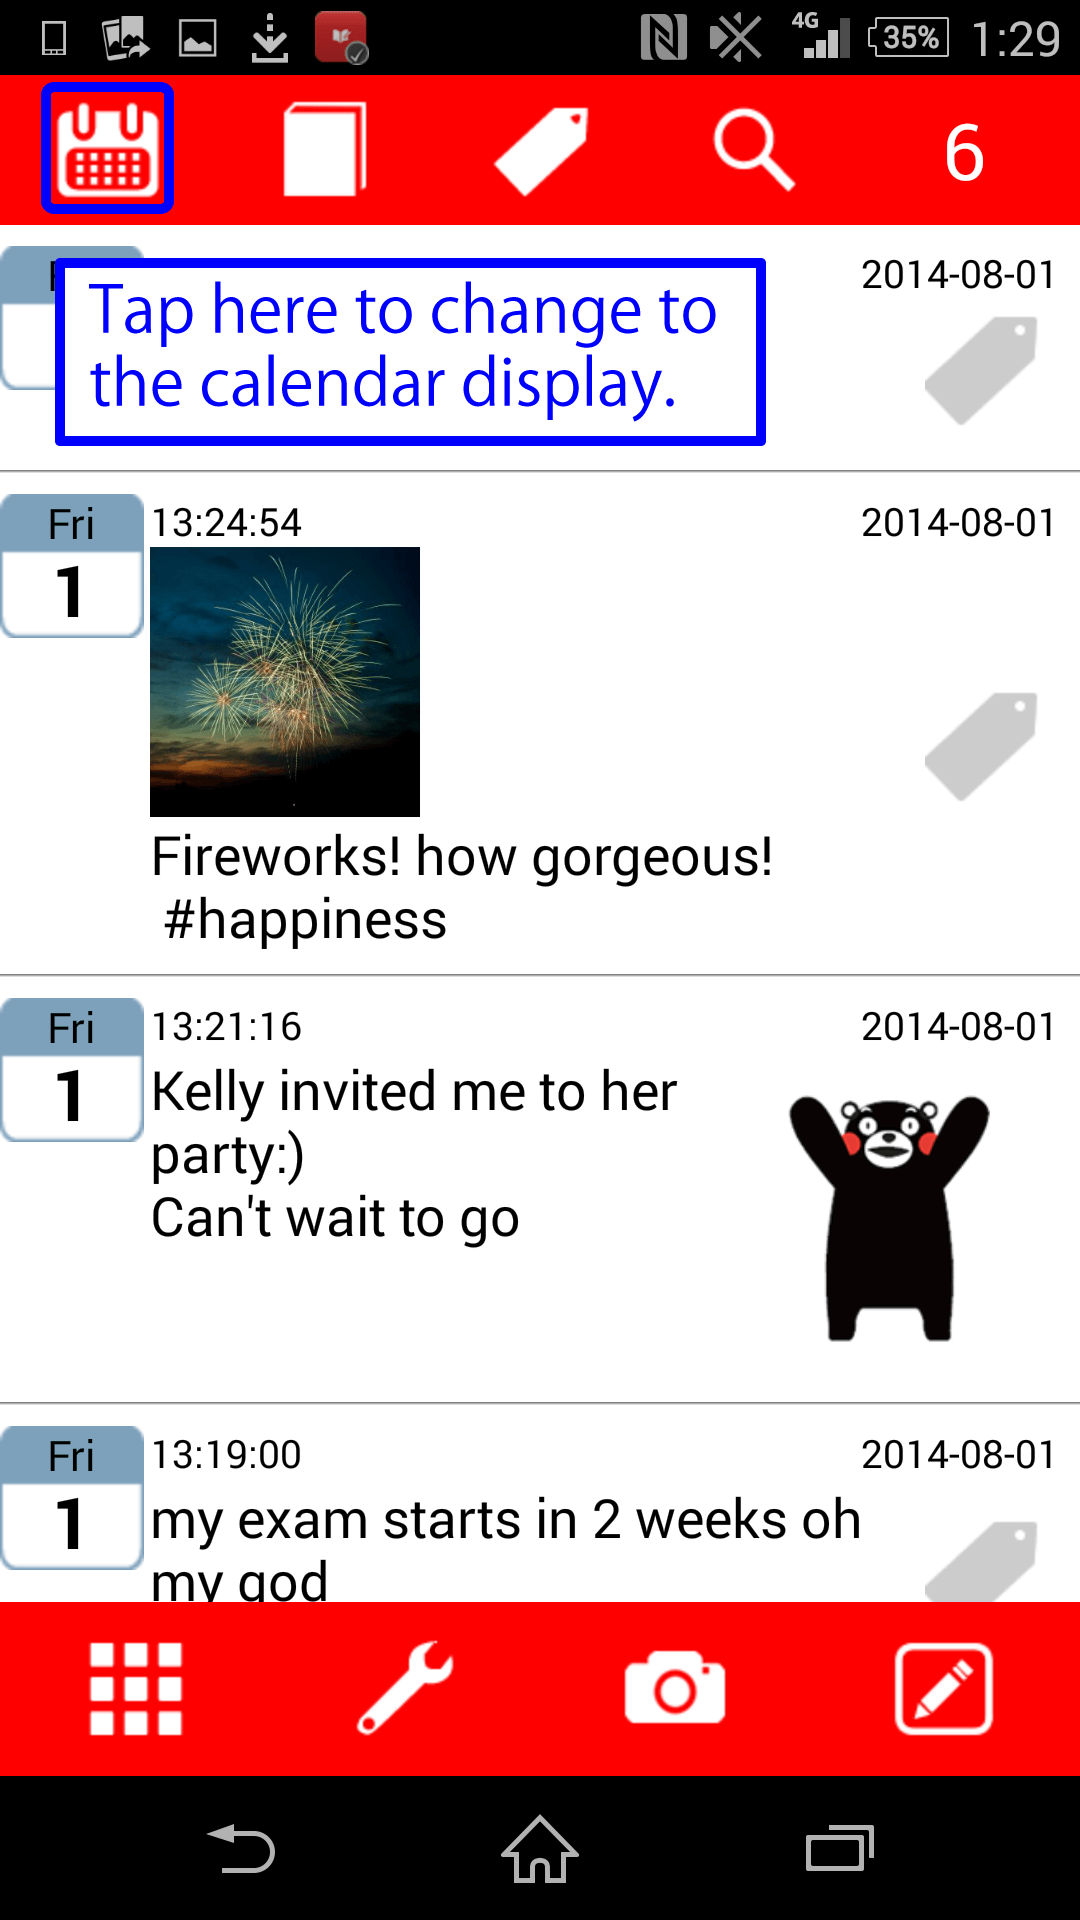
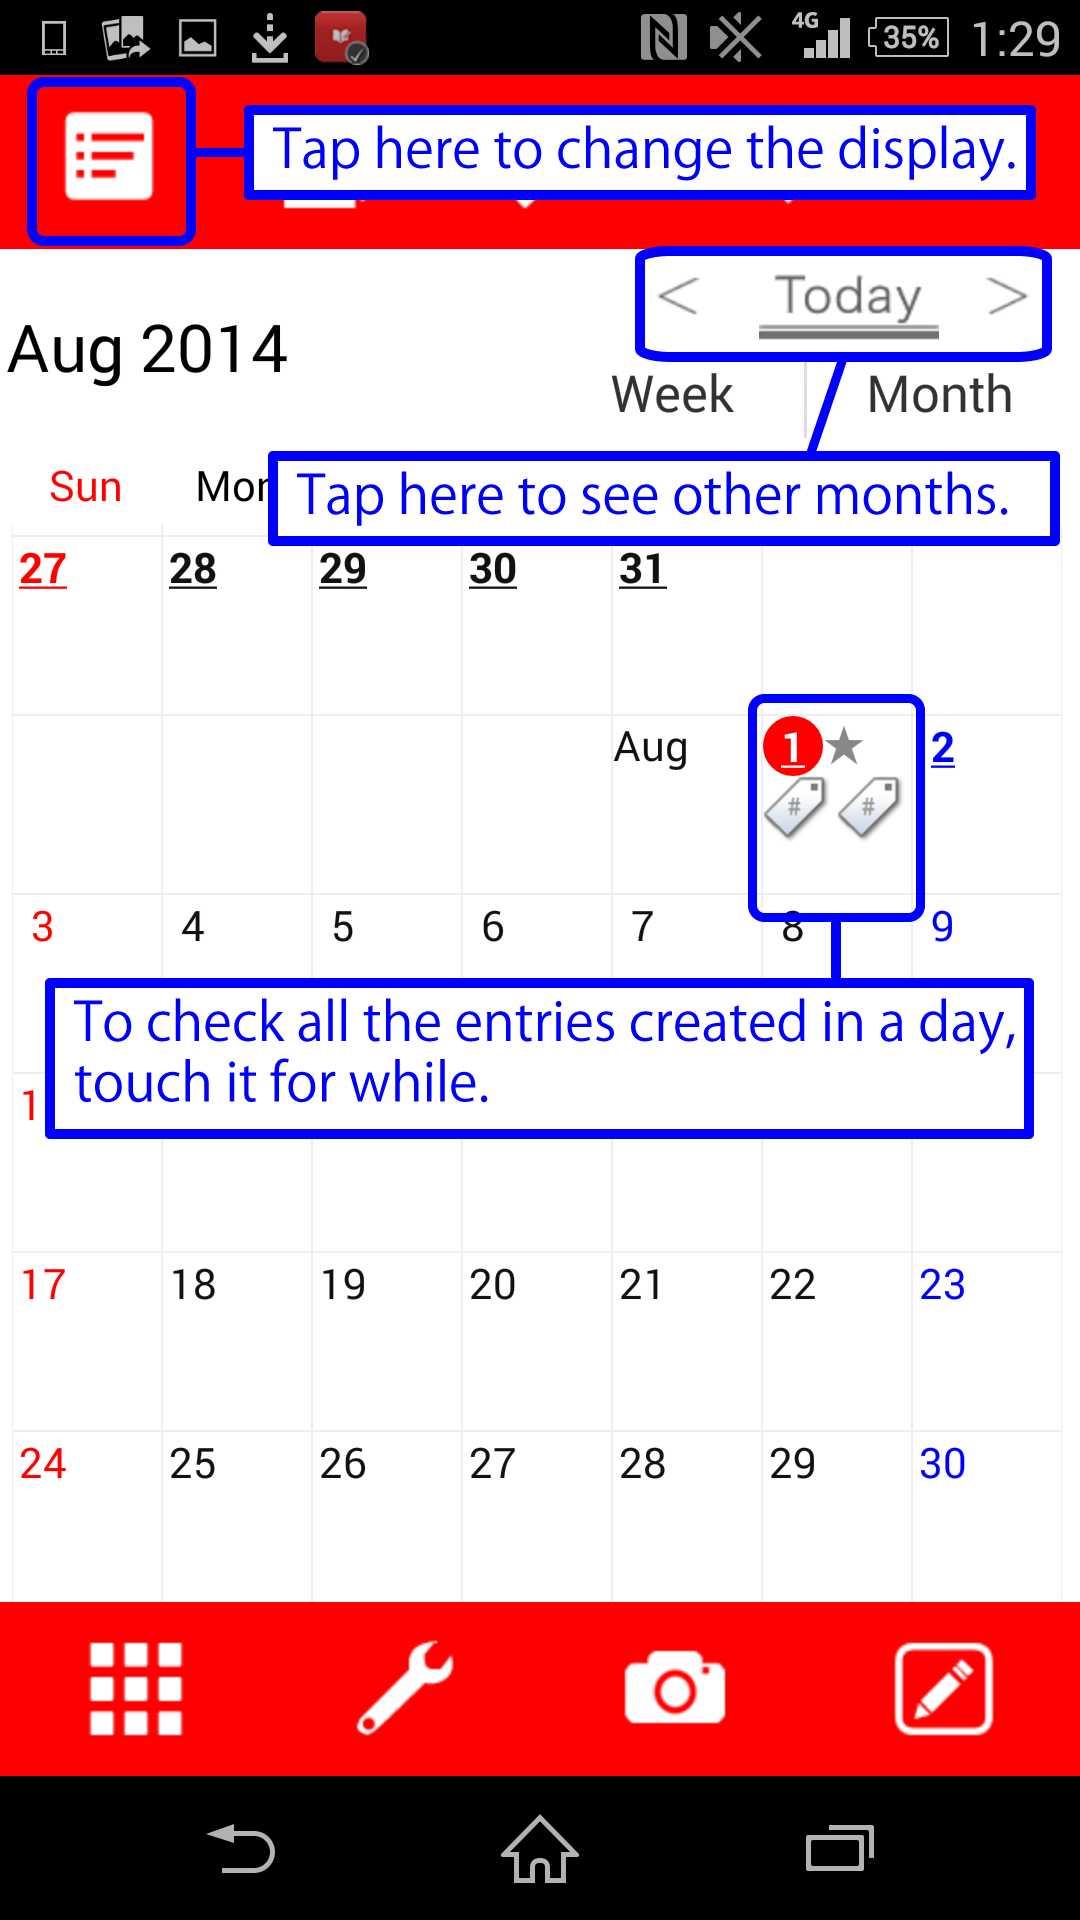
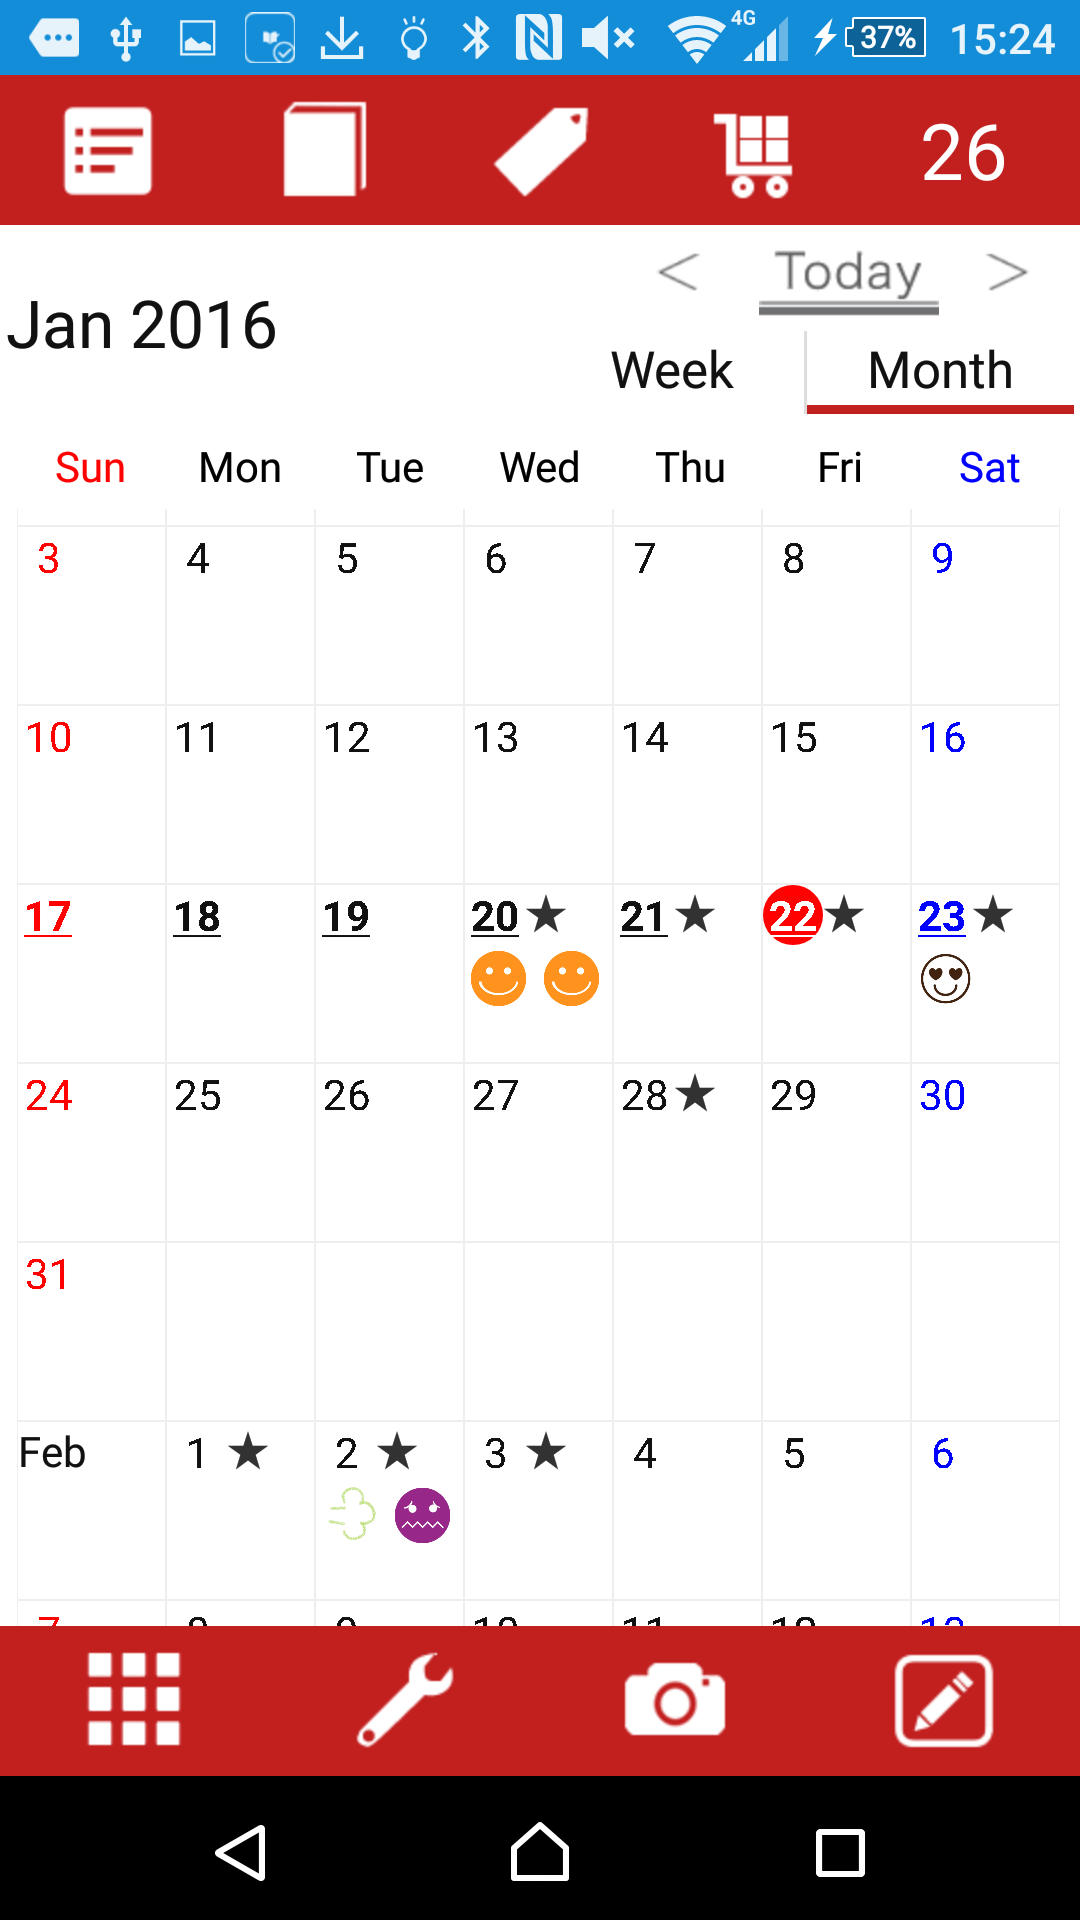
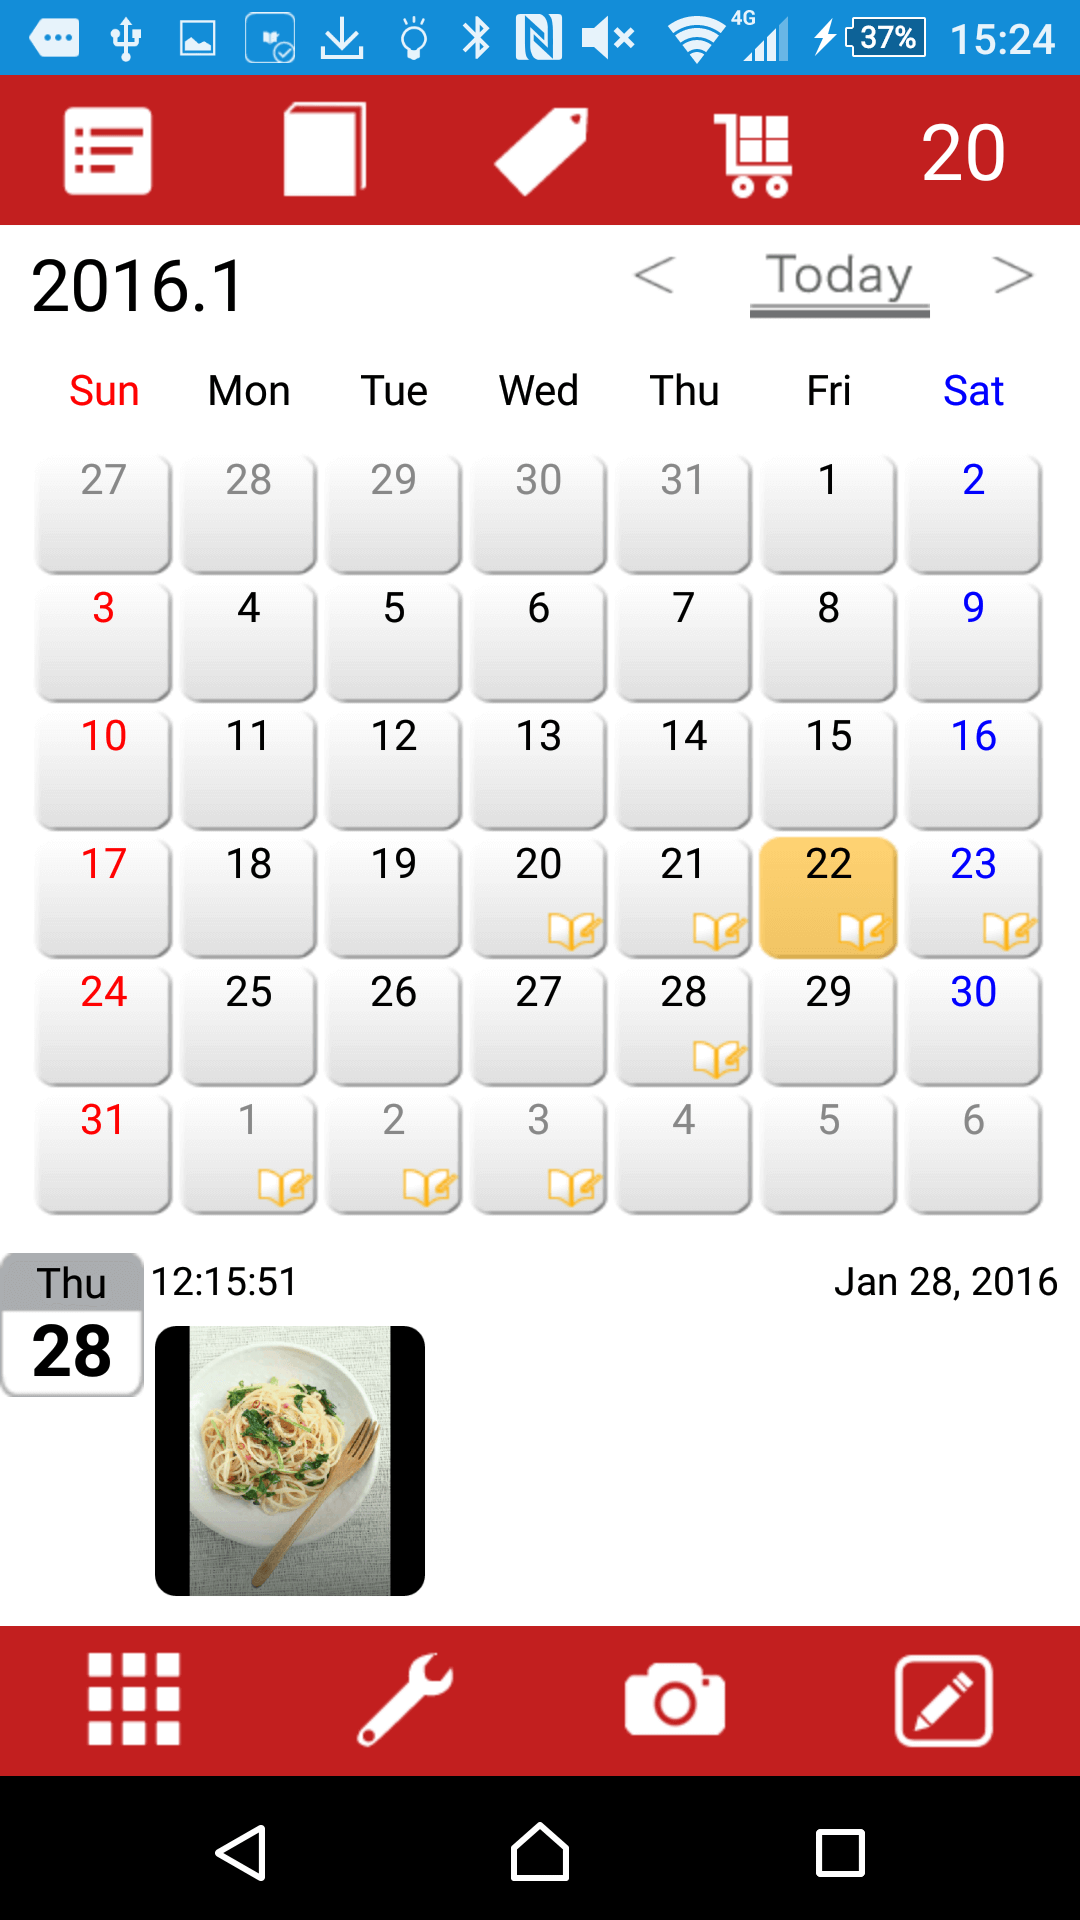
- Calendar page -
- Tap the calendar button on upper left of the screen to change to the calendar display.
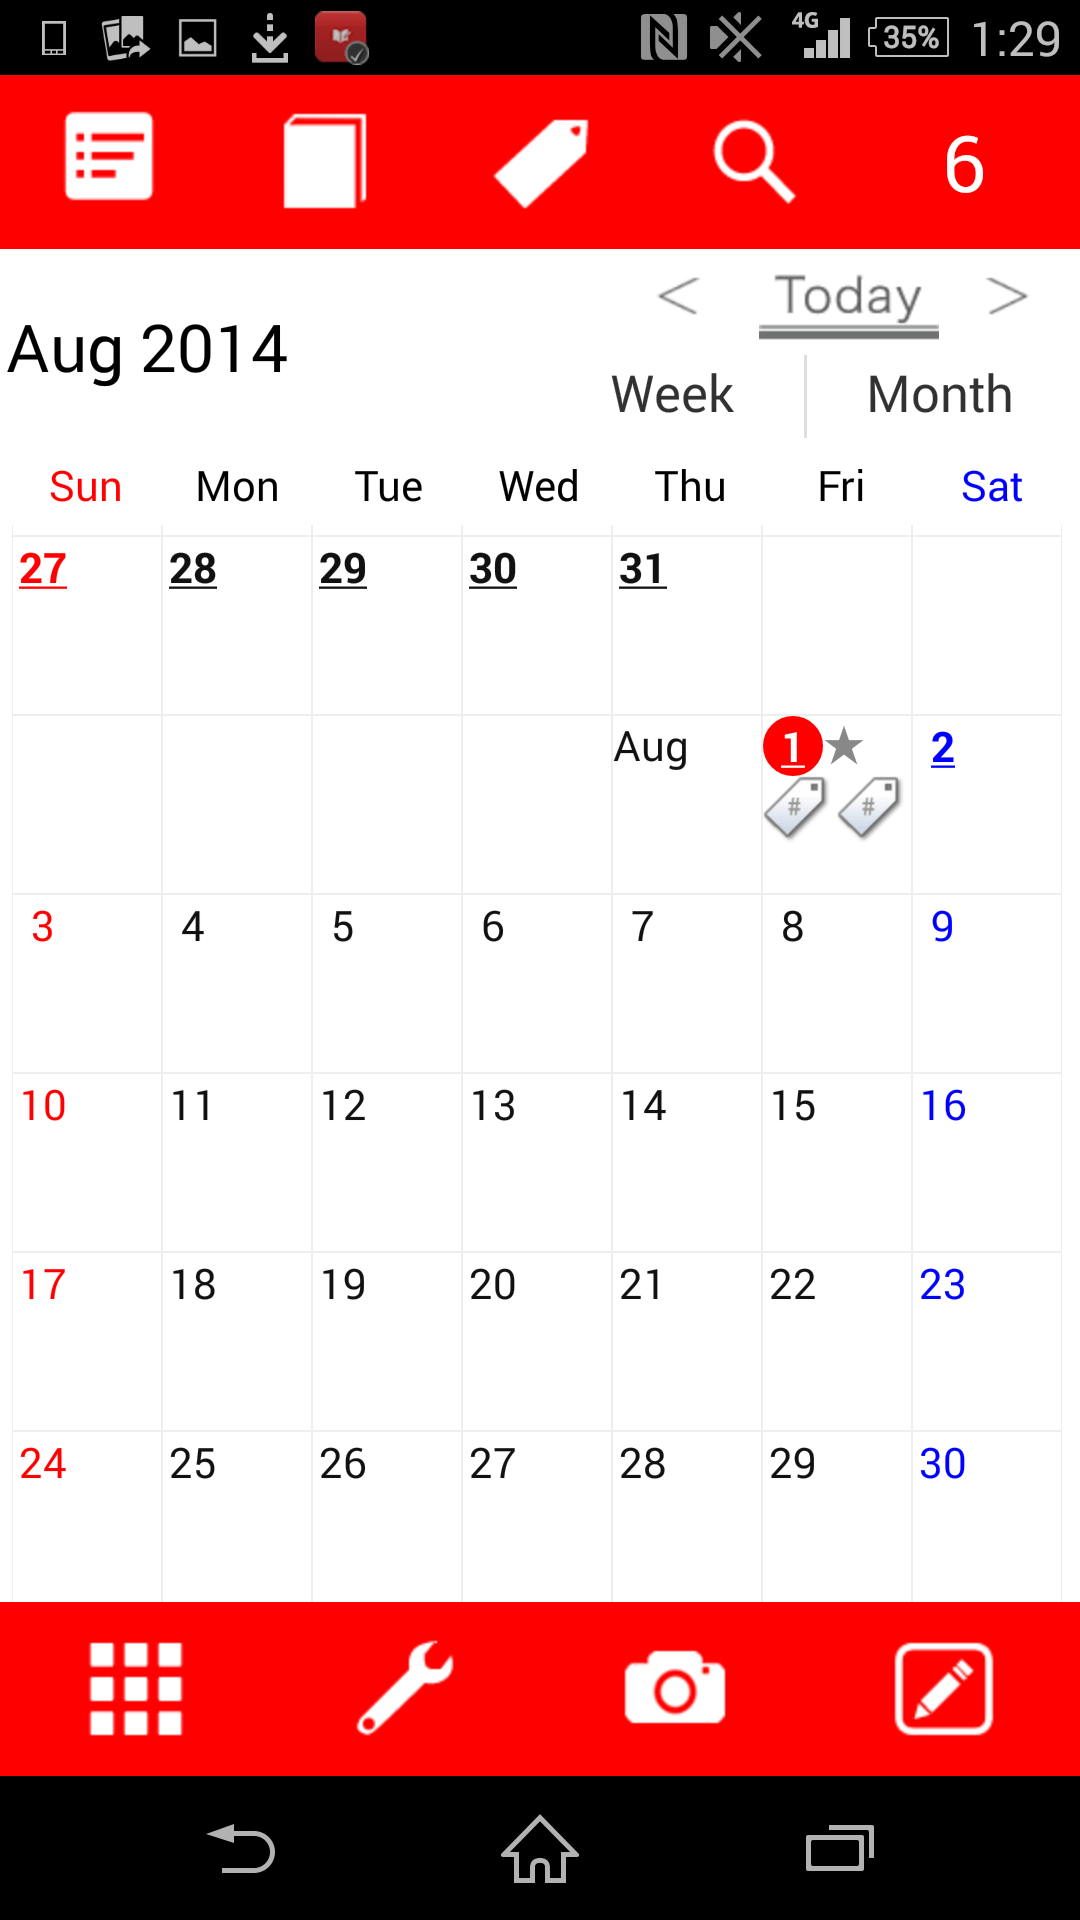
- Tap buttons above the calendar to see other months.
- Touch the day for a while to see all the entries made on that day.
- You can also create a new entry by tapping the post button and camera button.
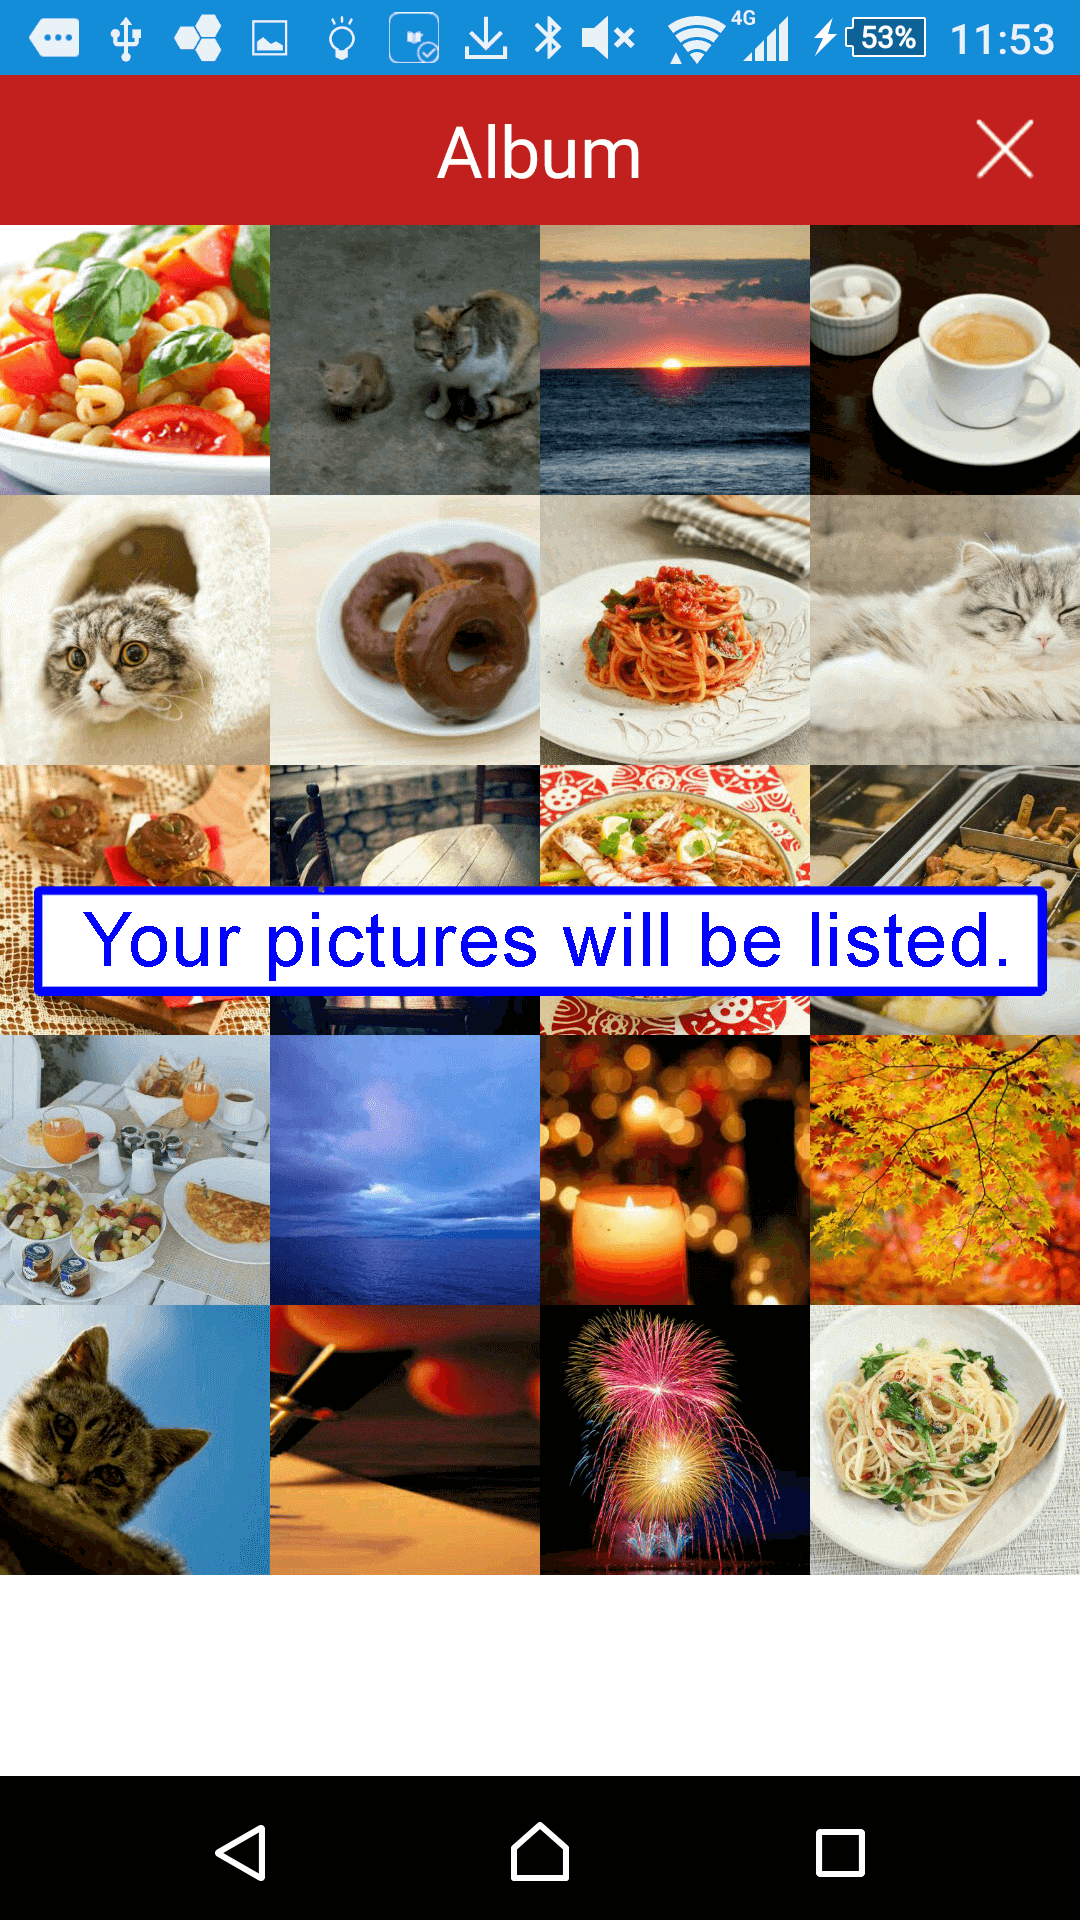
- Album function -
- Tap the album button.
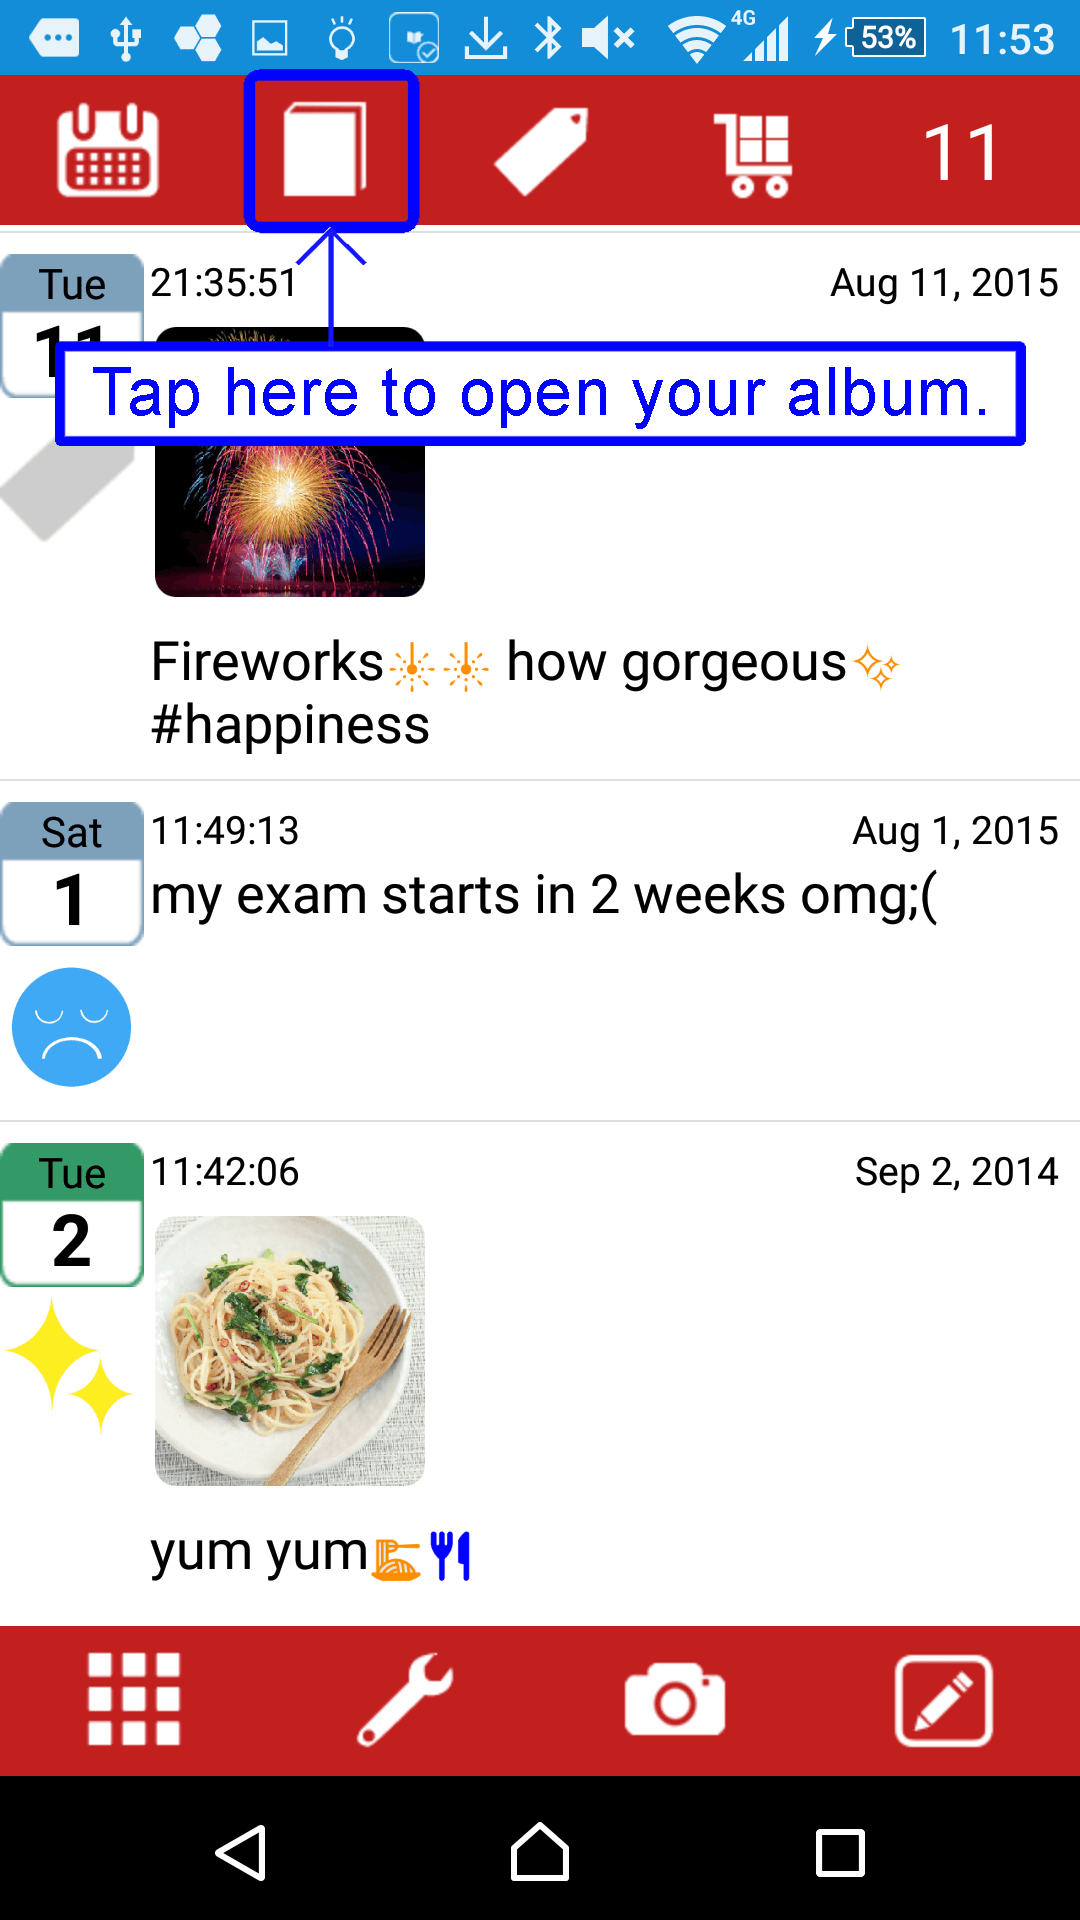
- You can see all the pictures you have added so far.
- Search Function -
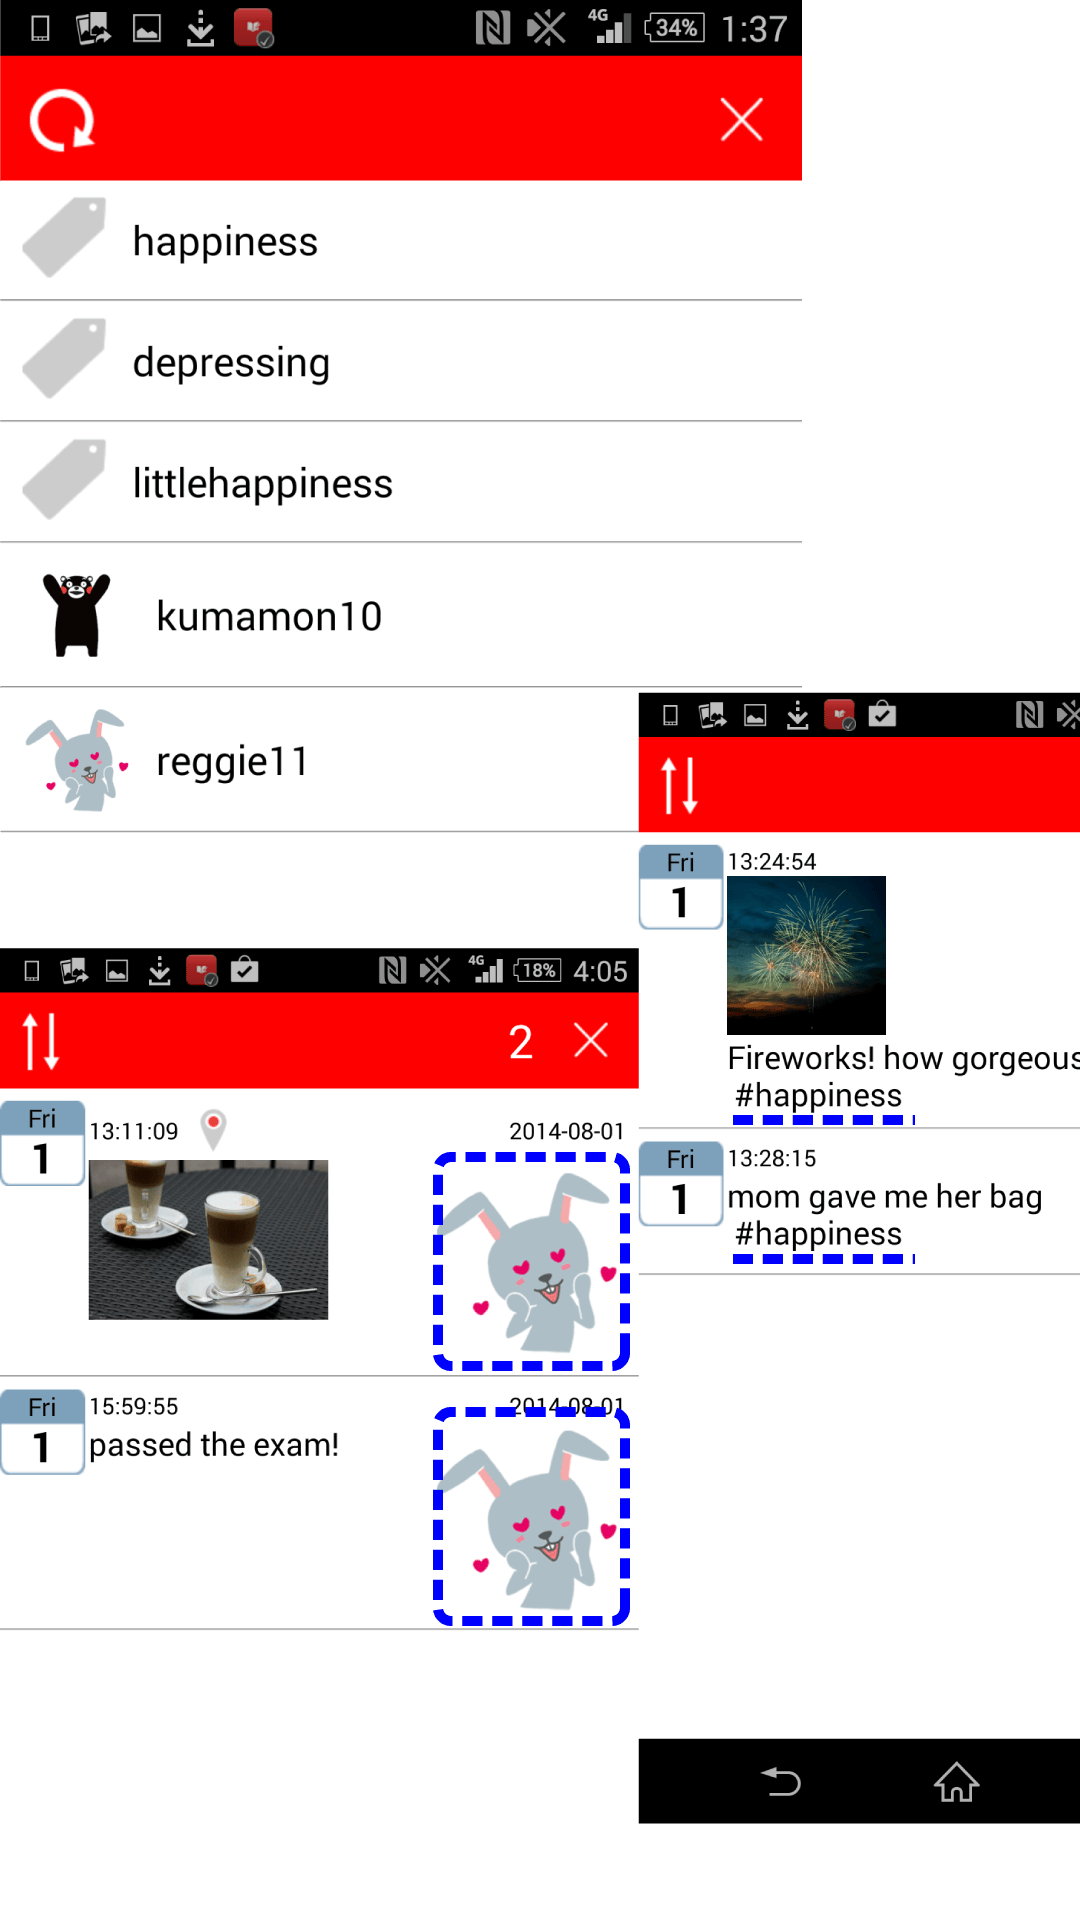
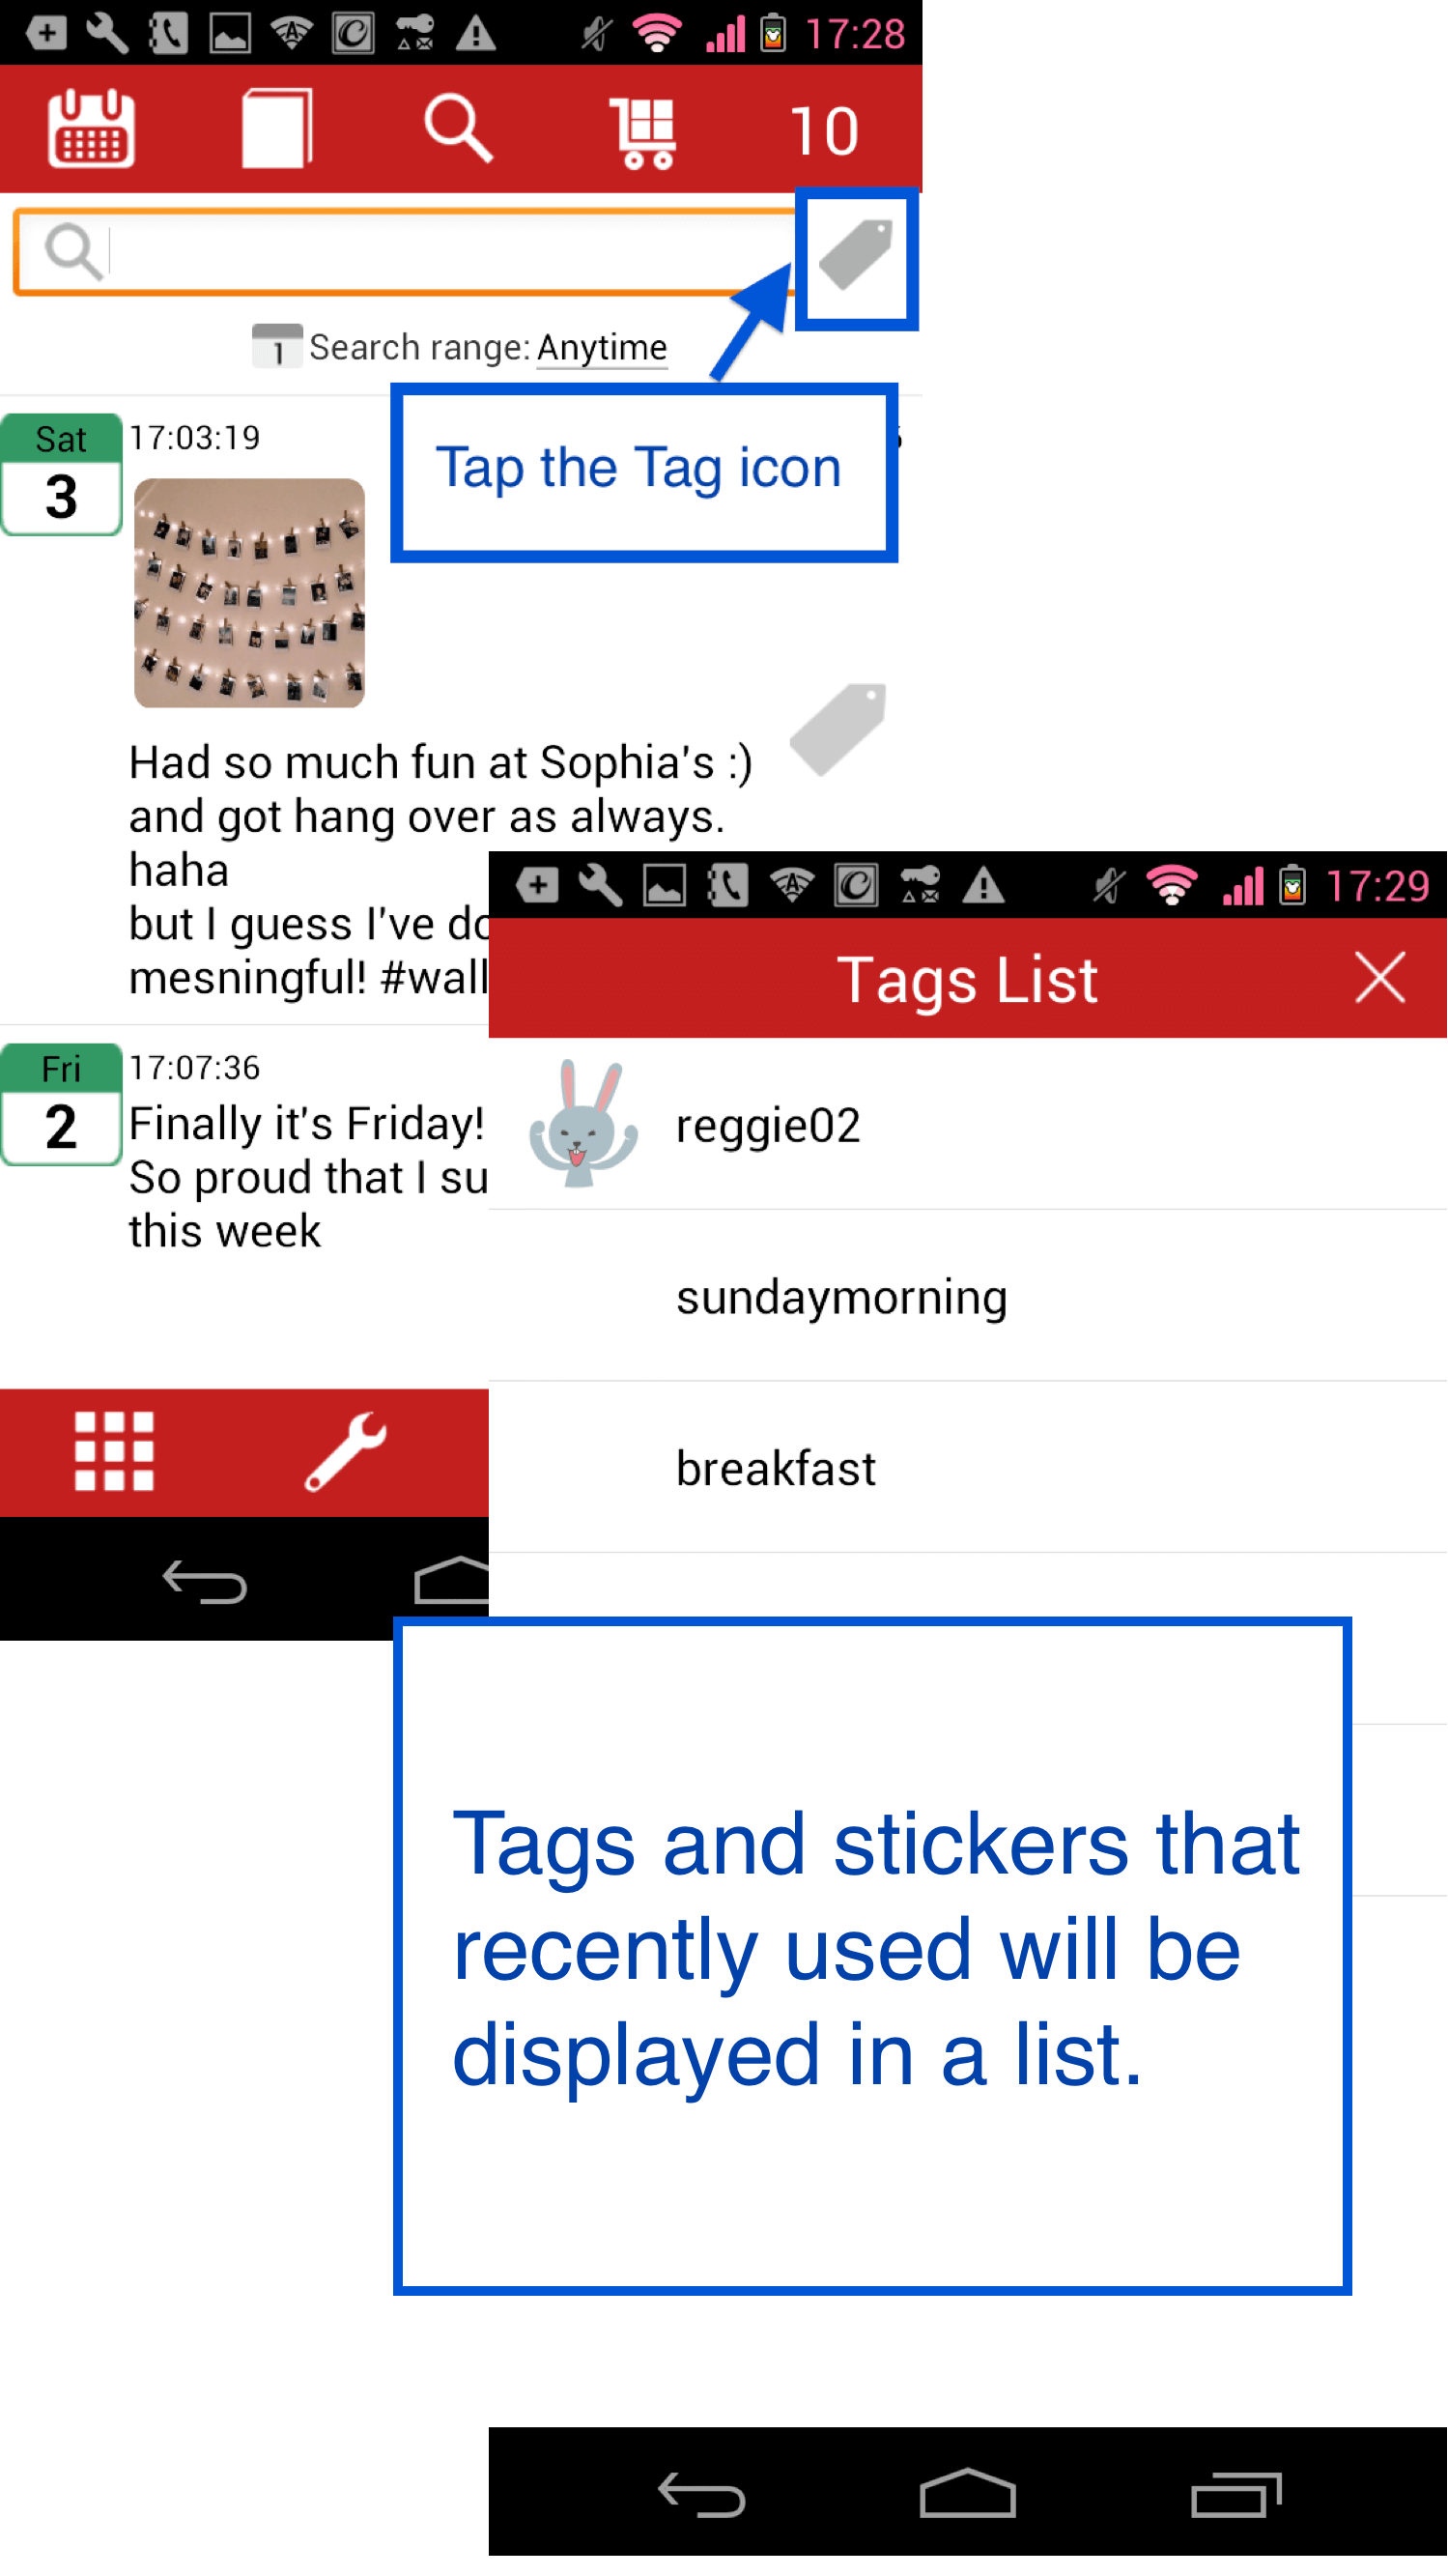
- By tapping Search icon on the top of the diary screen, you can search your entries by key words.
- Also, by tapping the Tag icon next to the search box, you can see the list of Tags and Stickers that you recently used. By tapping a tag or sticker, you can find your entries with that tag or sticker.
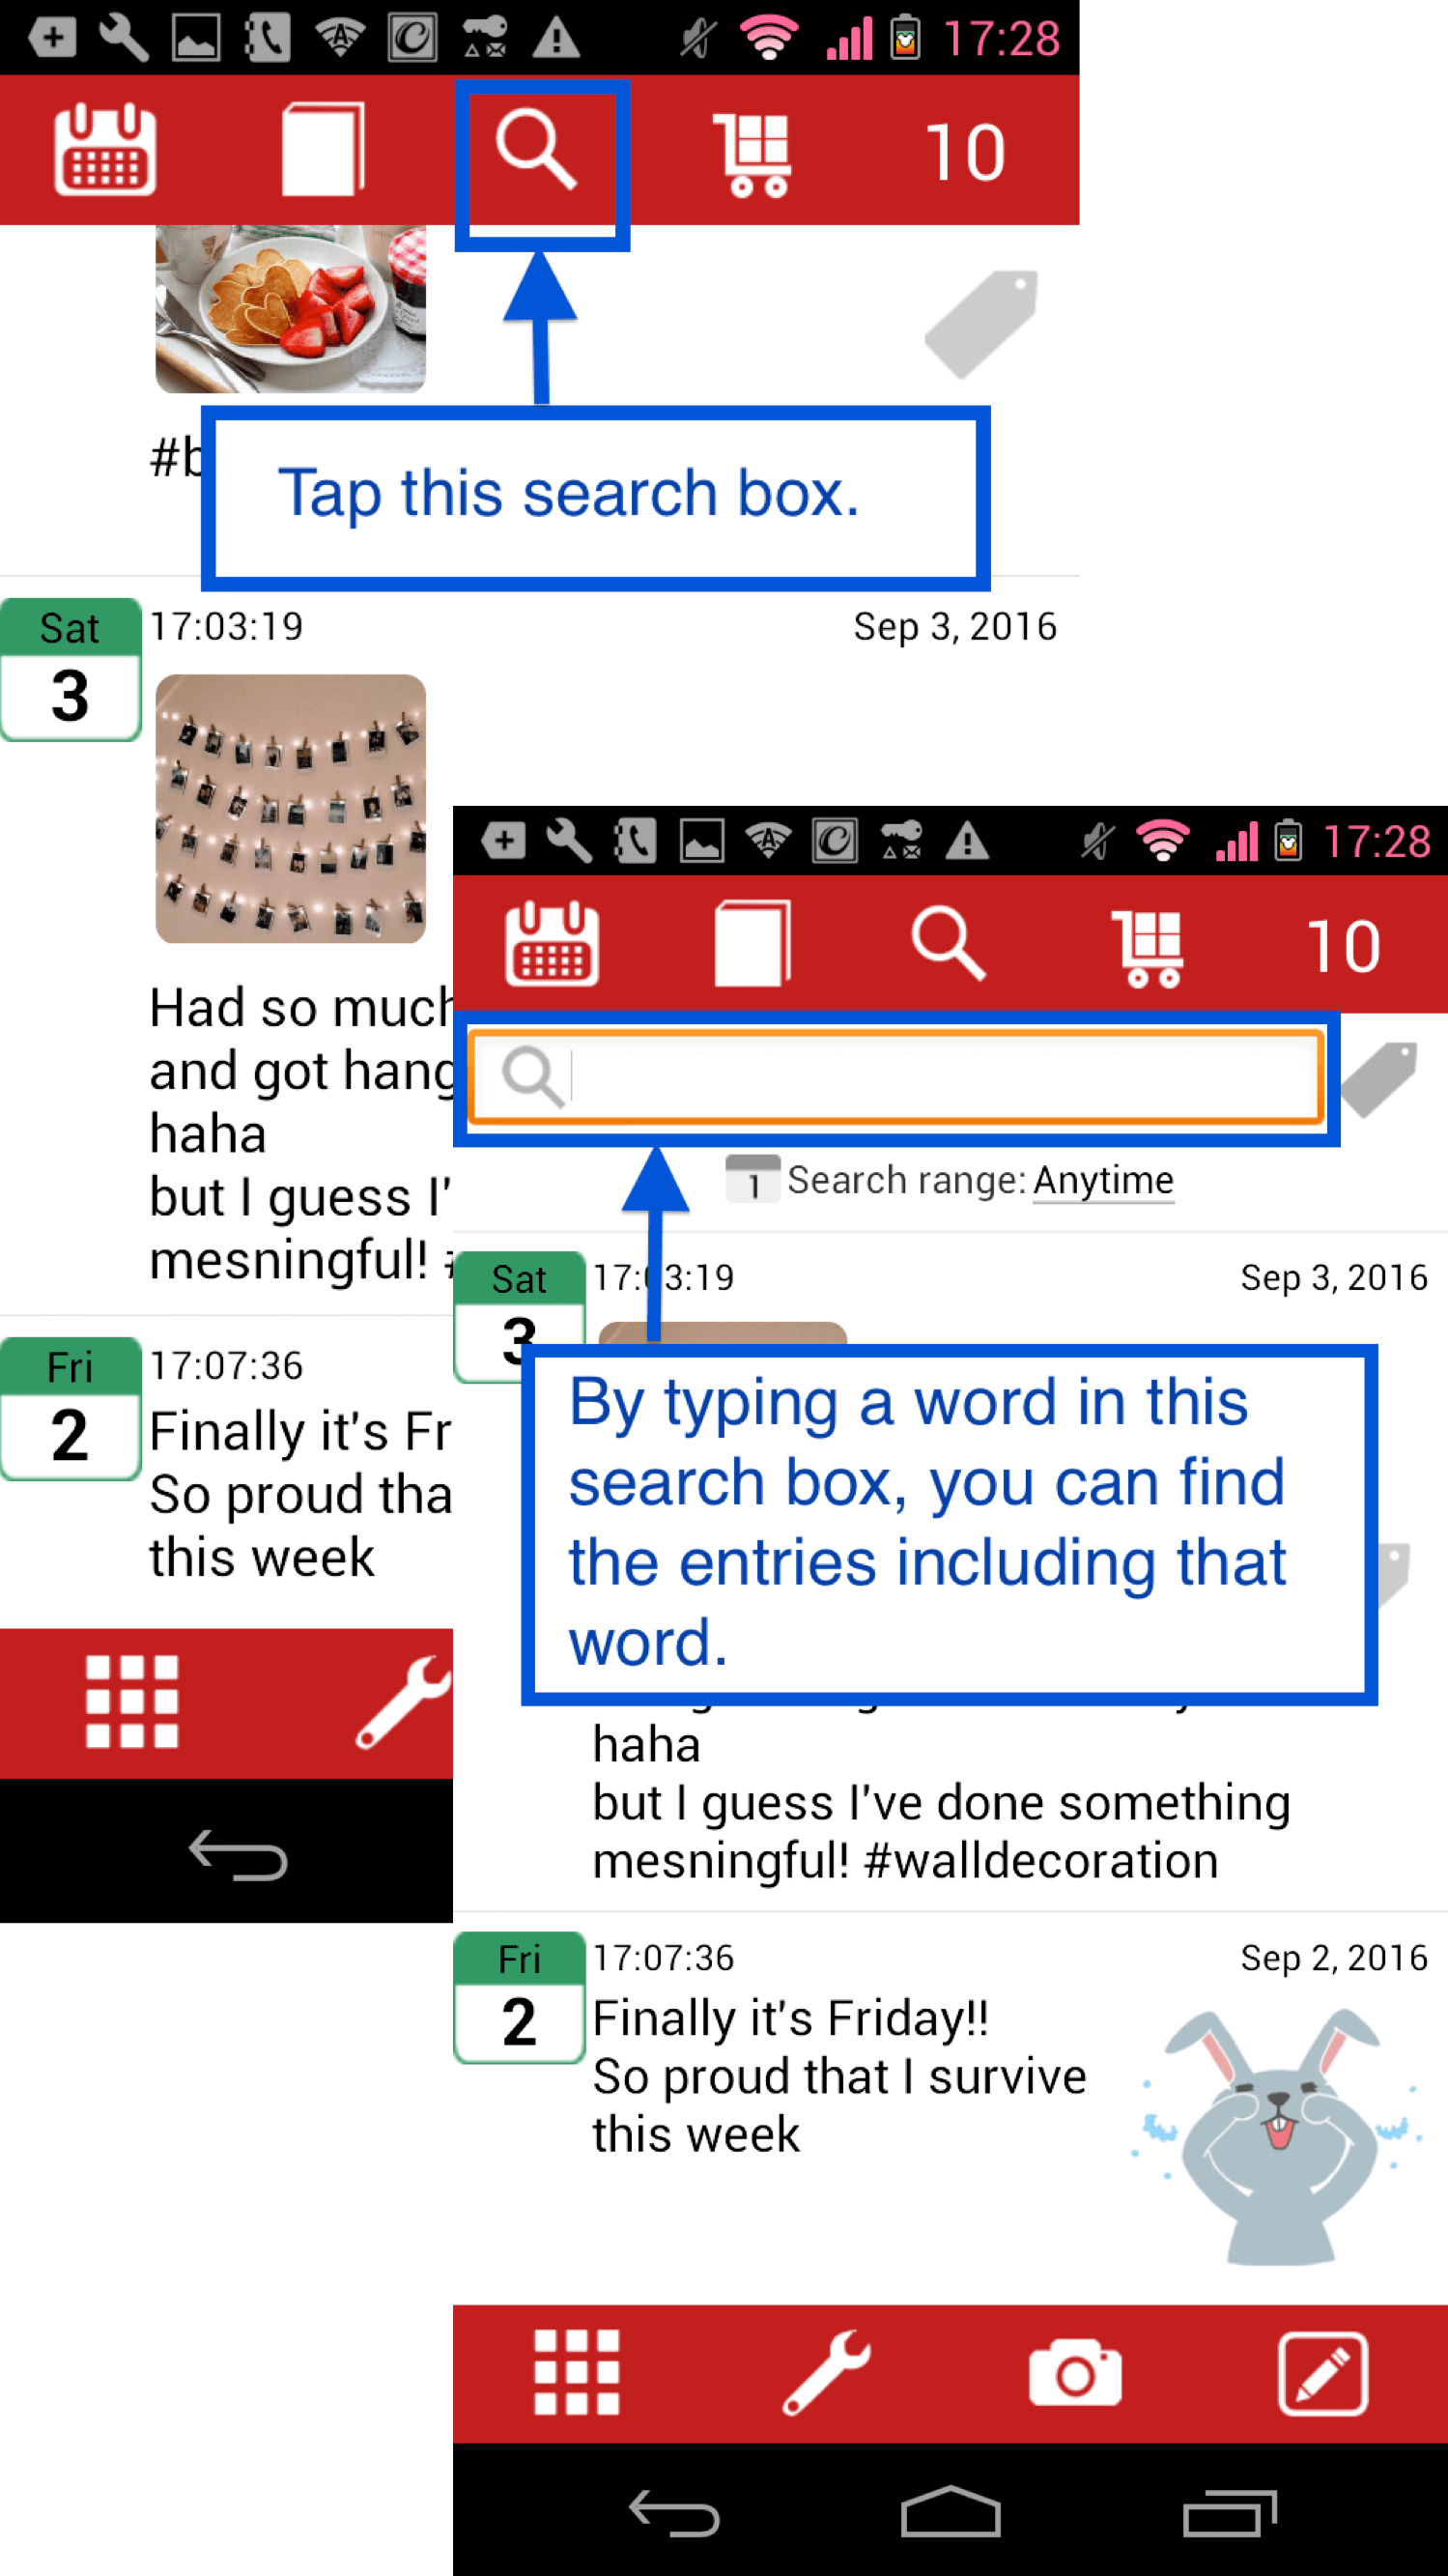
- Search function -
- Tap the search button to open the search dialogue appears.
- Type the text that you want to search for.
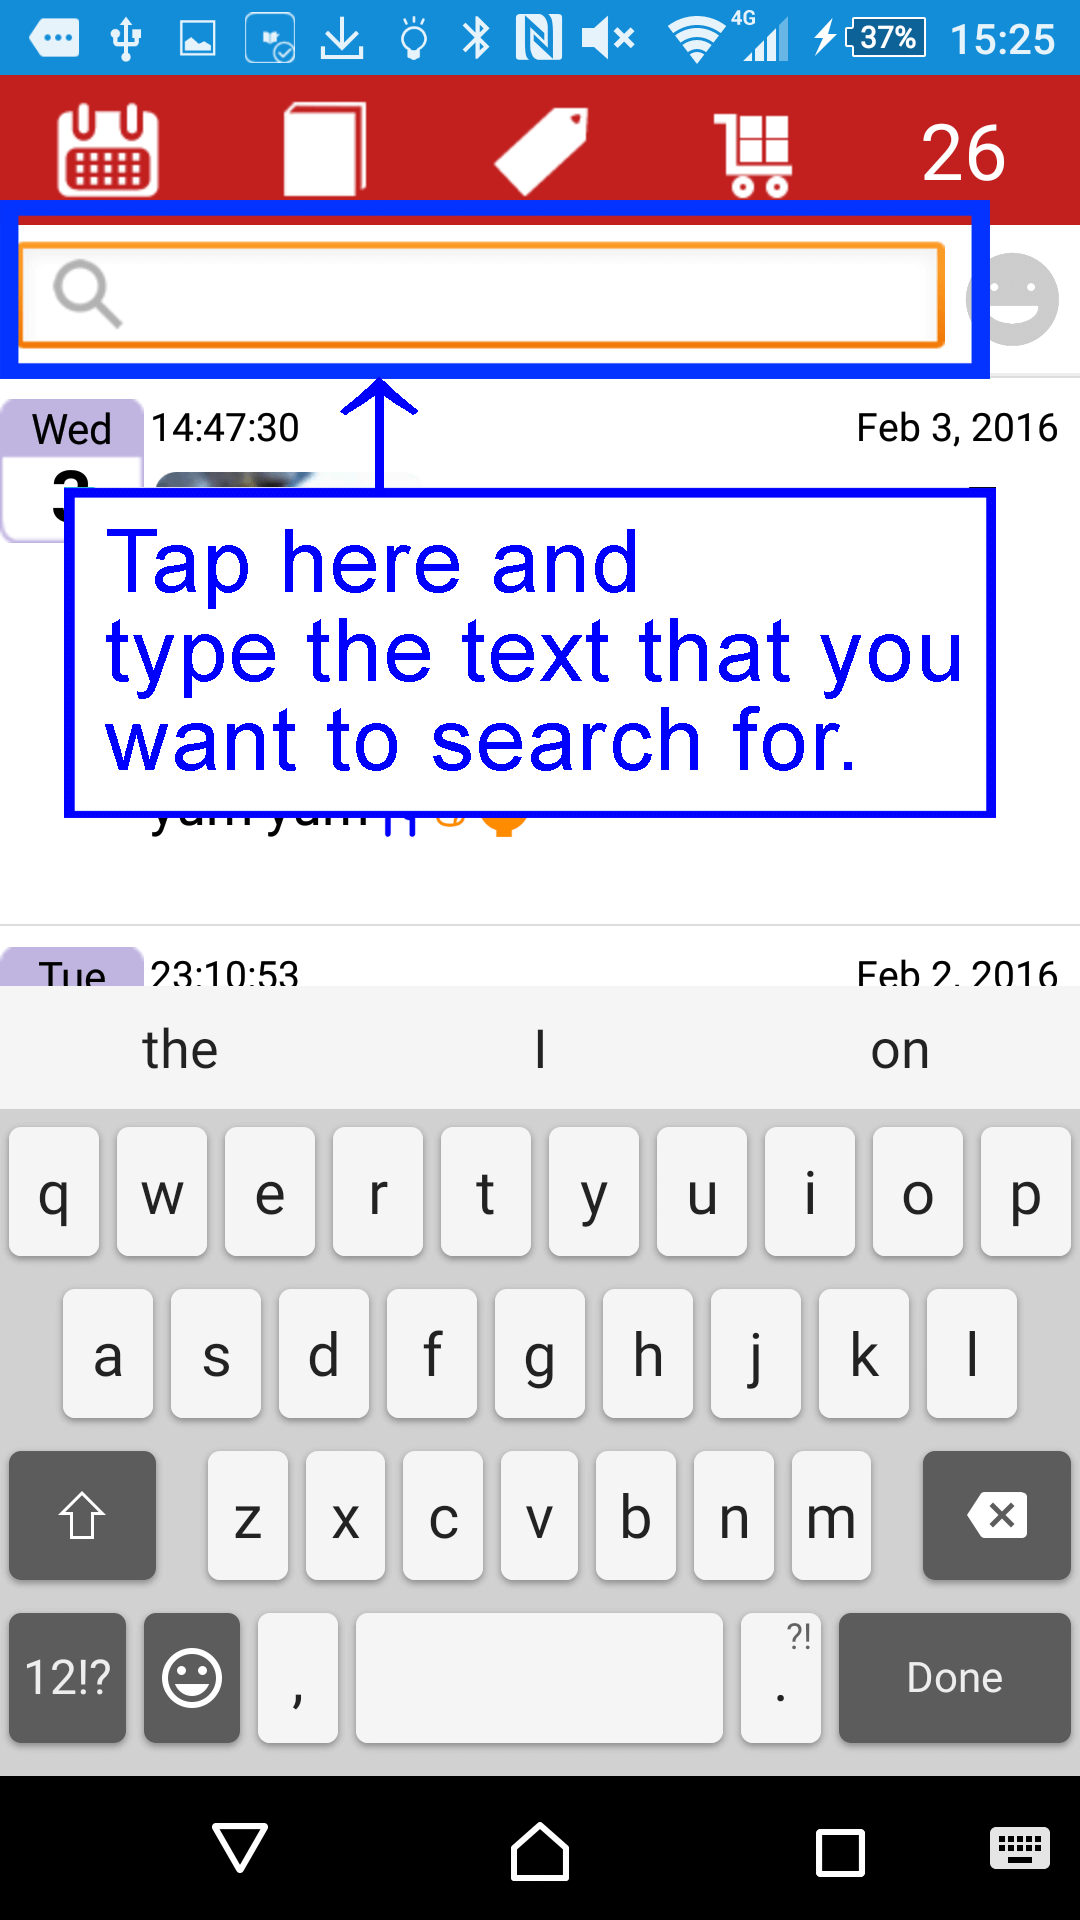
- You can see the previous entries including the word.
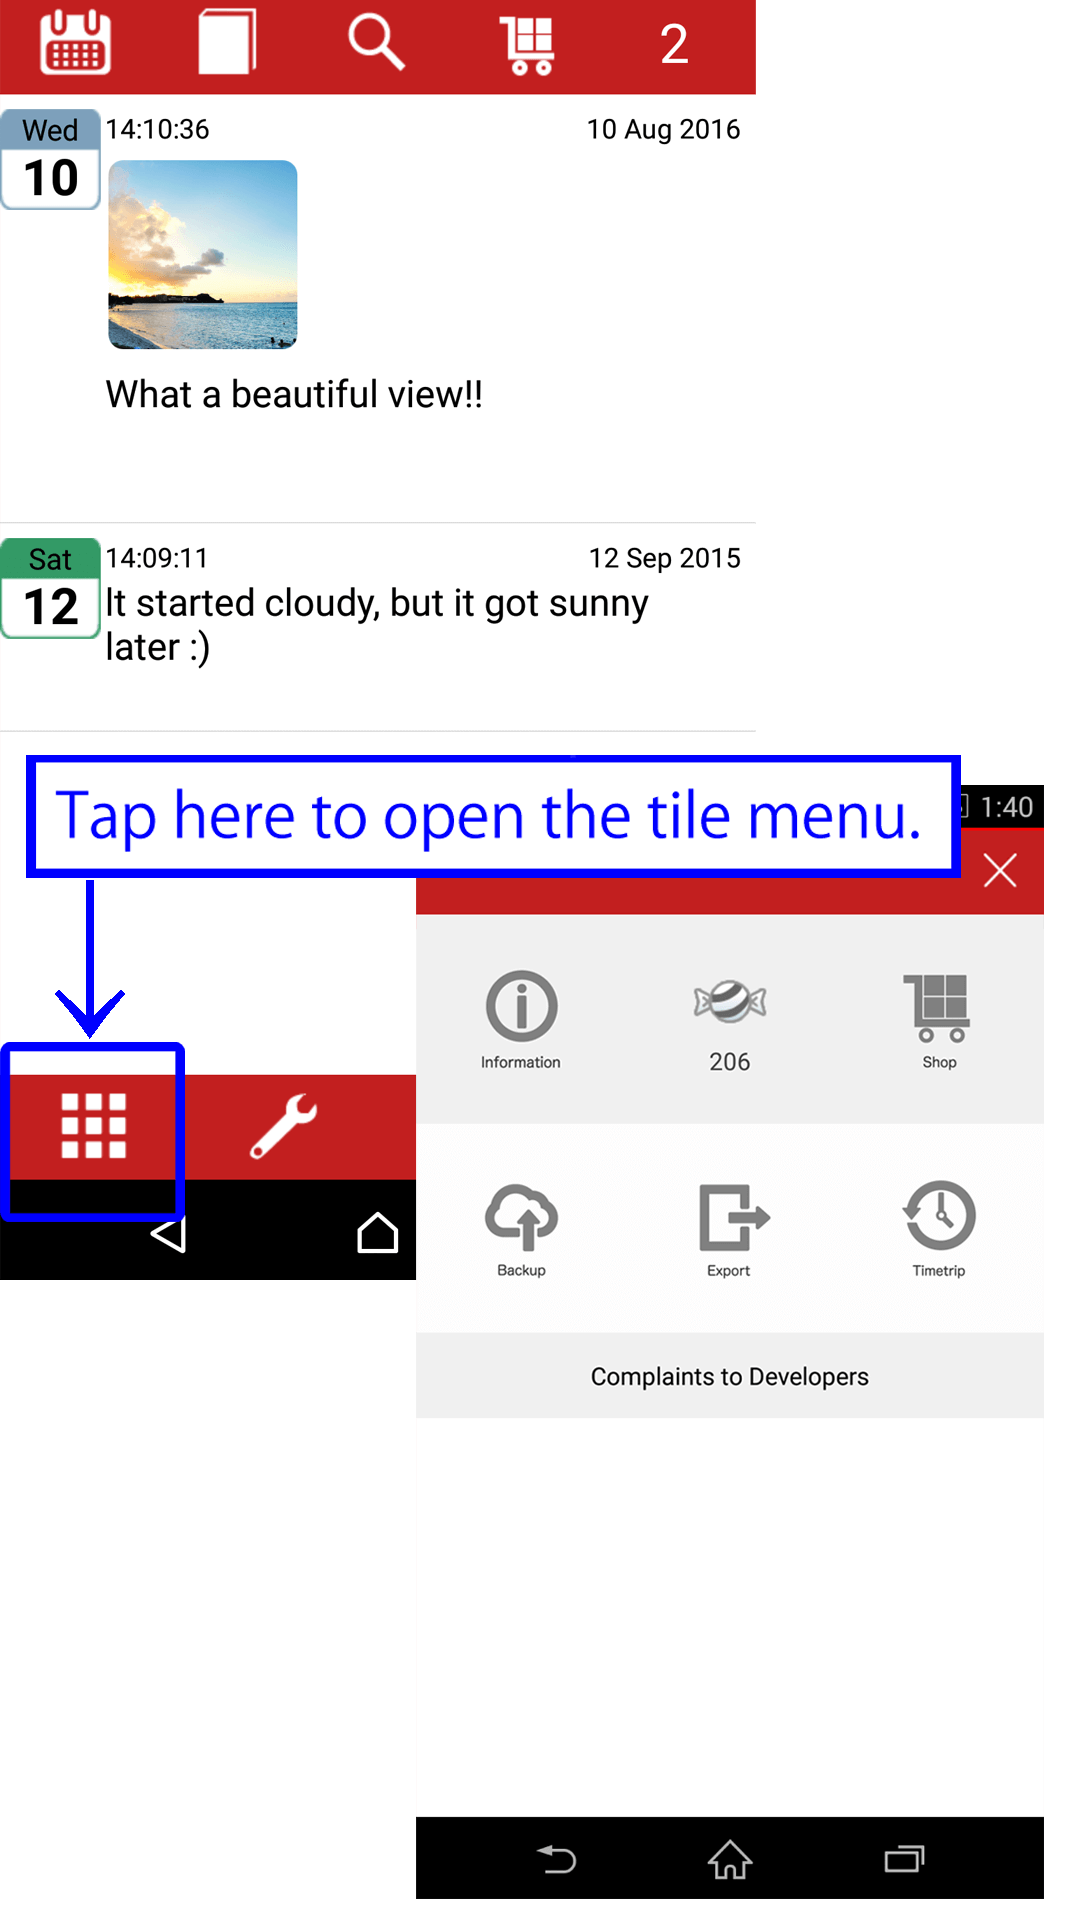
- Tile Menu -
- Tap the tile menu button to open the tile menu.
- Export function -
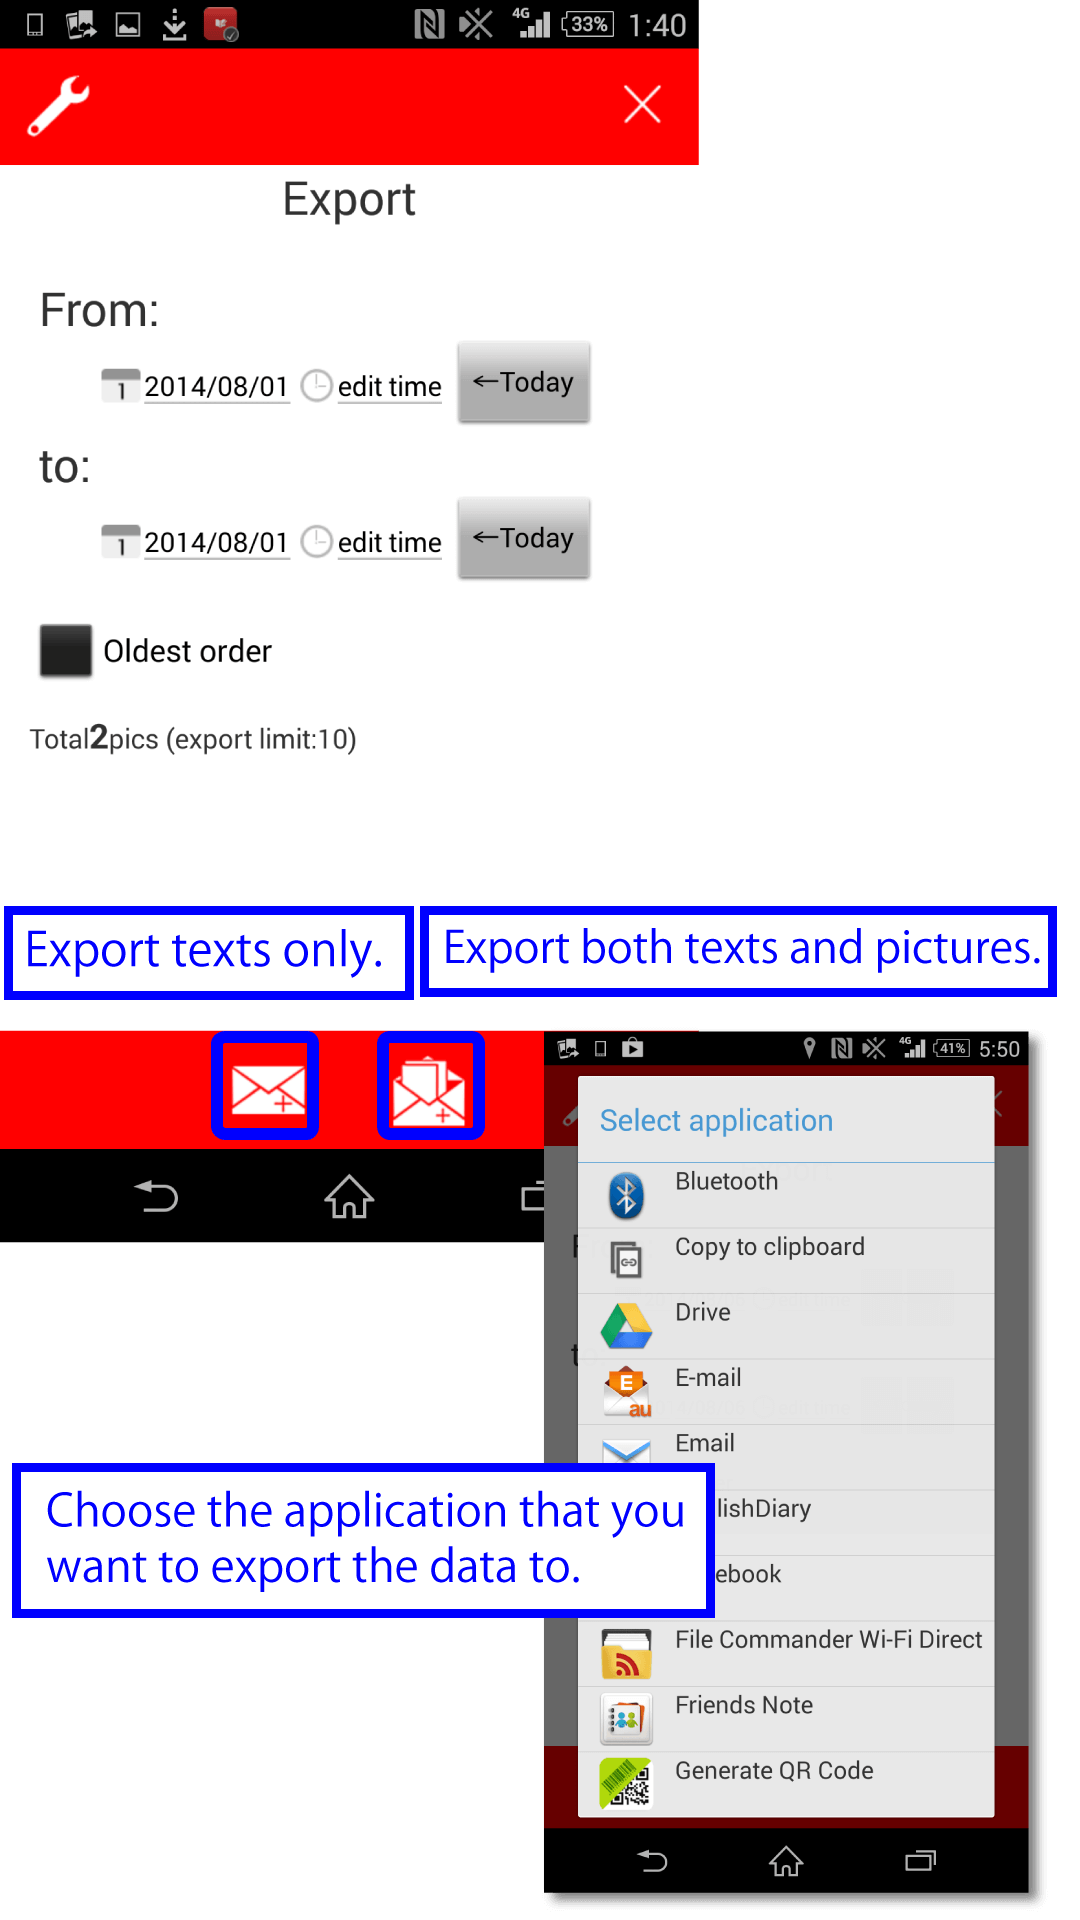
- Tap the export button in the tile menu to open the export dialogue.
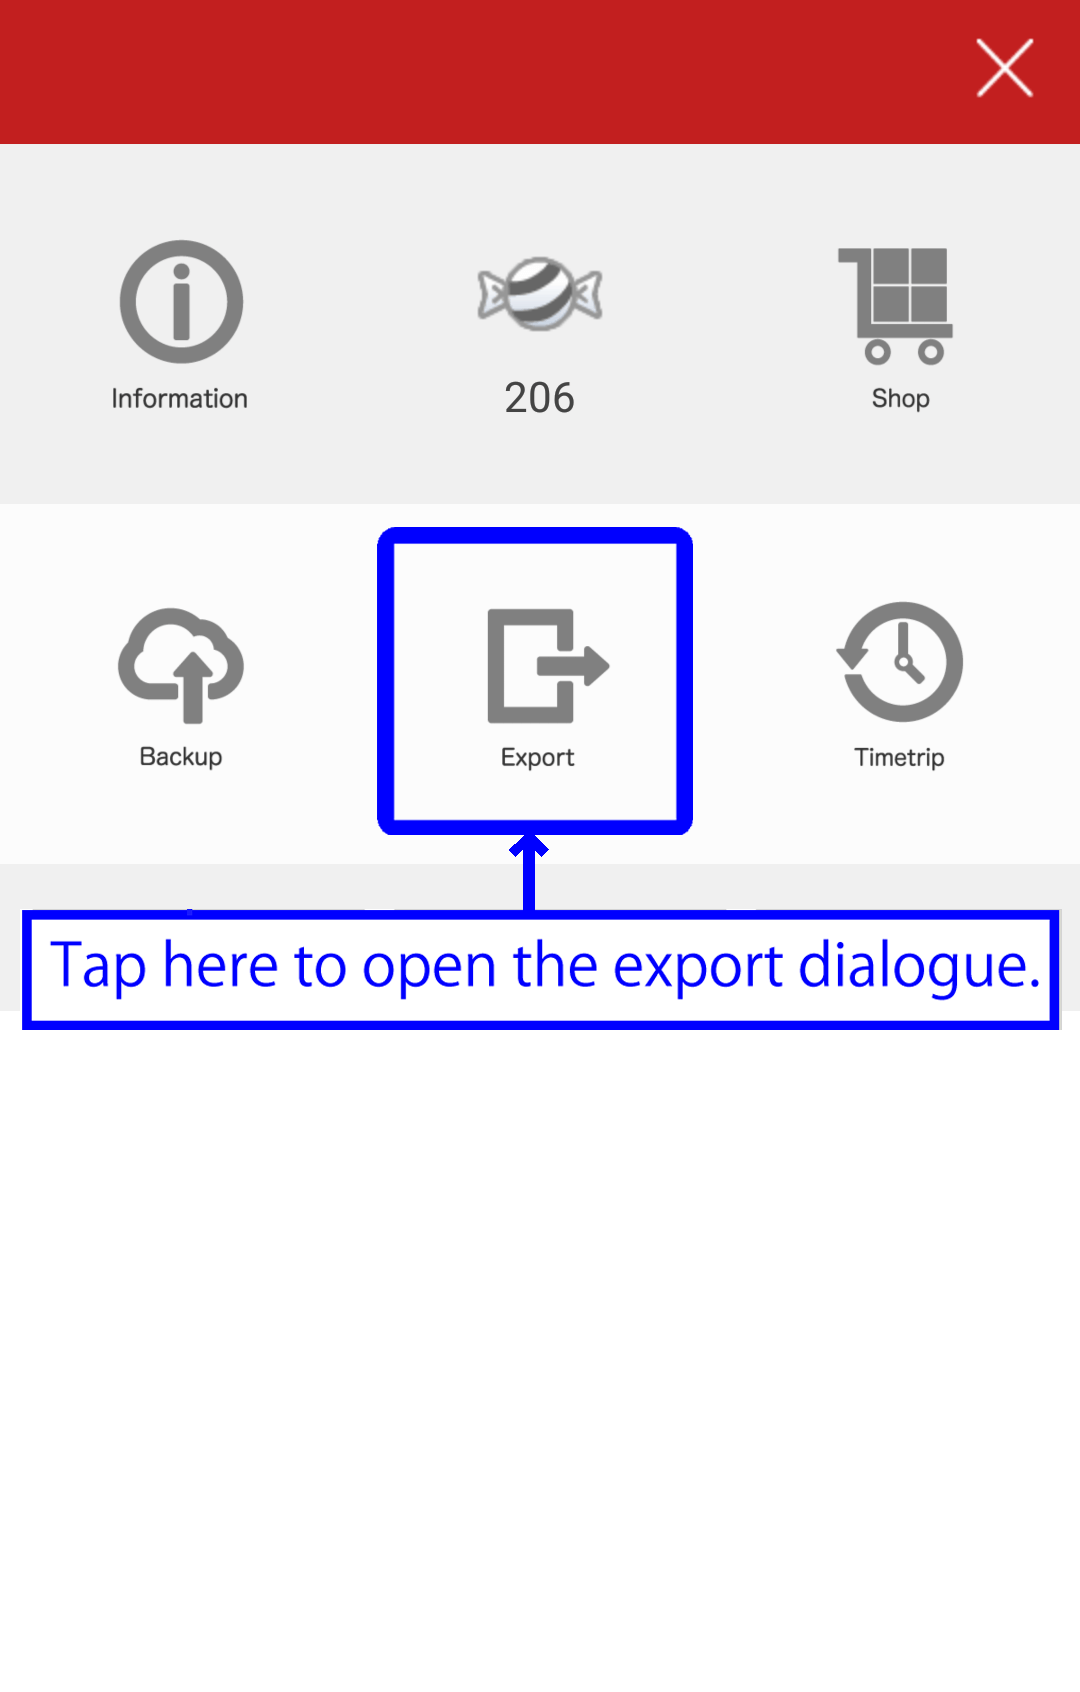
- You can choose a length of time and output method for export.
- If you want to export texts only, tap the left button. If you want to export both texts and pictures, tap the right button.
- *The upper limit on the number of photos is 10
- *Your photos will be attached as a zip file.
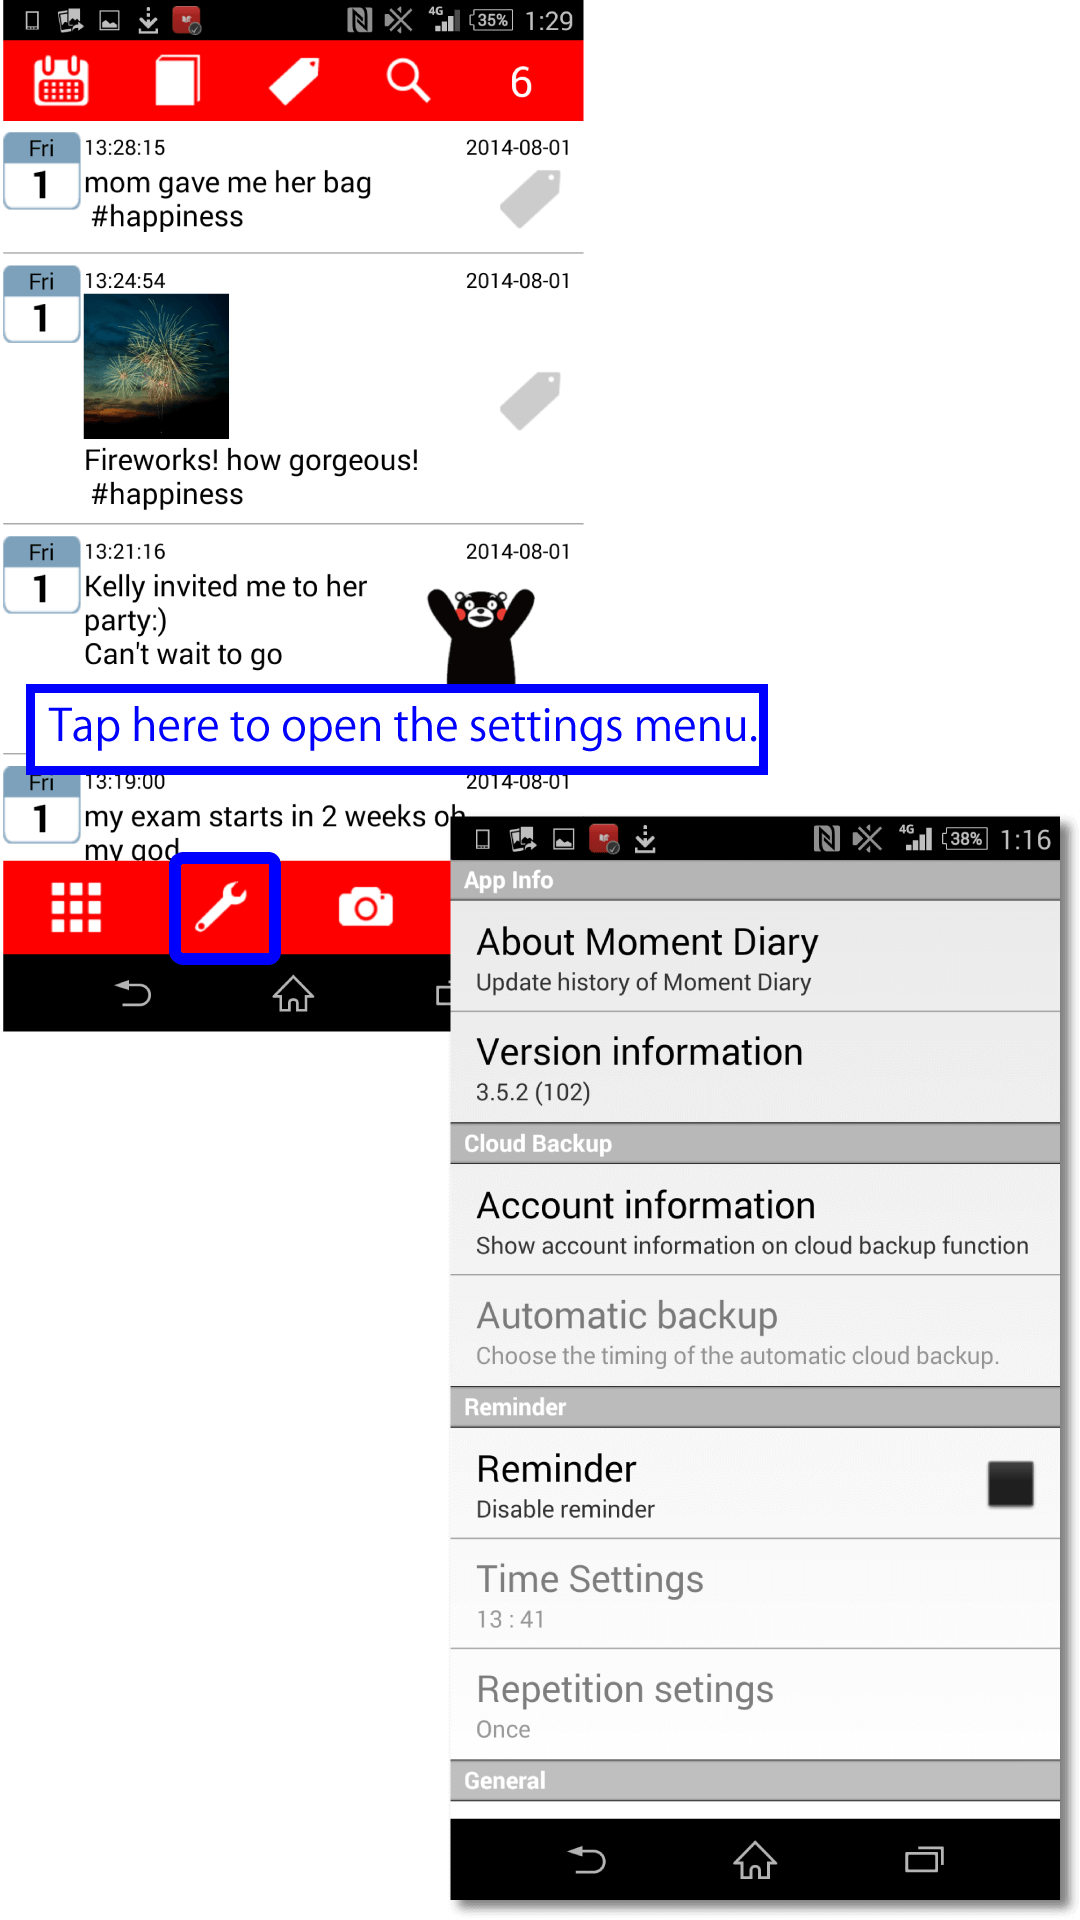
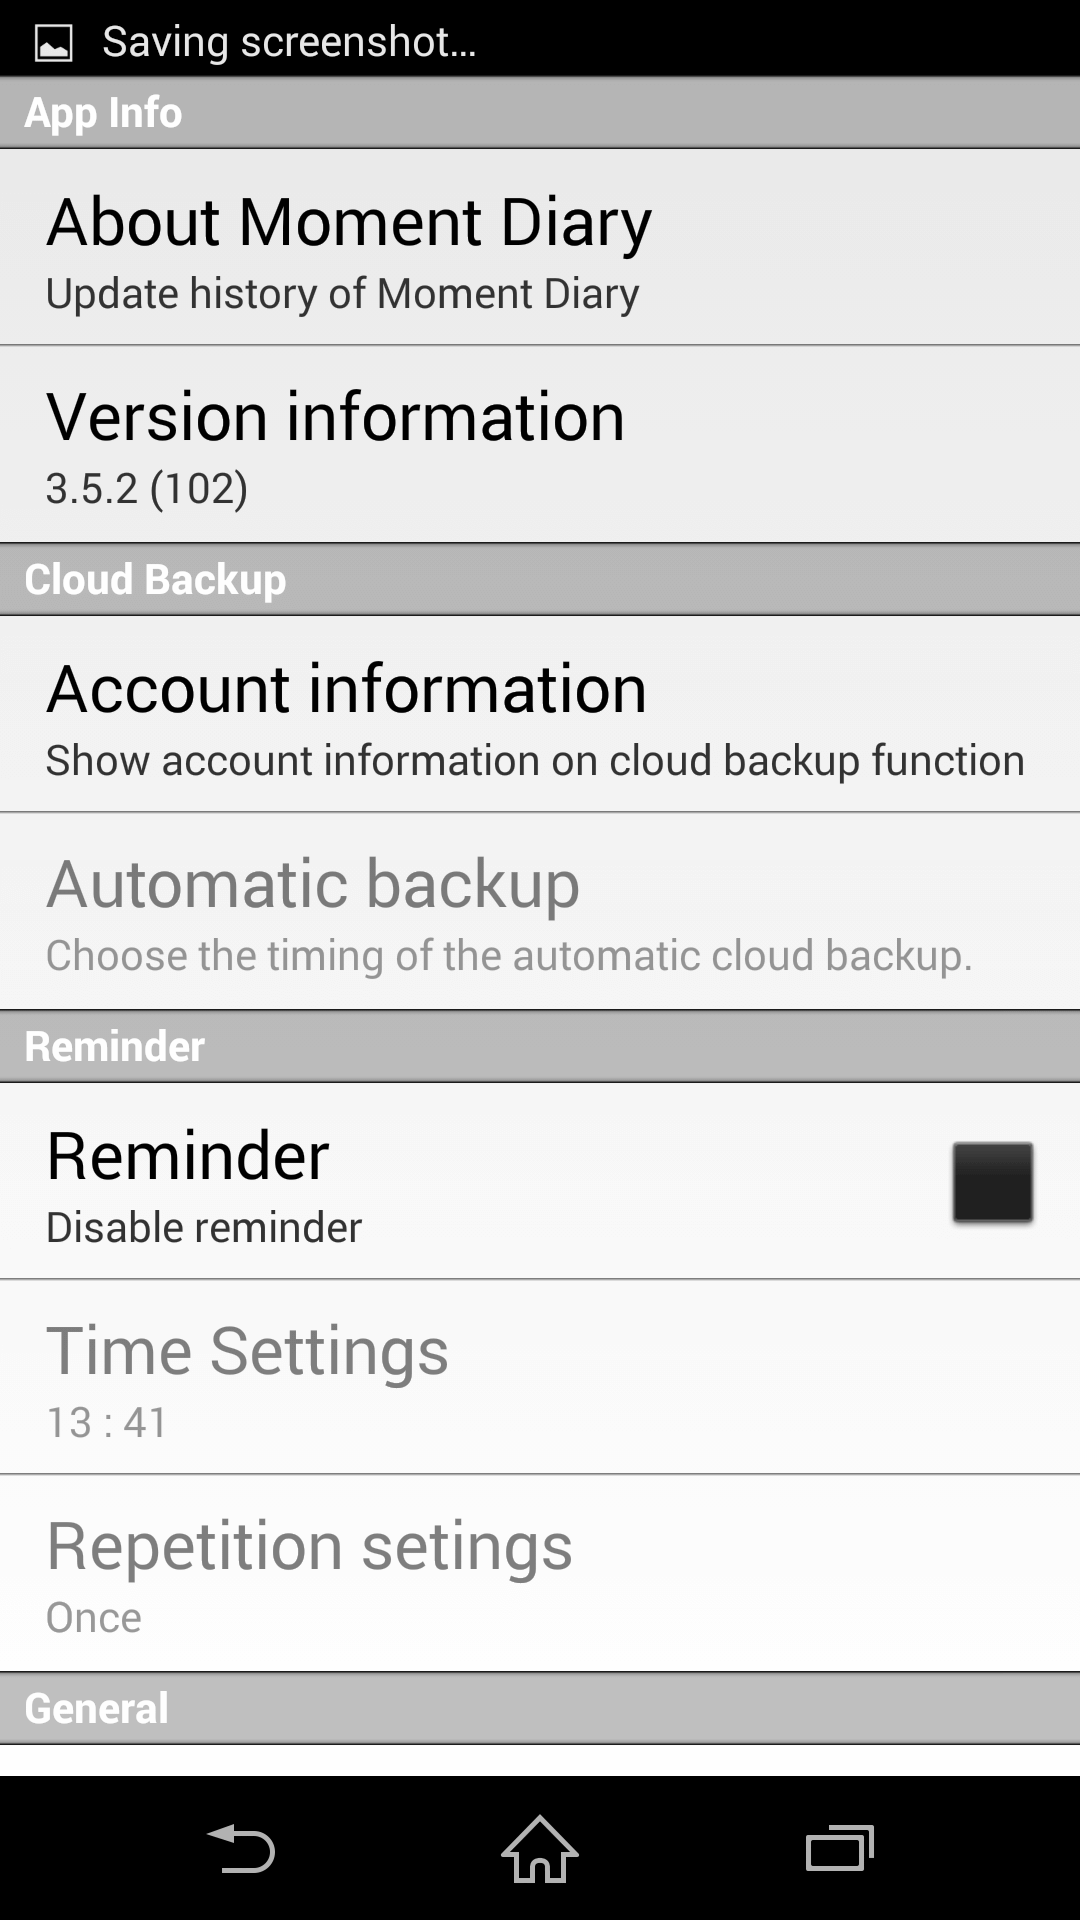
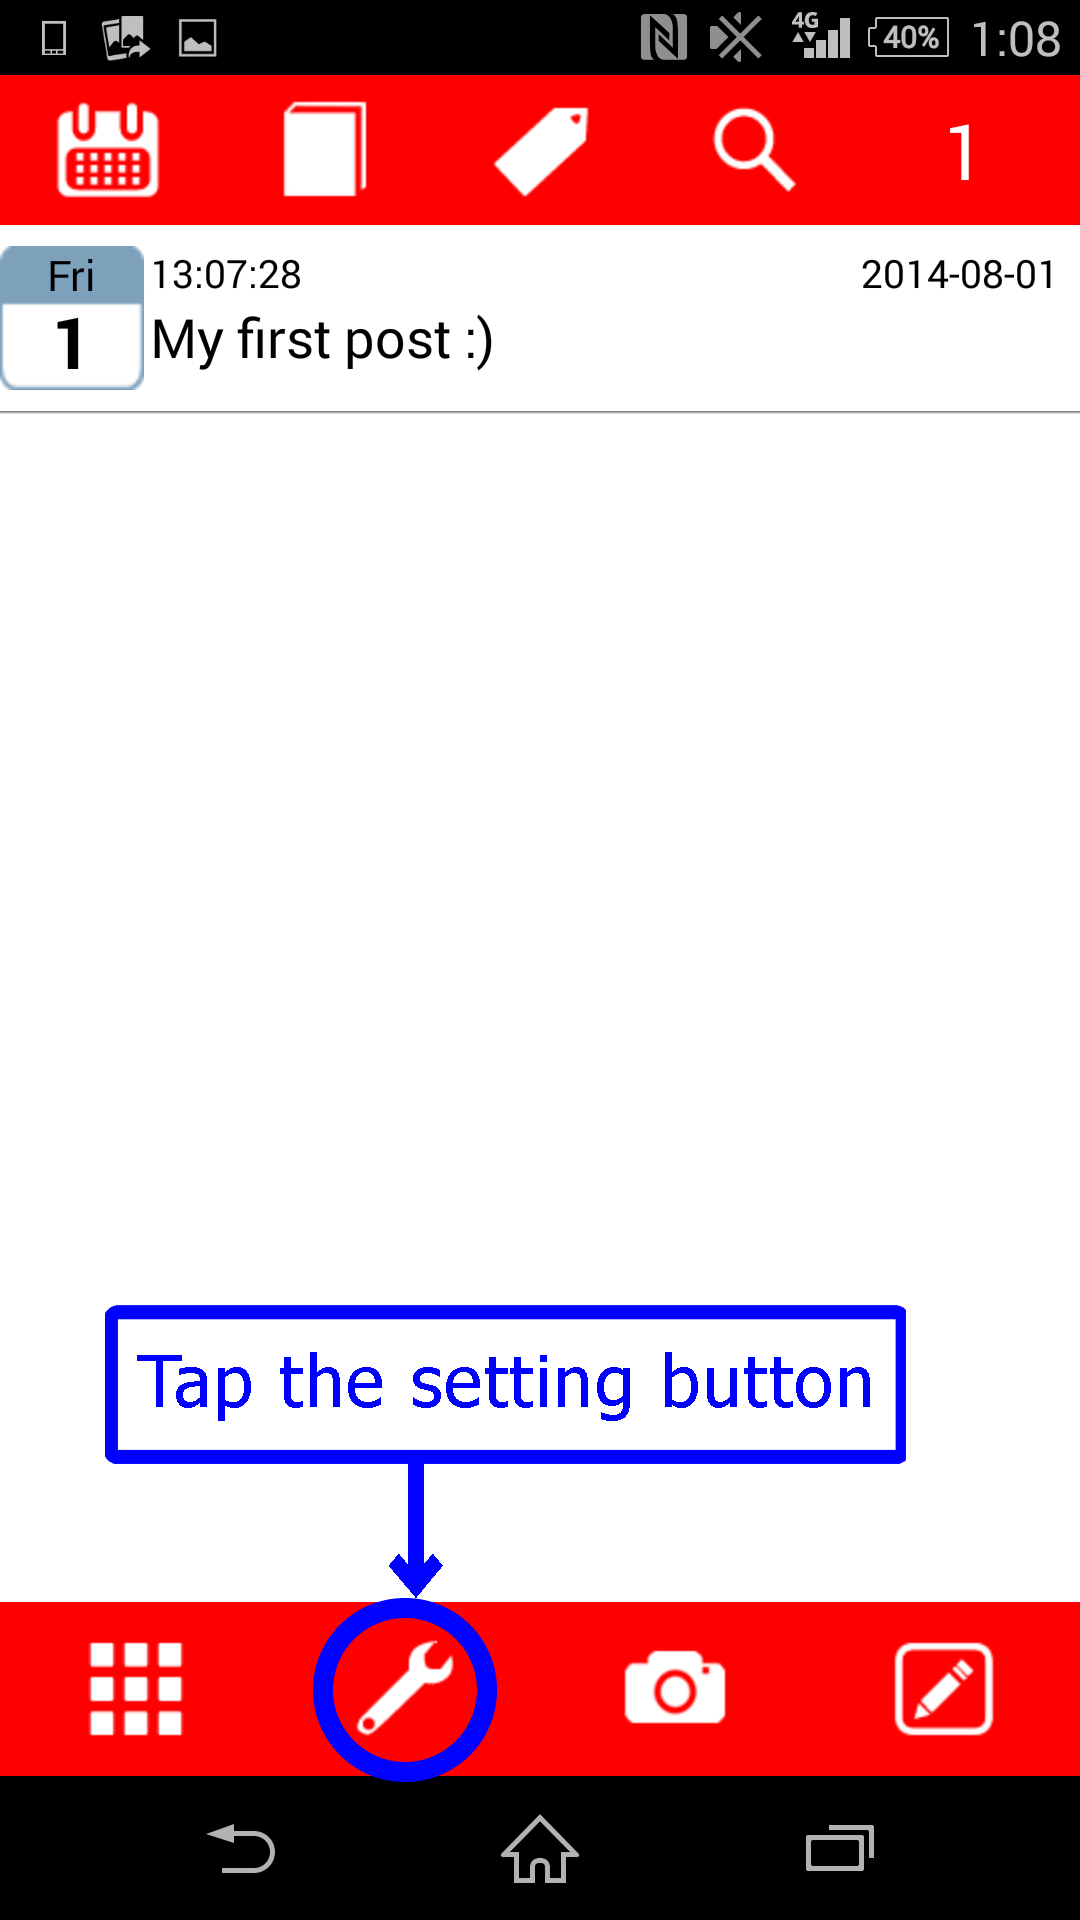
- Settings -
- Tap the settings button and open the settings screen.
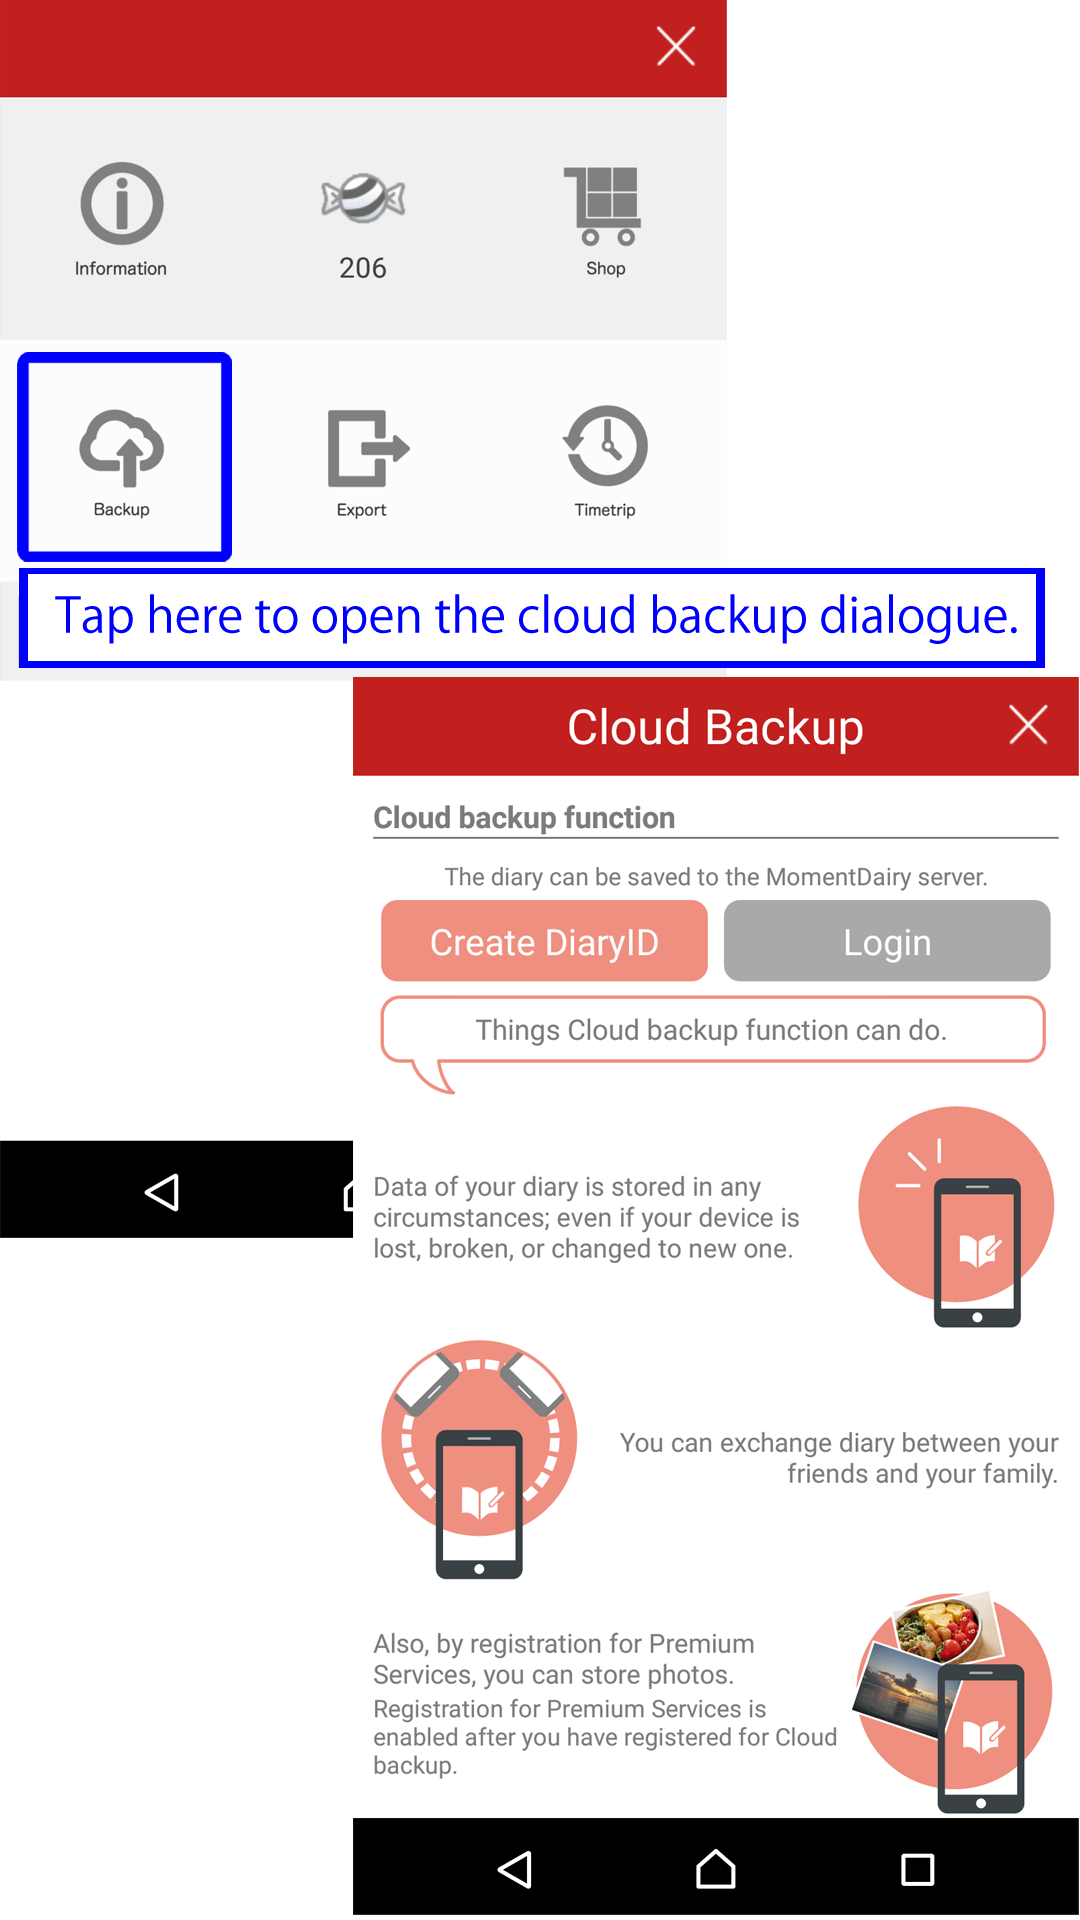
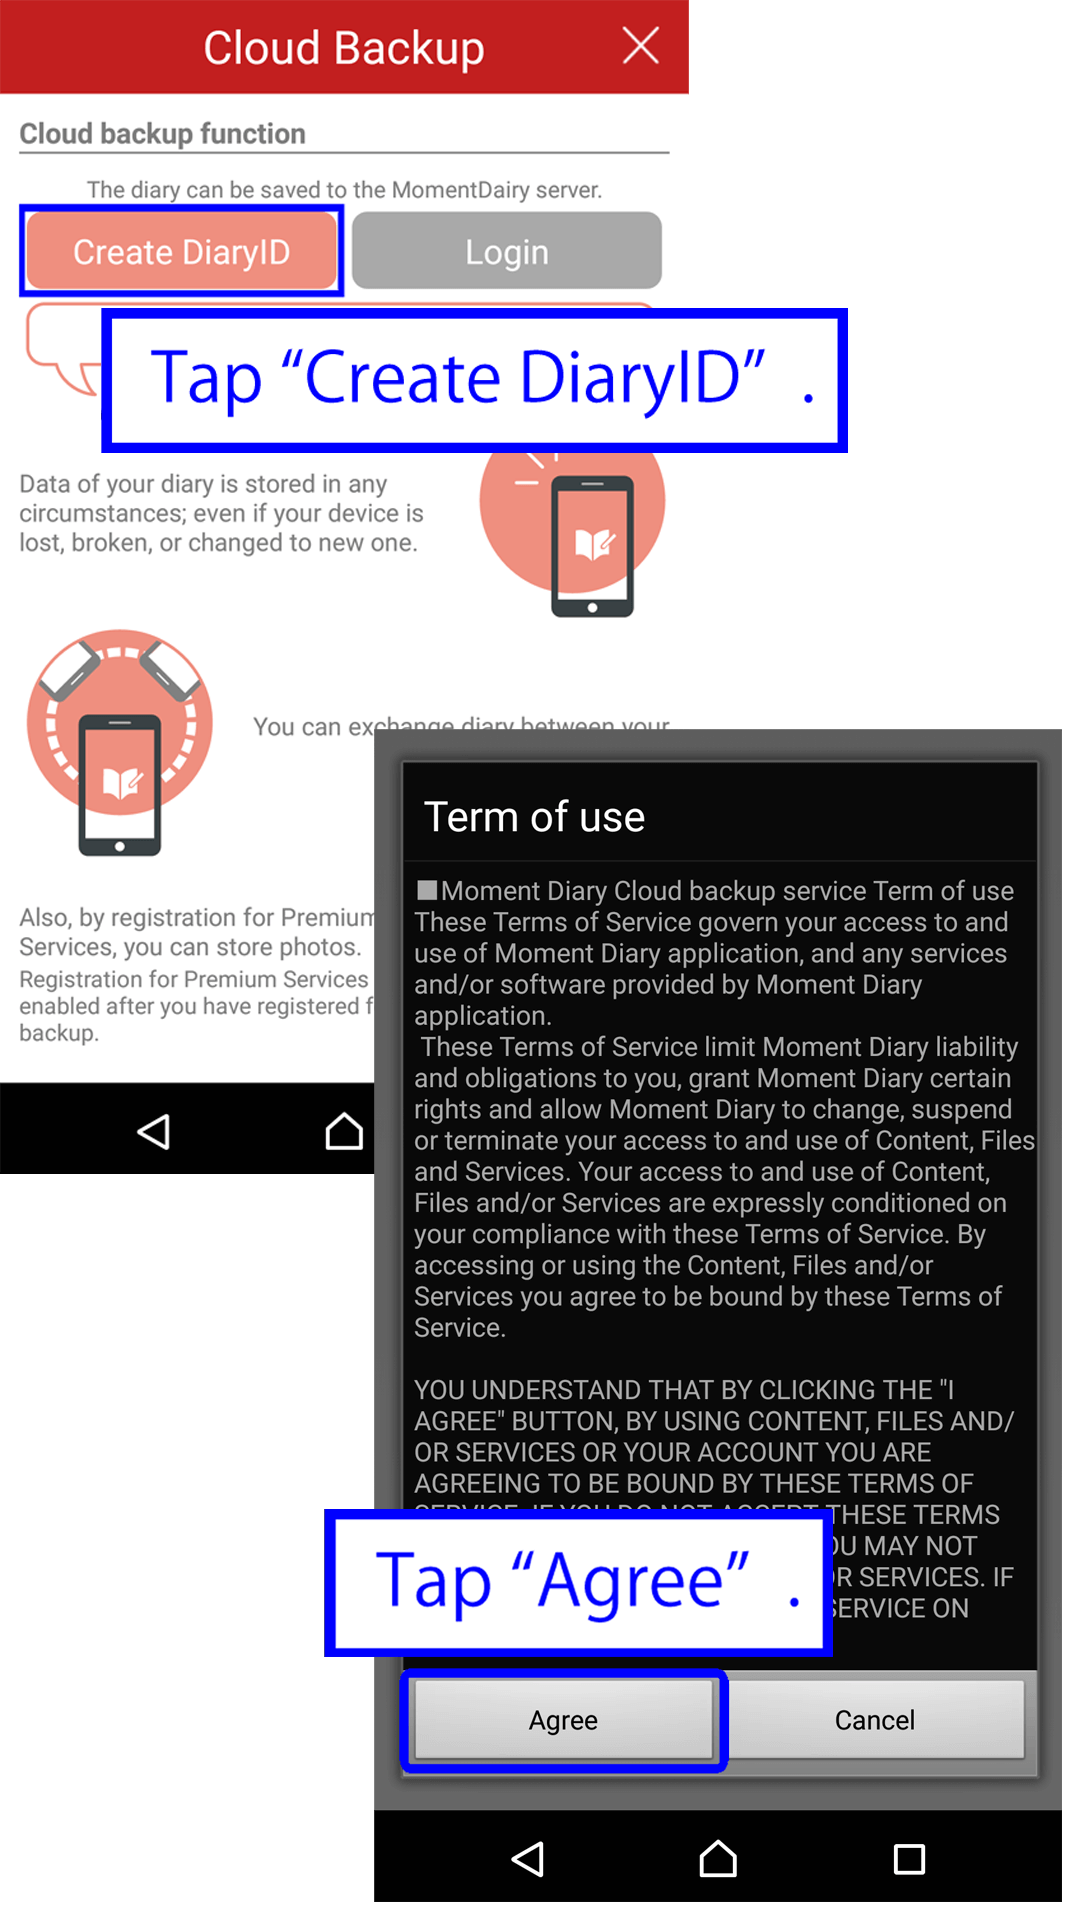
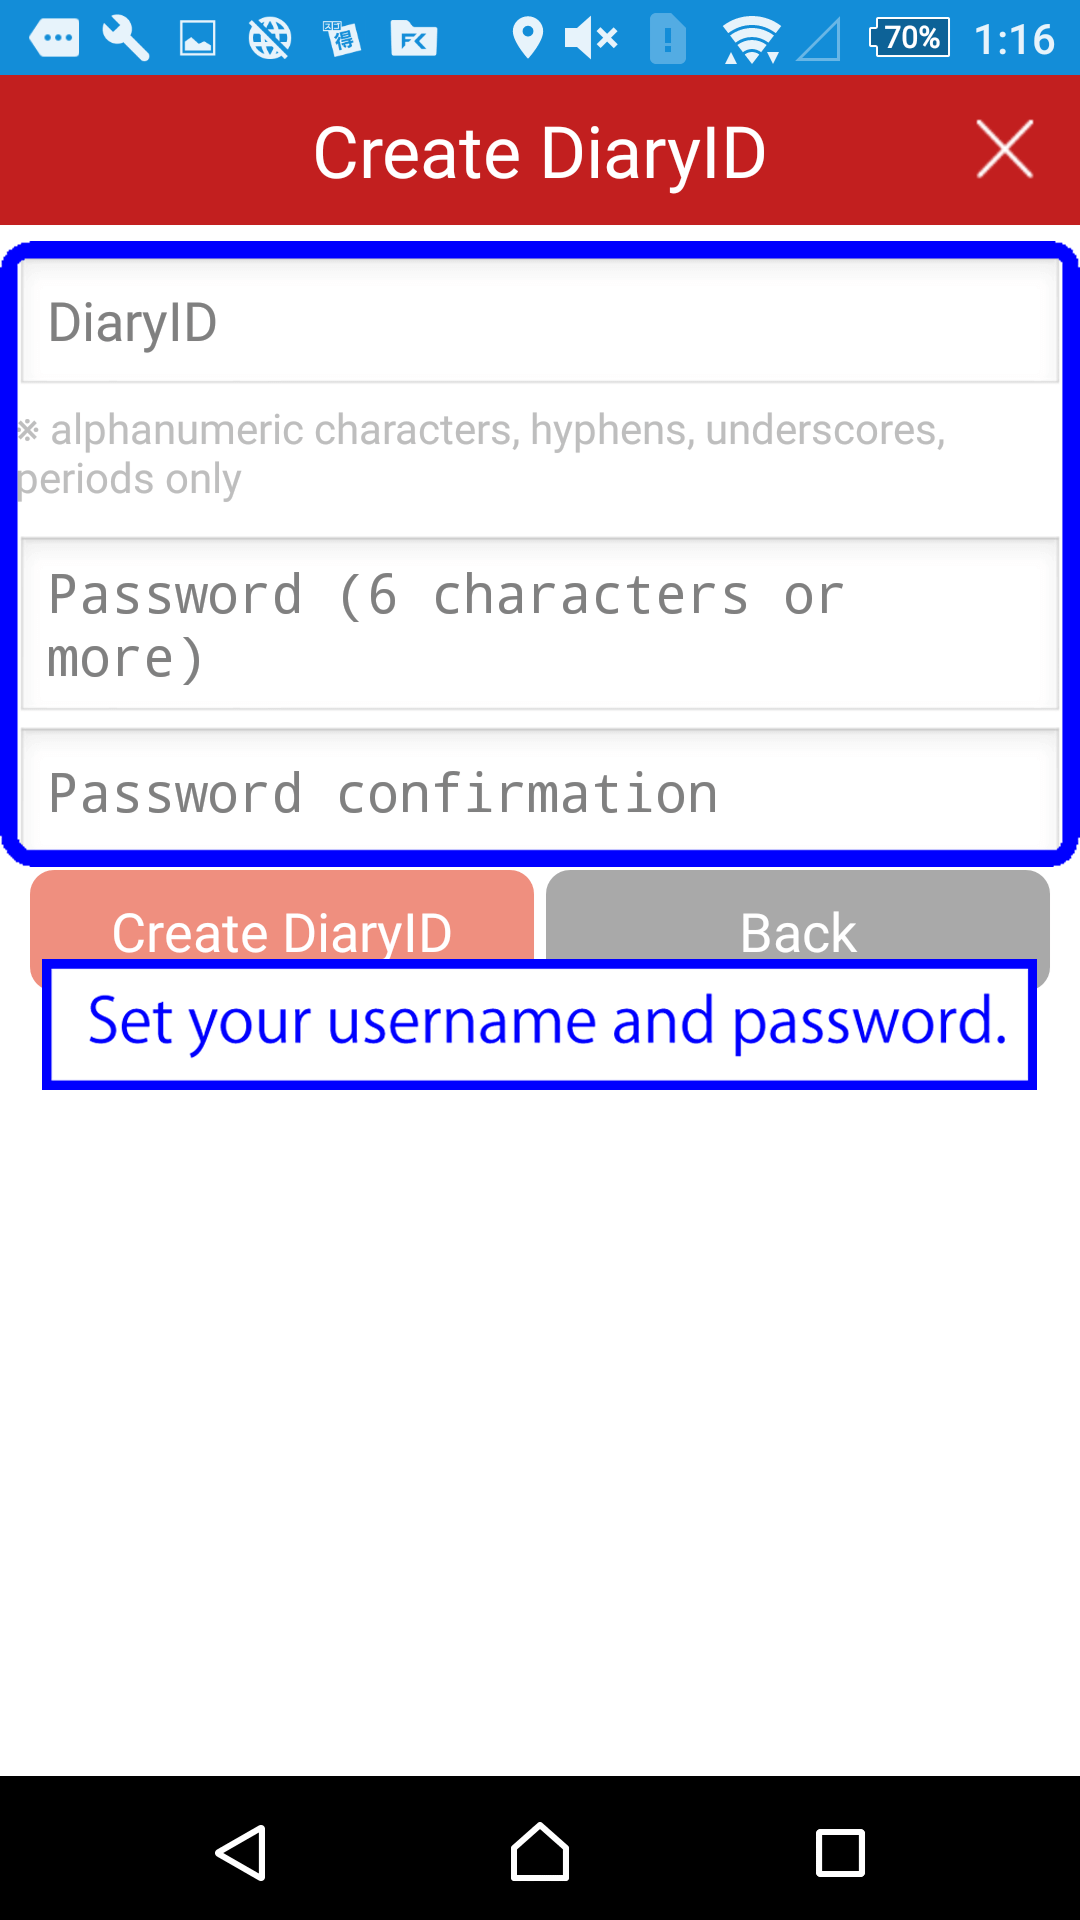
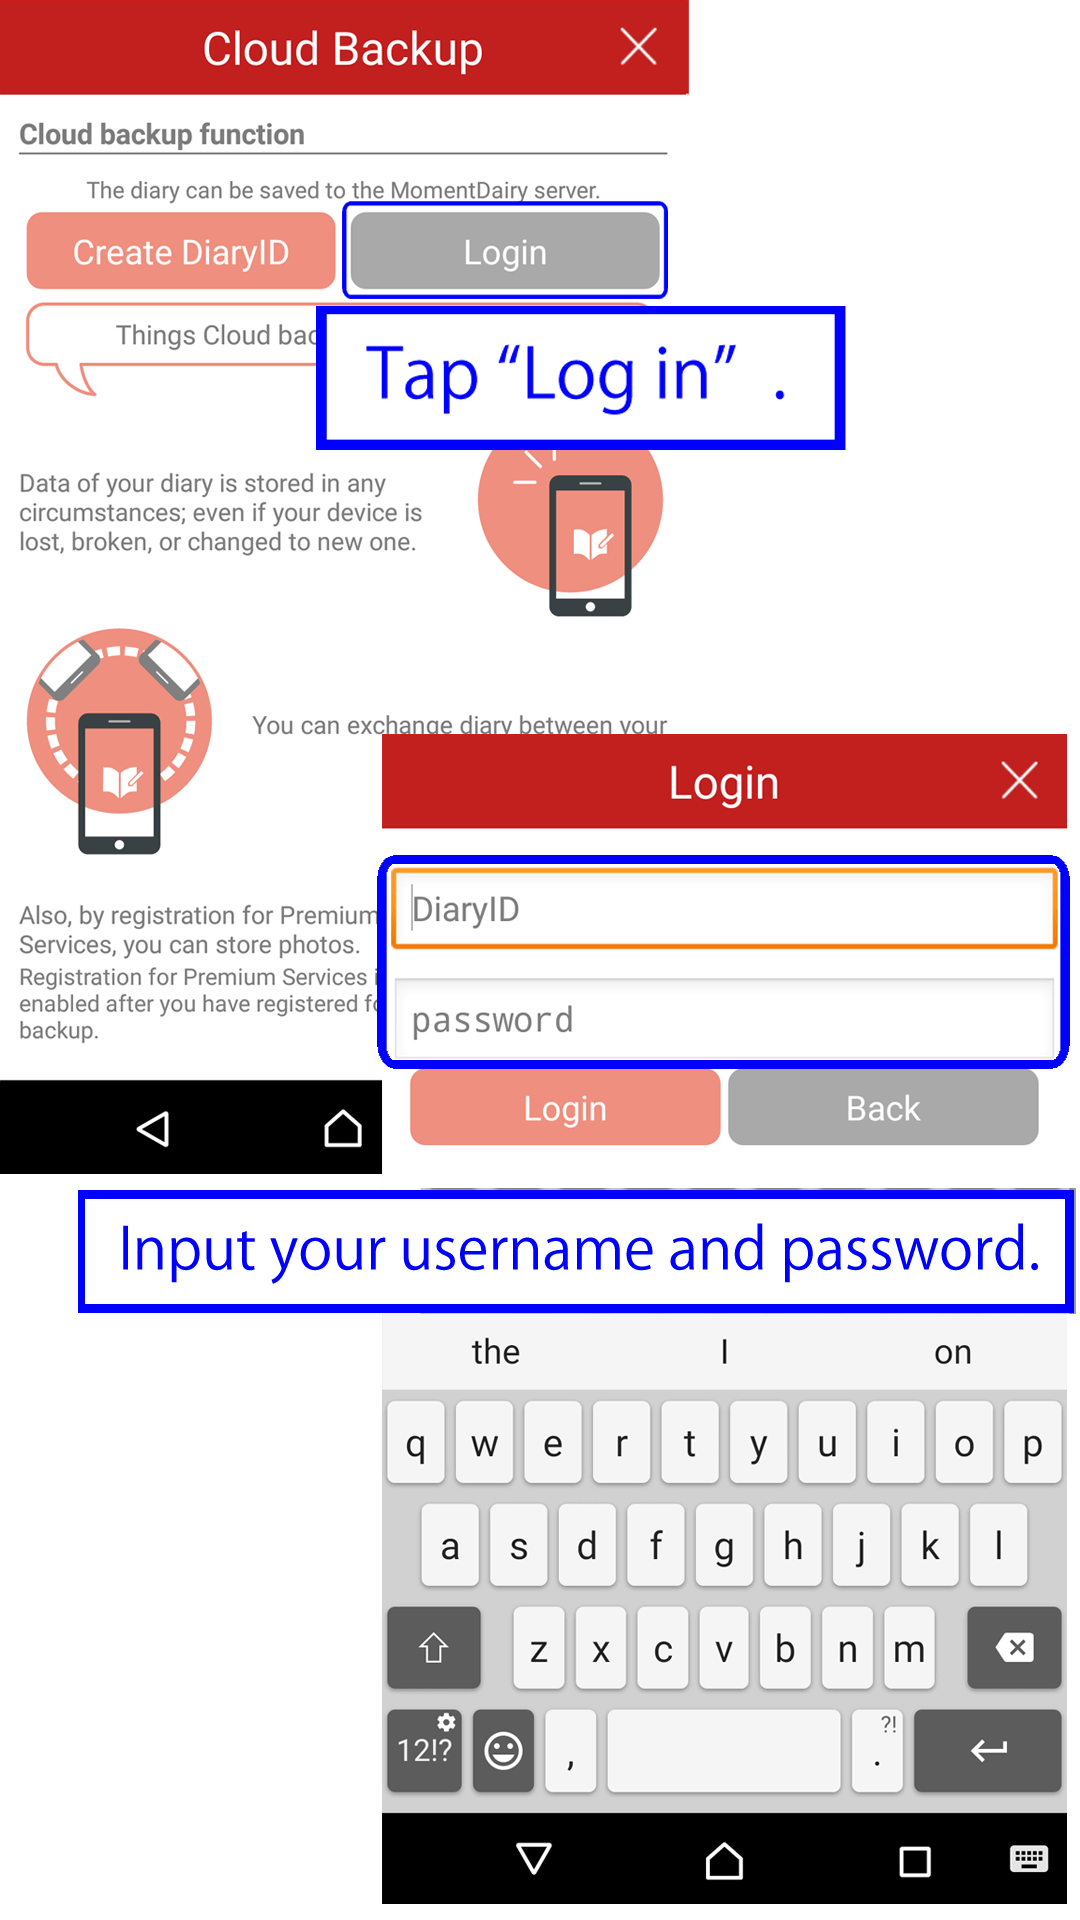
- Cloud backup function -
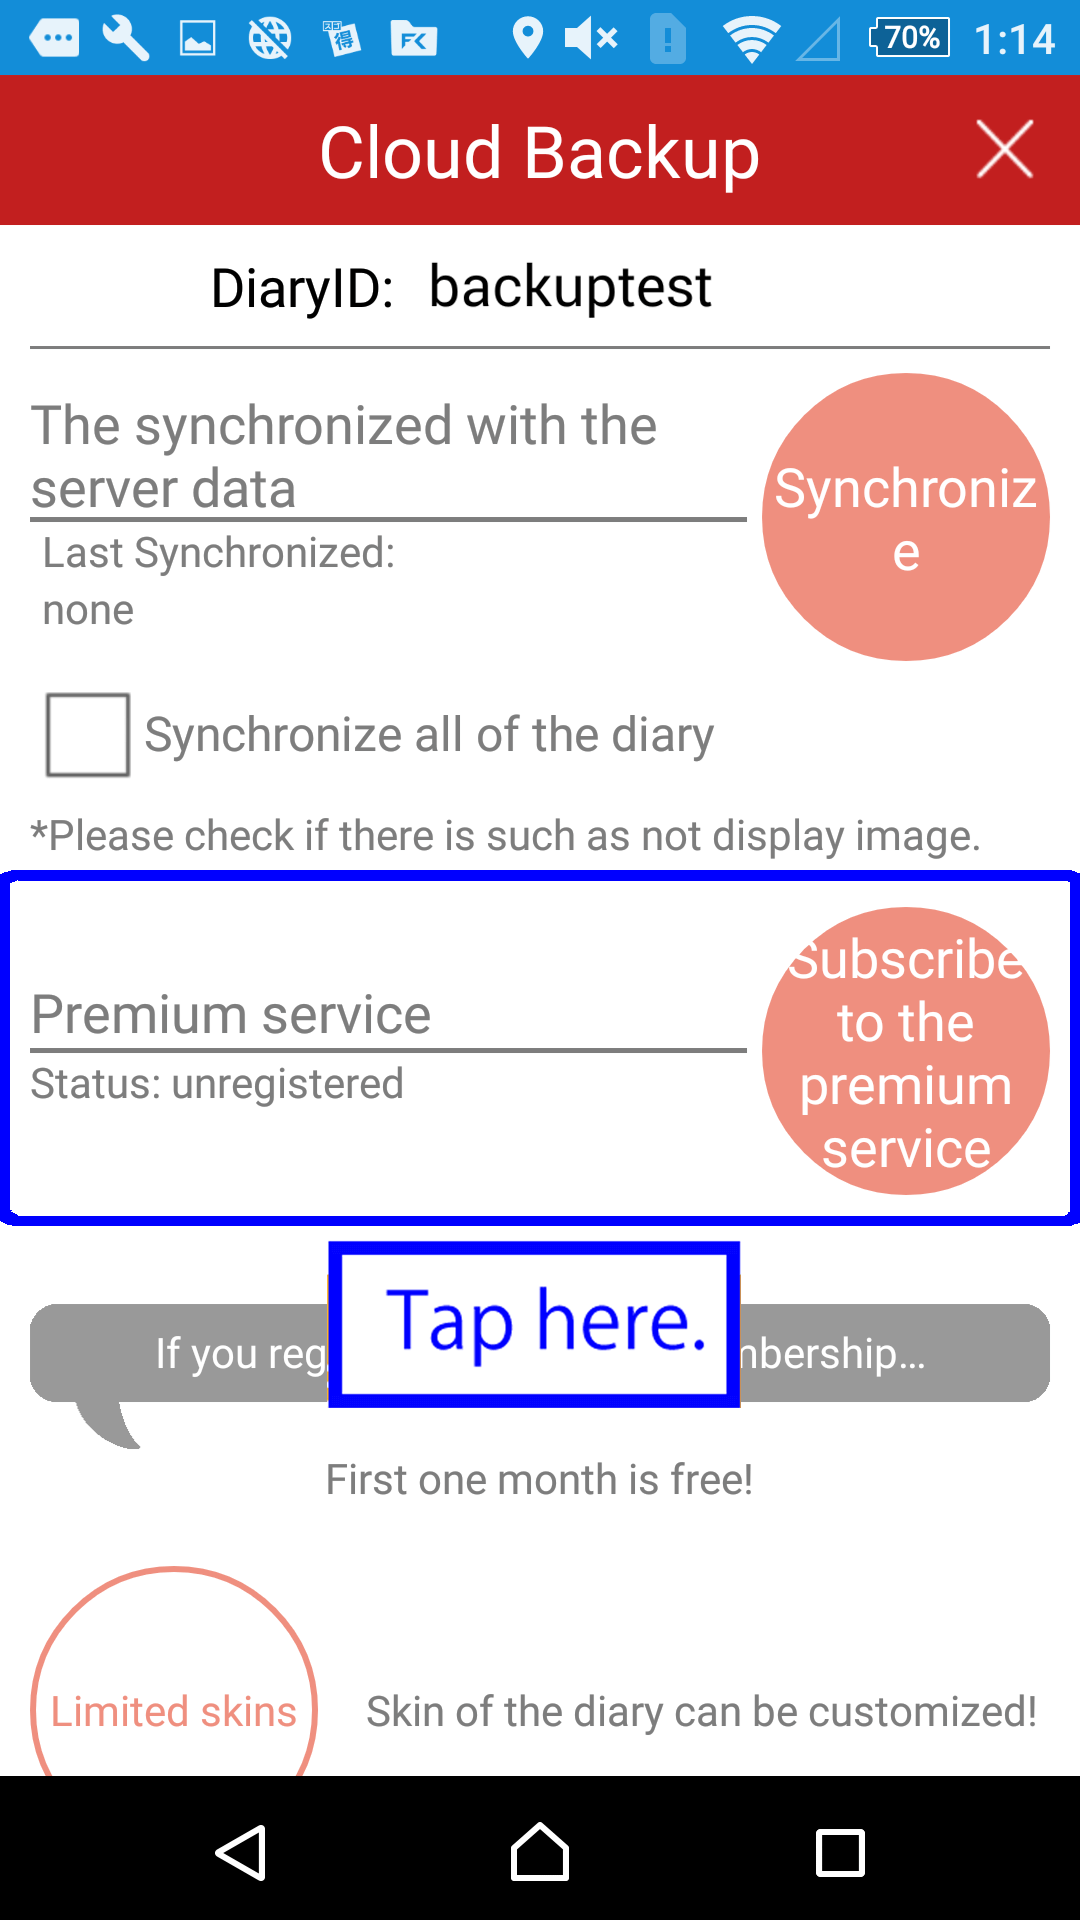
- How to do Cloud backup? -
- Touch the cloud backup button in the tile menu.
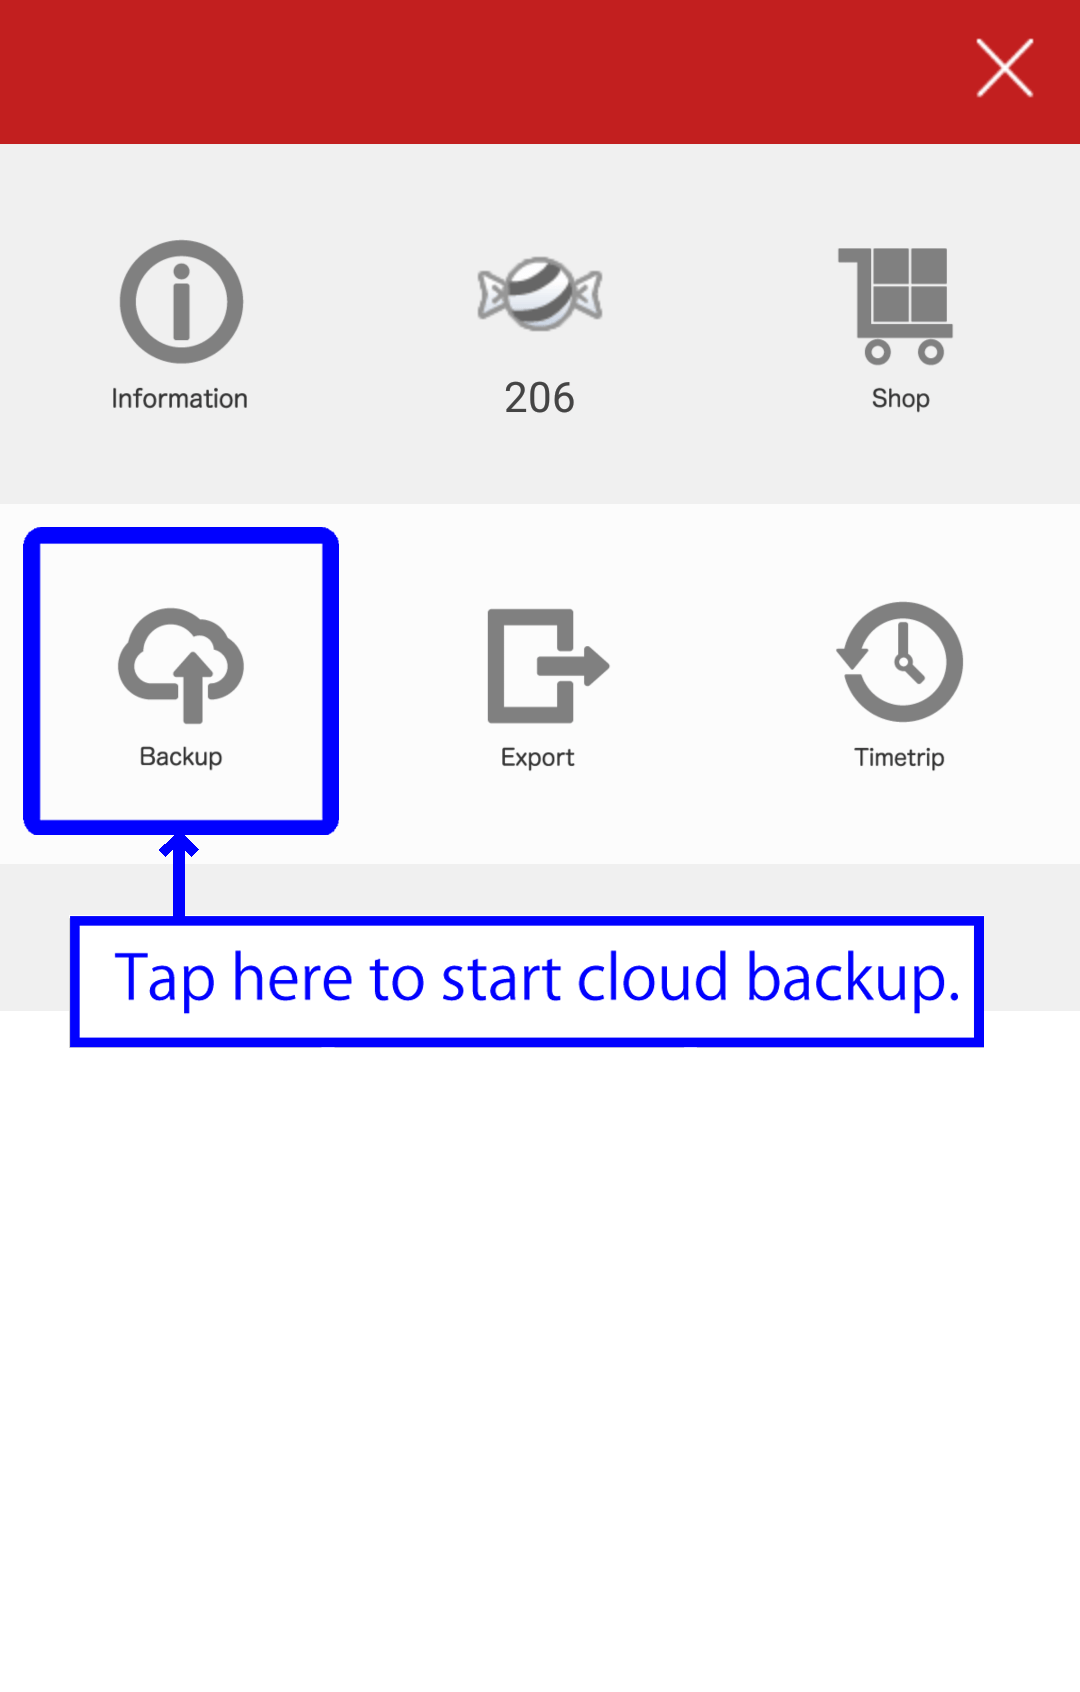
- If you want to backup only text, tap "Synchronize".

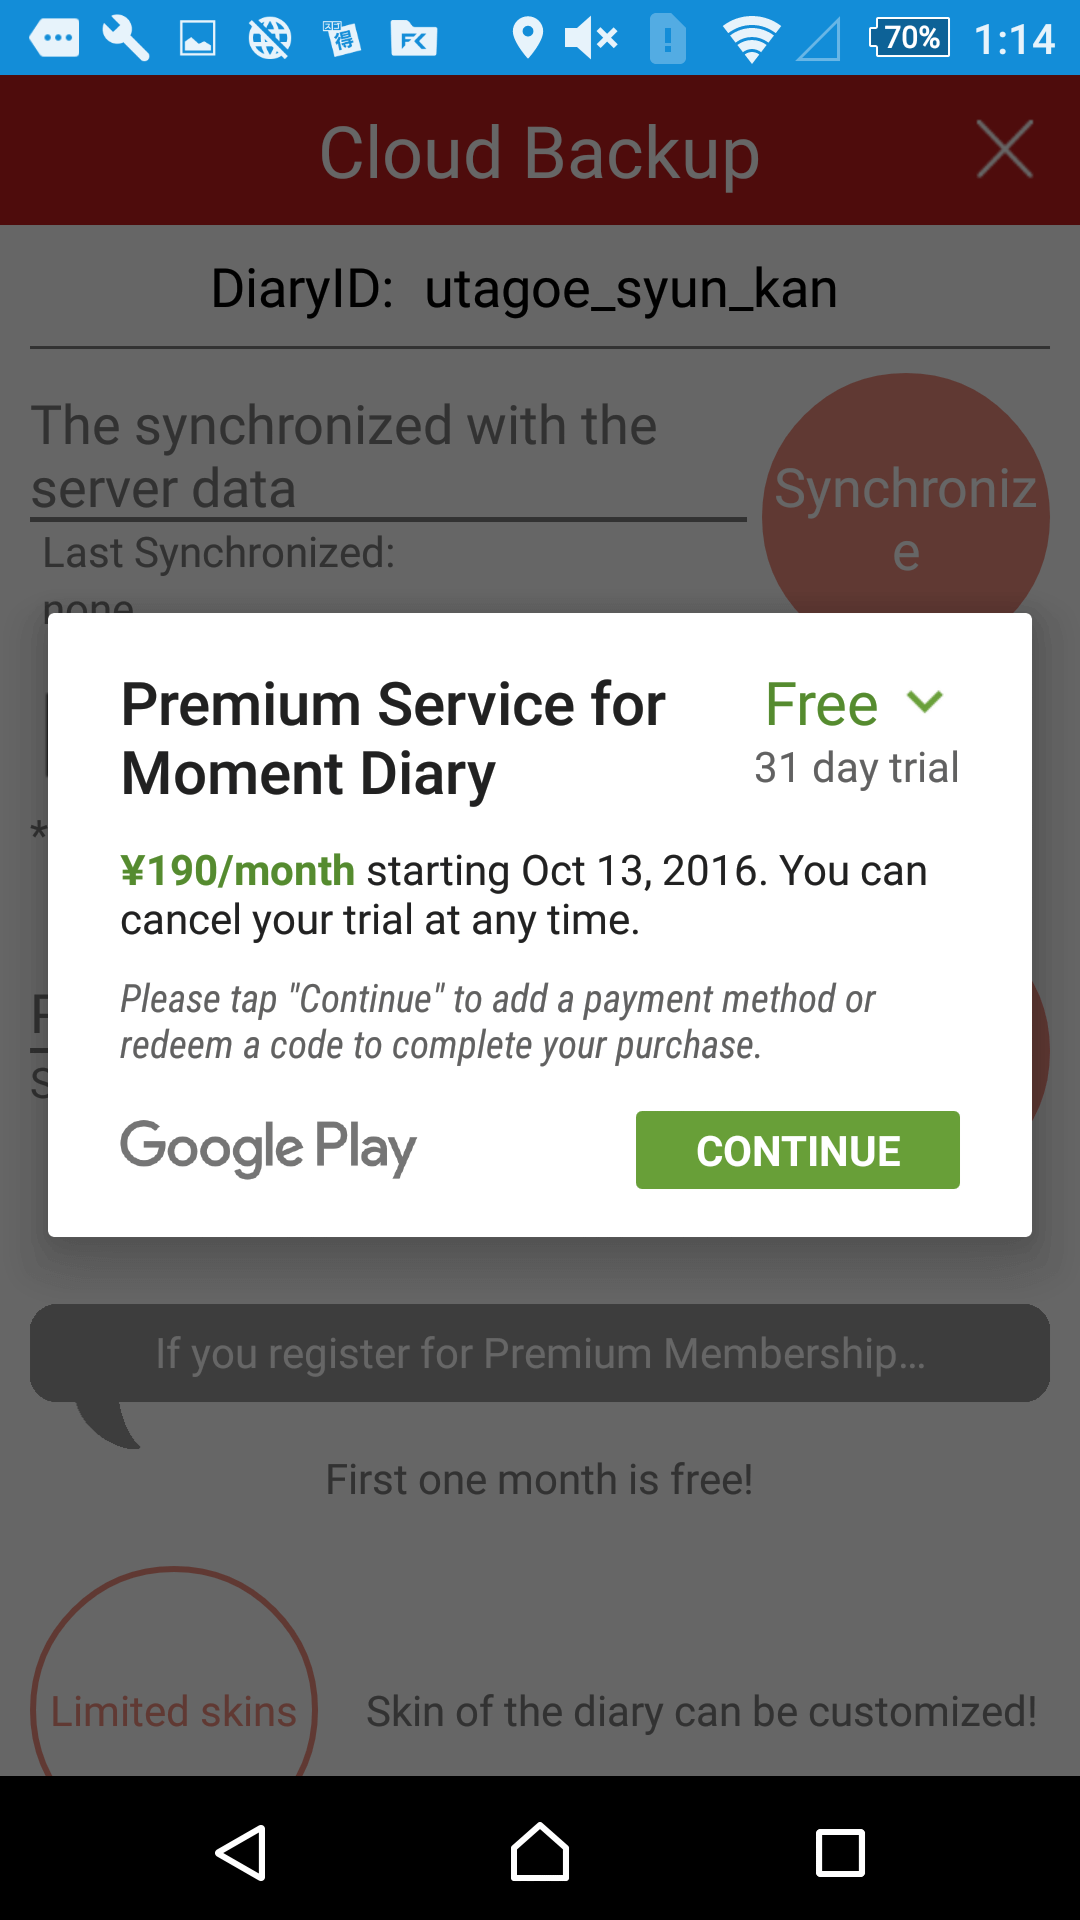
- To backup both your texts and pictures, you have to subscribe to the premium service.
For the first month, you can get a free trial.
Choose "Subscribe to the premium service" and start registration to use cloud backup premium.
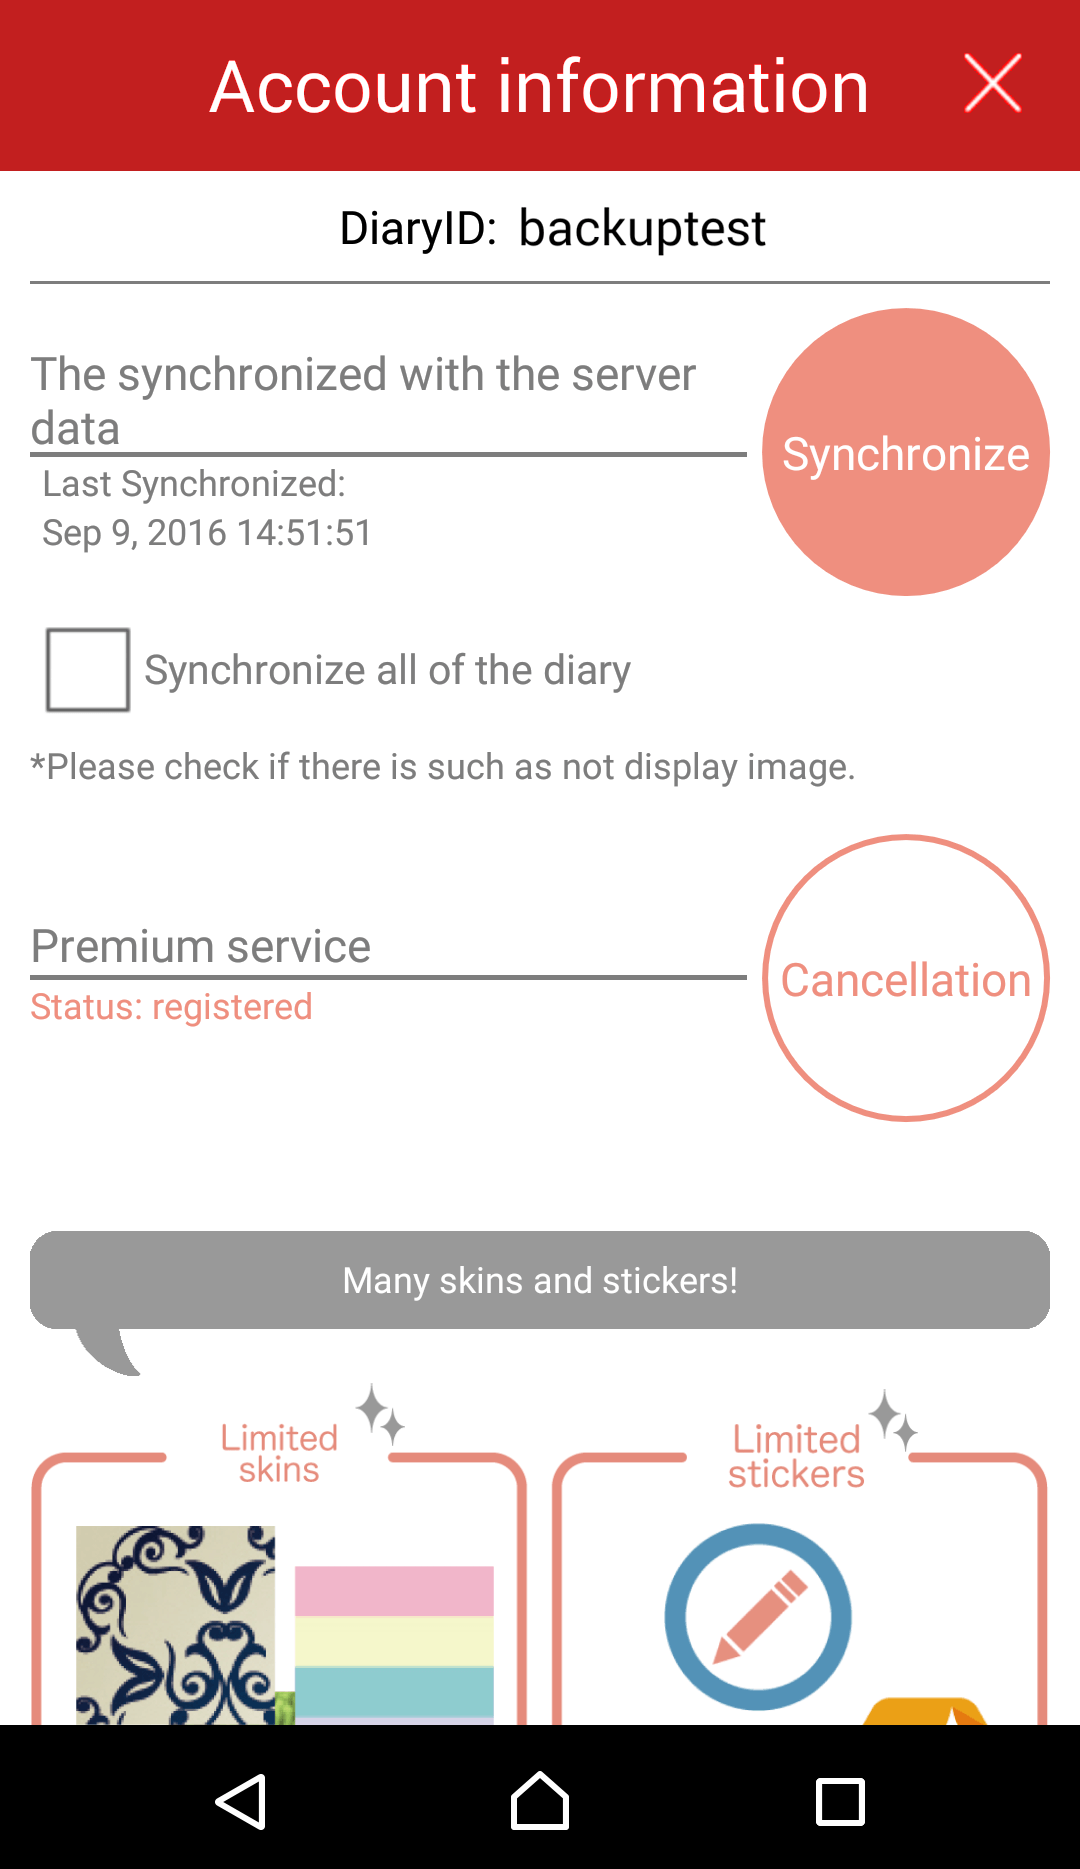
- Cloud backup information -
- As you go "Main Page" → "Preference" → "Cloud backup User's information", you can change or confirm your information.
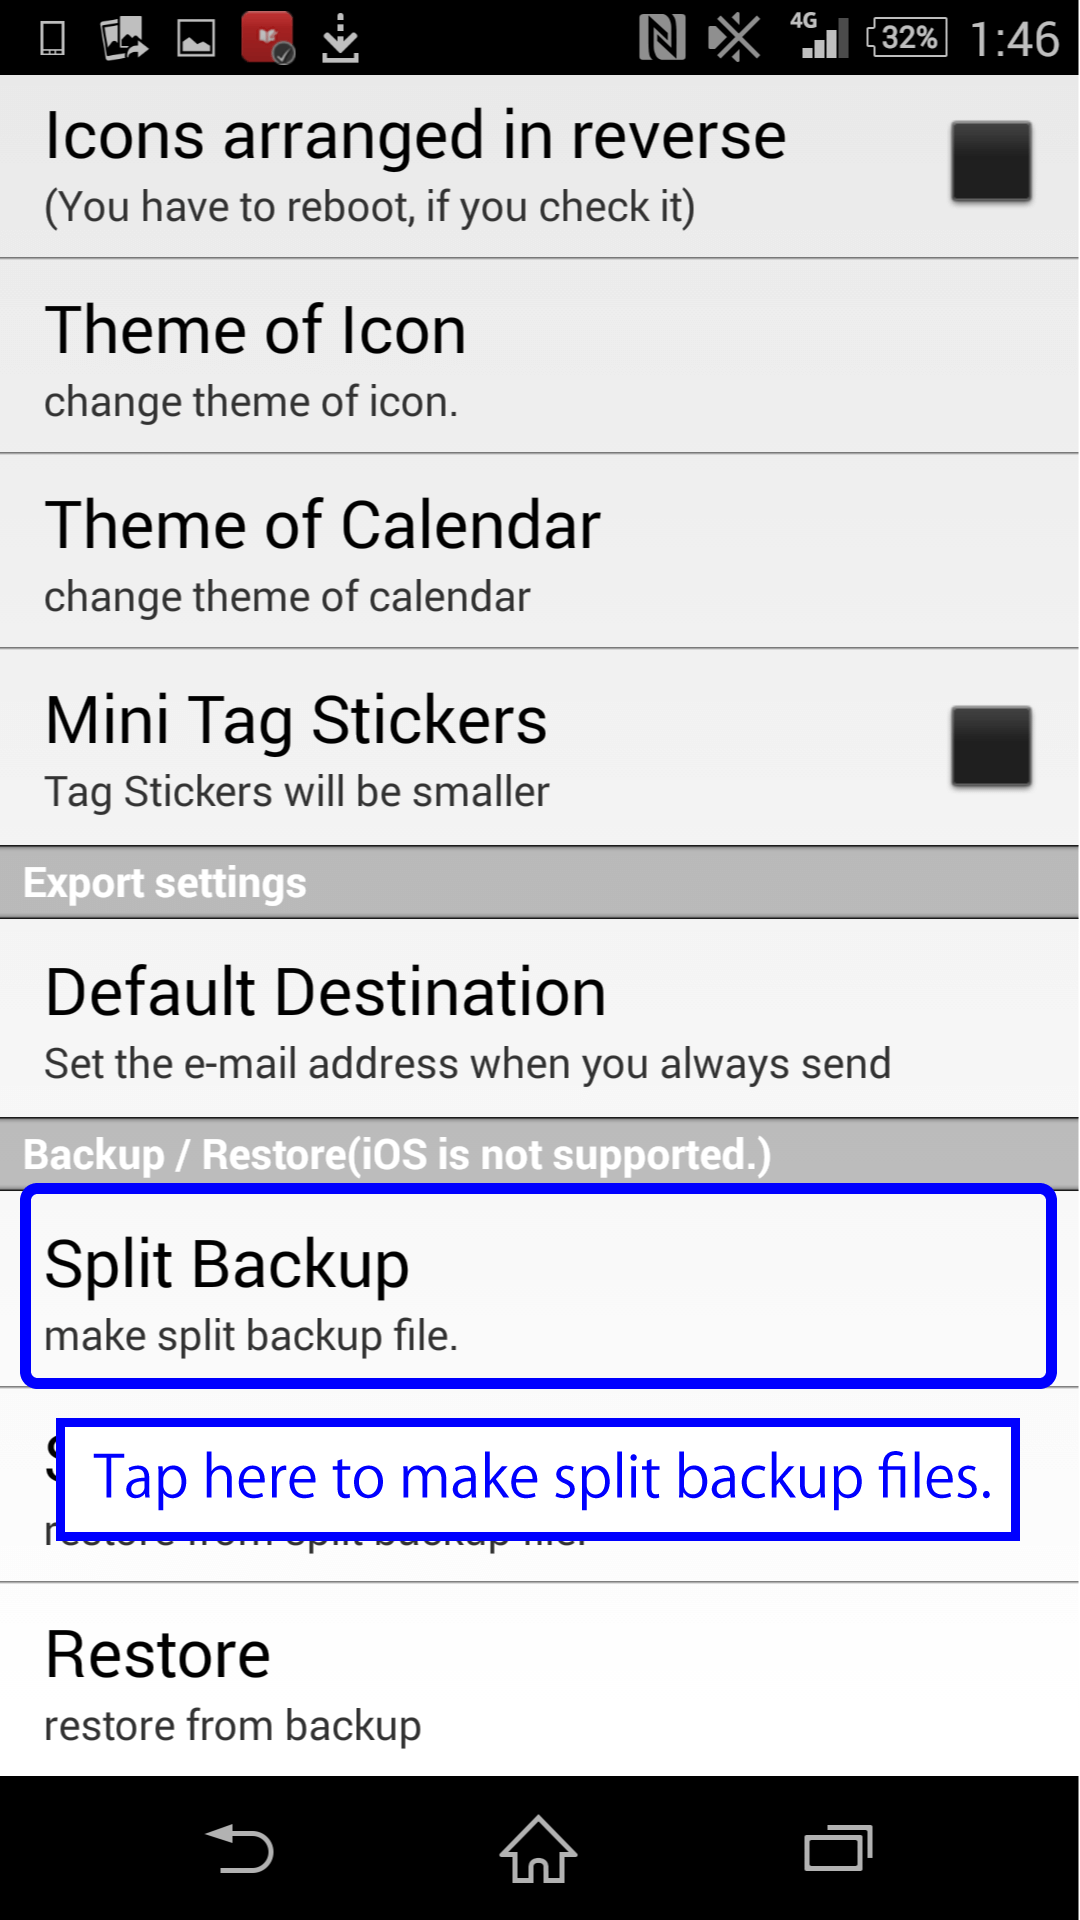
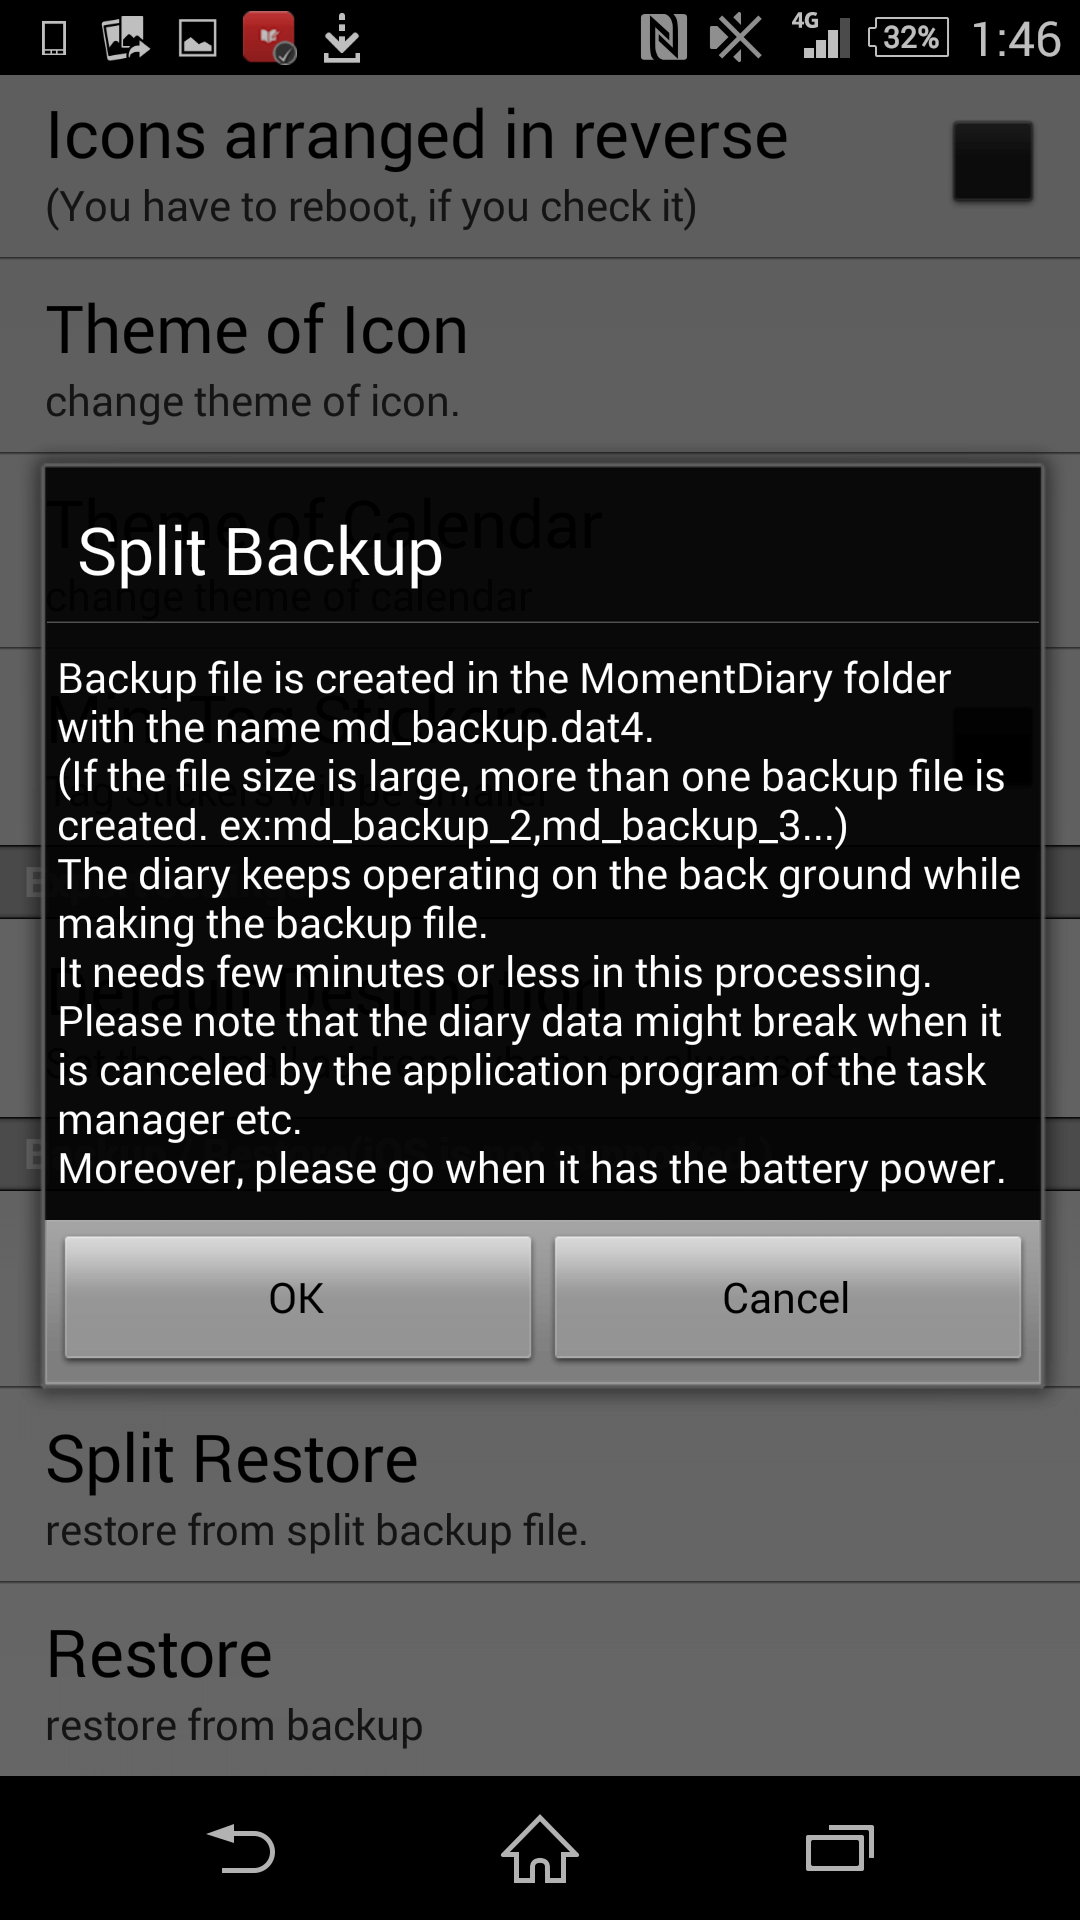
- Split backup -
- Restore -
Restore after you have finished backup.
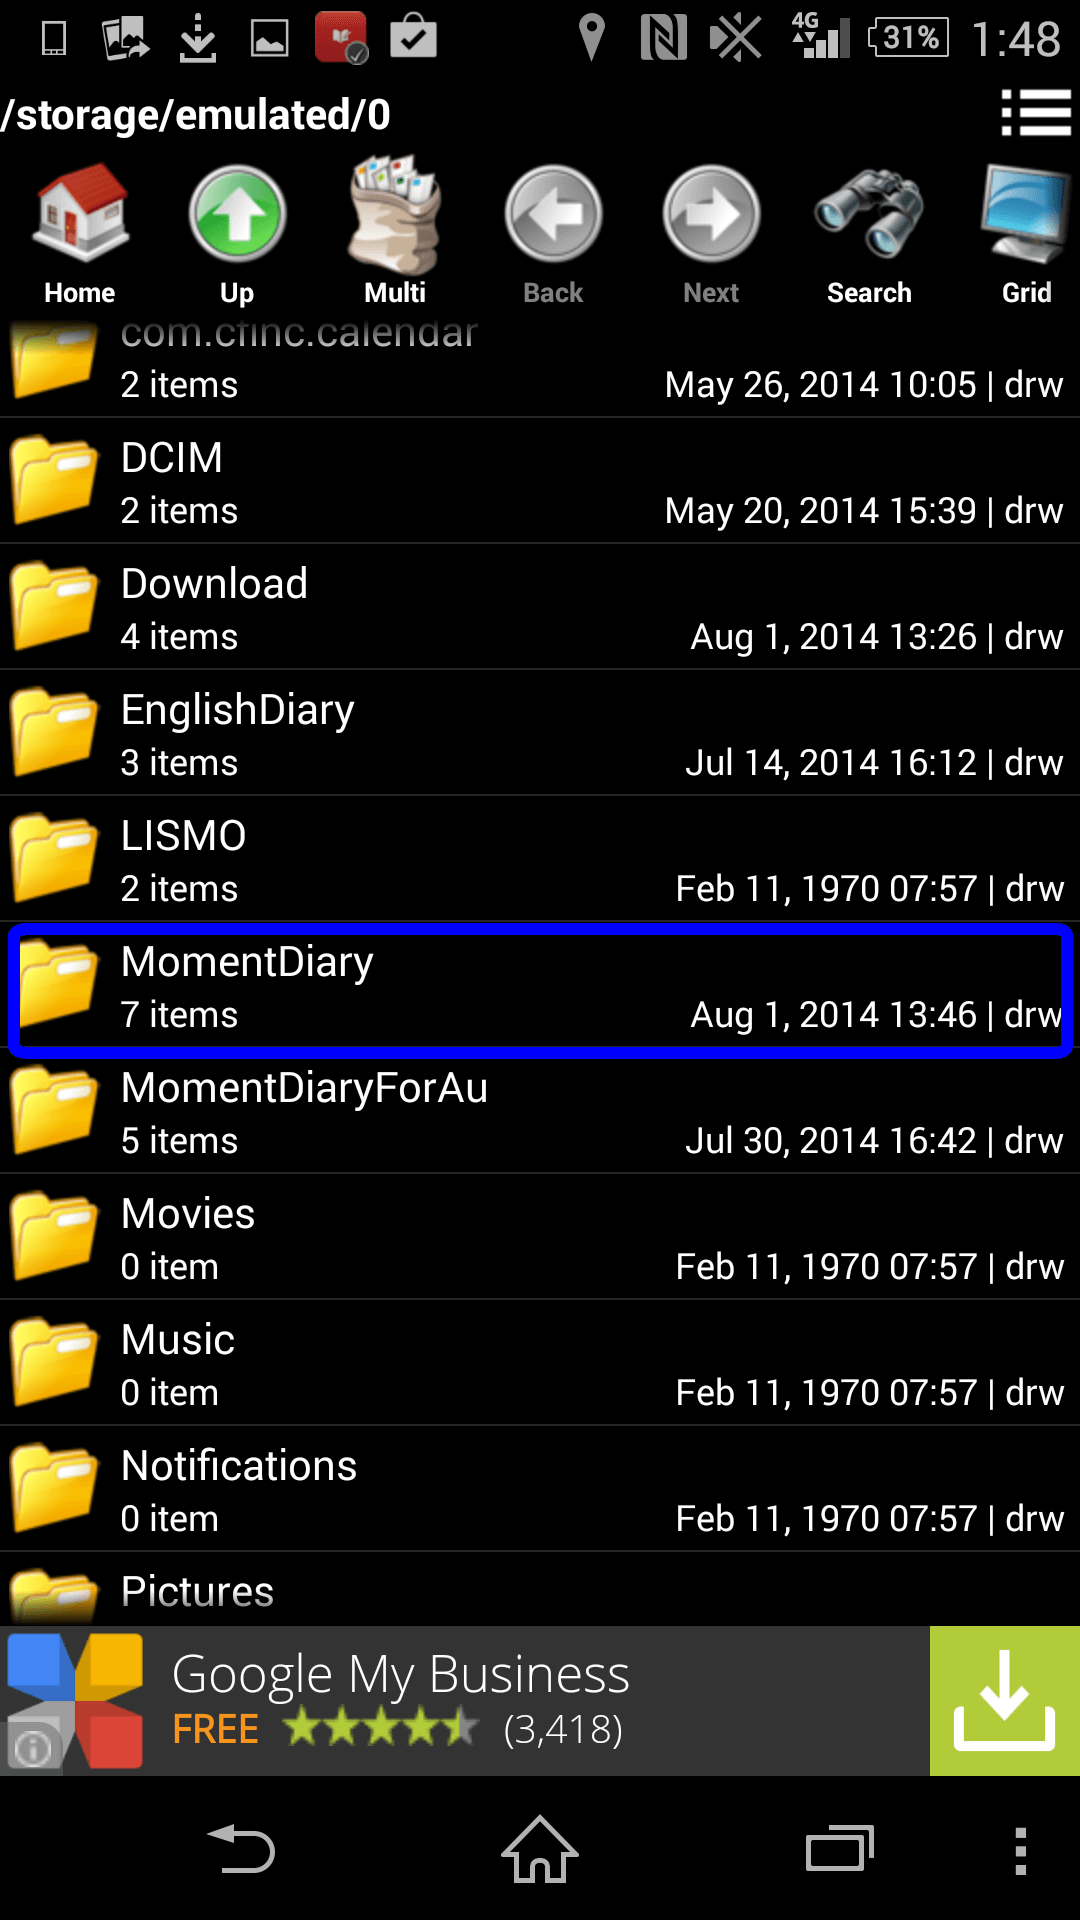
- 1. Start file manager application
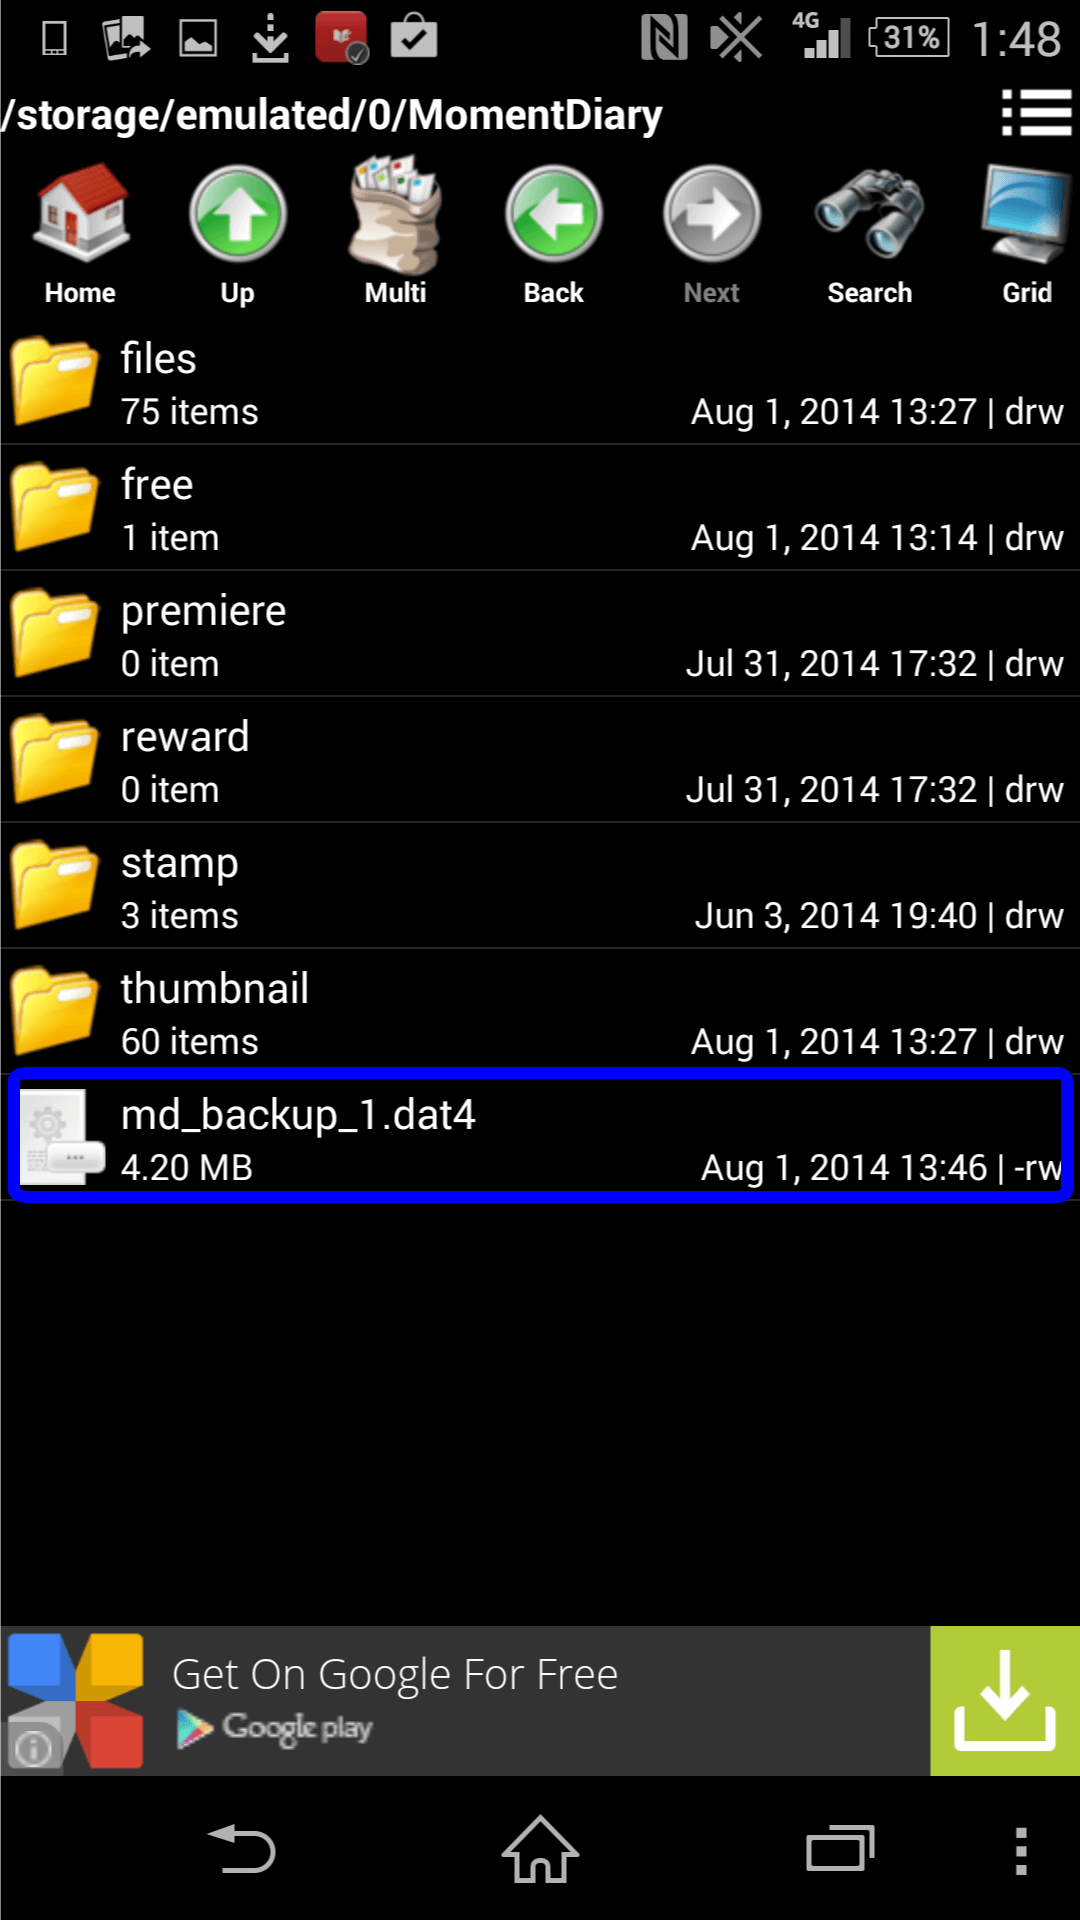
- 2. Open the "MomentDiary" folder and copy the backup files whose name includes "md_backup".
- 3. Copy the files to external disks such as a microSD card or USBs
- 4. Move the files from the external disks to the other device and open the file manager application in the other device.
- 5. Paste the files to the "MomentDiary" folder of the other device.
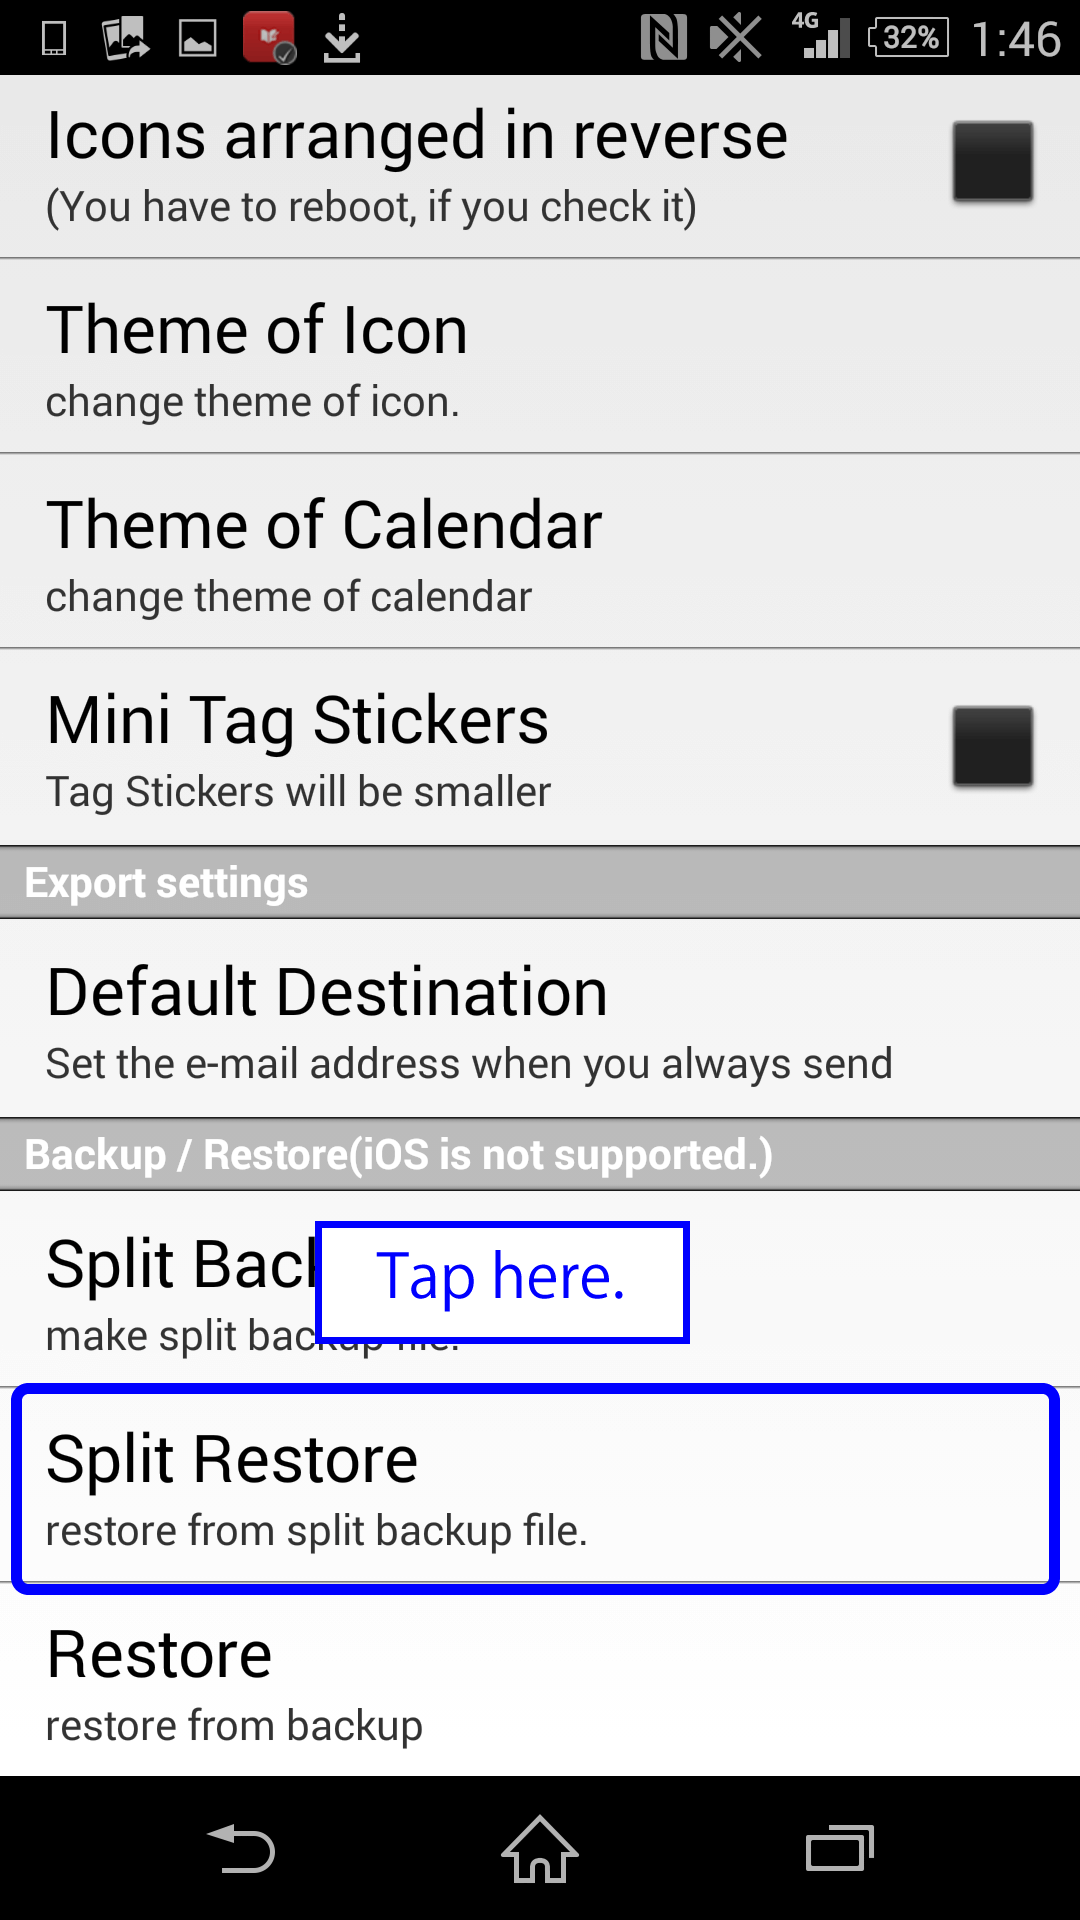
- 6. Tap "Restore" in the settings
- 7. Open MomentDIary. You can recover data by opening Main Page Settings Back up restore.
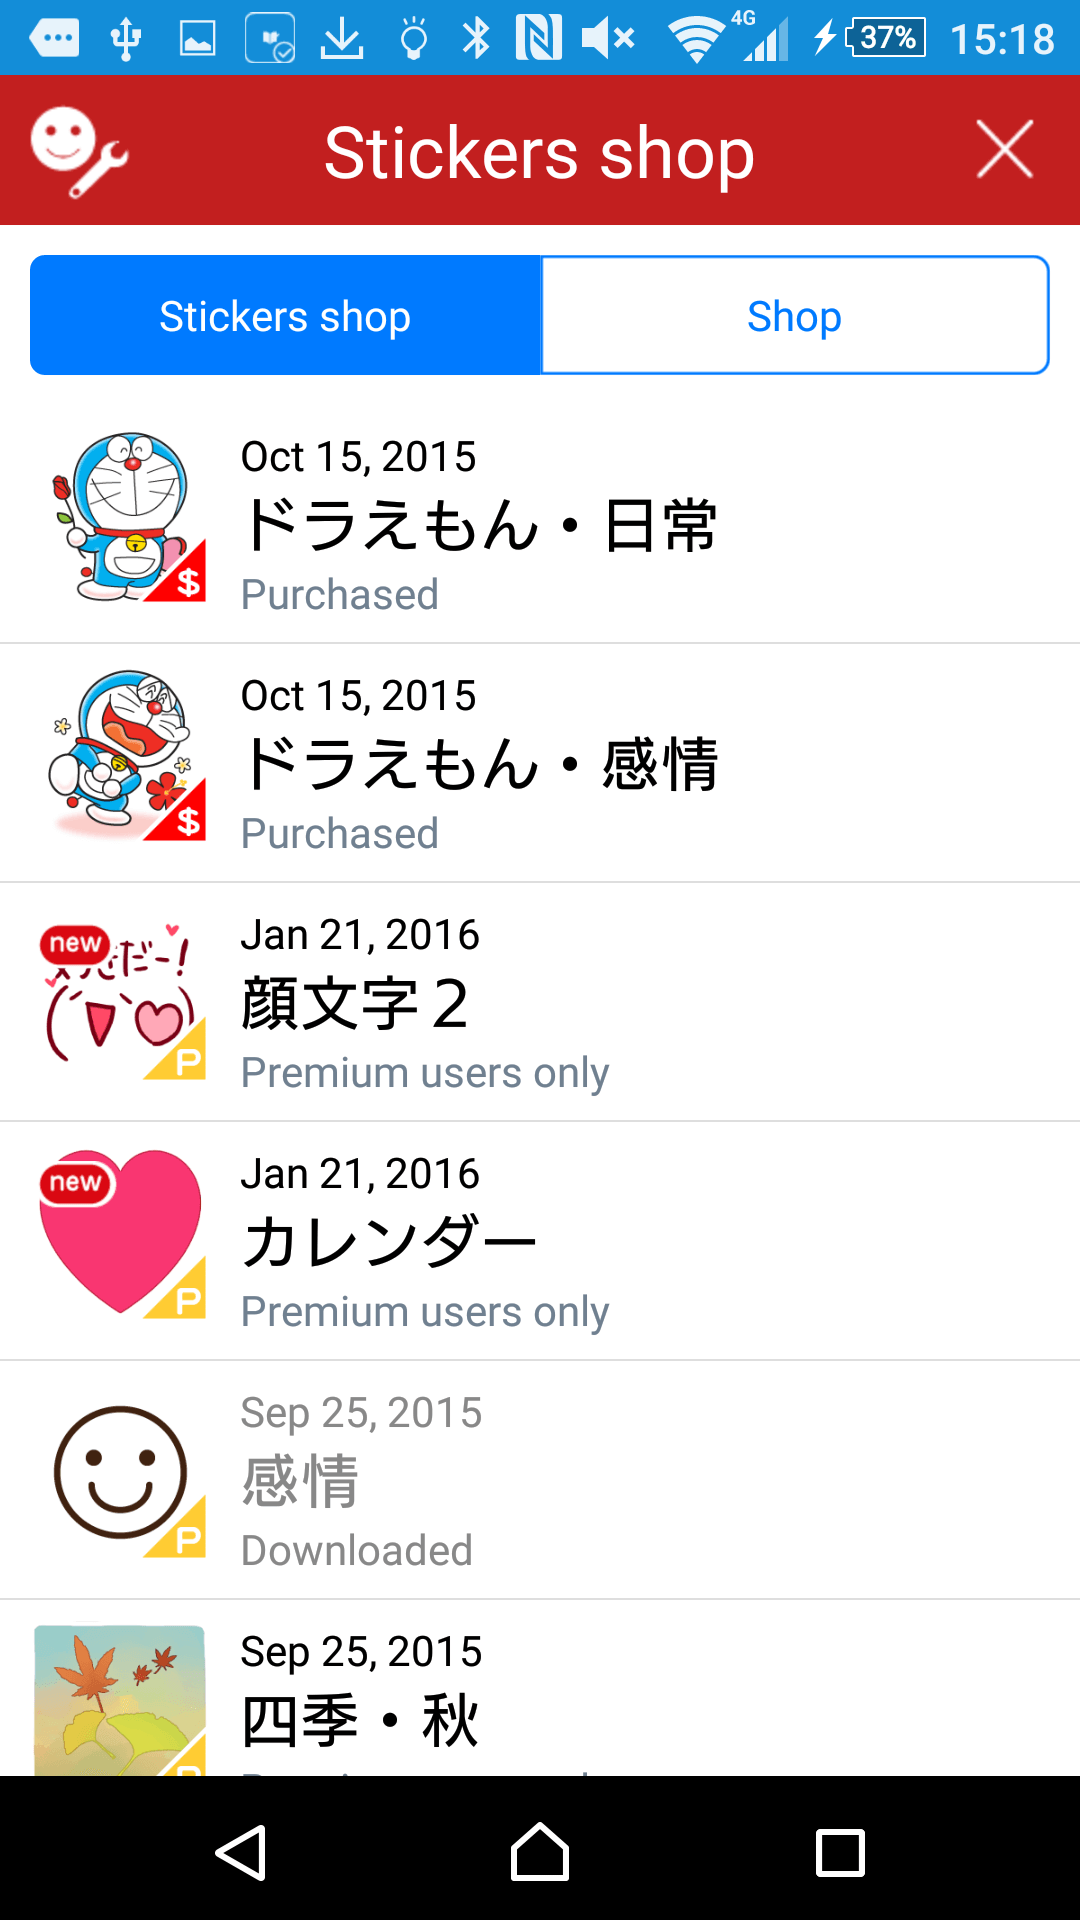
- Shop stickers and skins-
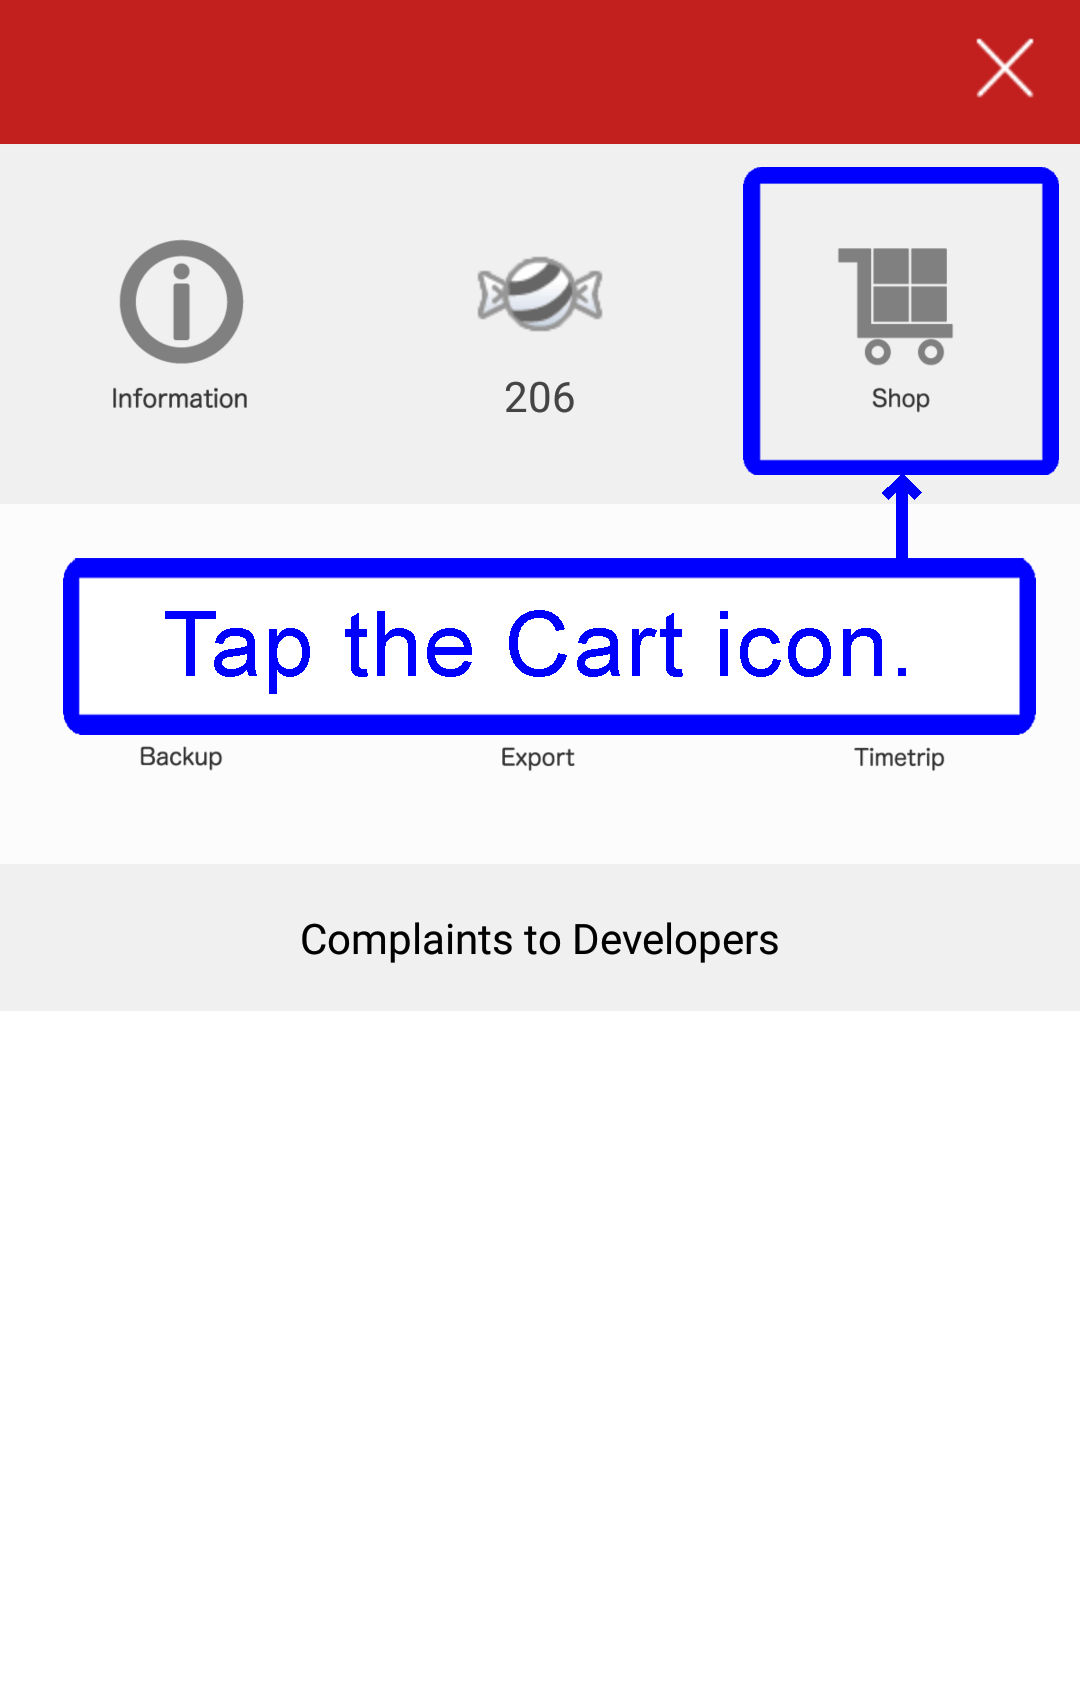
- From the Cart icon on the diary list screen and tile menu, you can access to the shop.
- At the shop, you can download various kinds of stickers and skins.

- Skin -
- Wallpaper for upper and bottom part of diary is called "skin".
- Check Skin from the setting menu.

- From Skin, you can change skin to the one you downloaded.
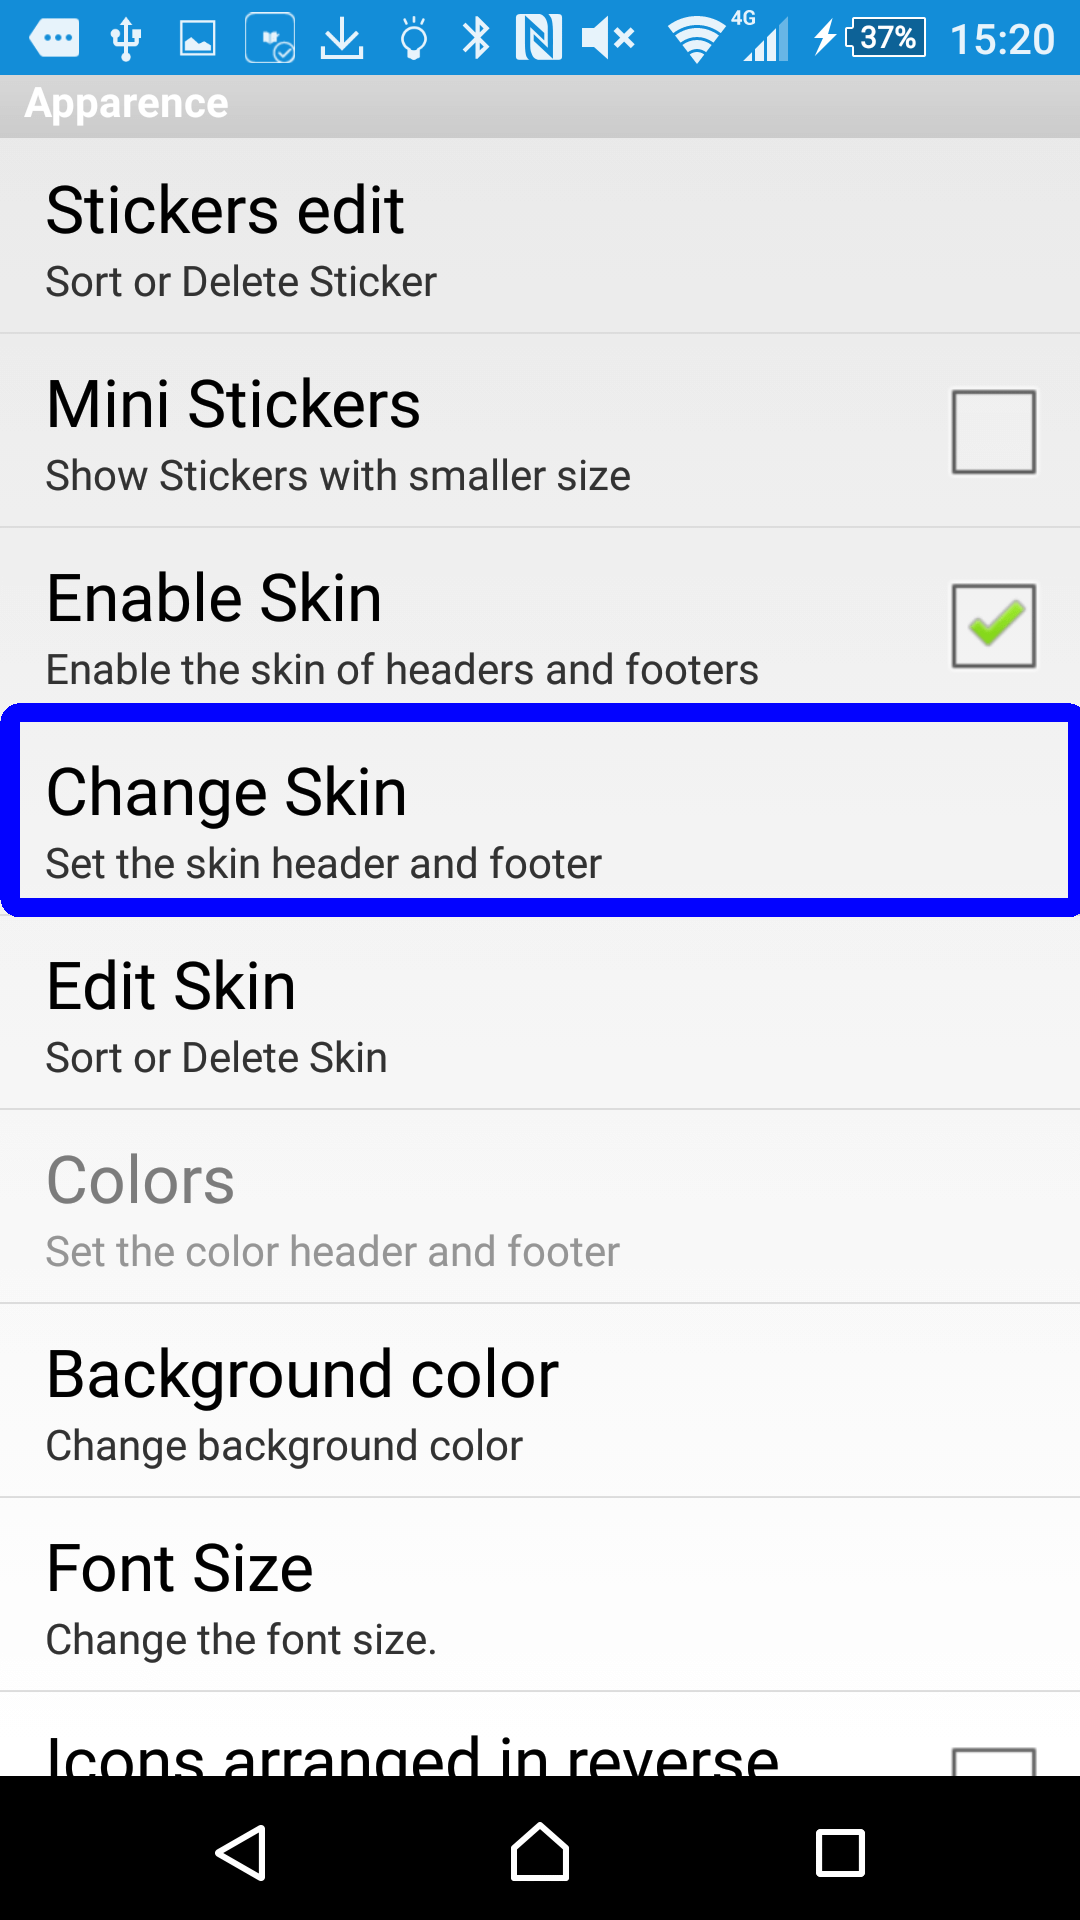
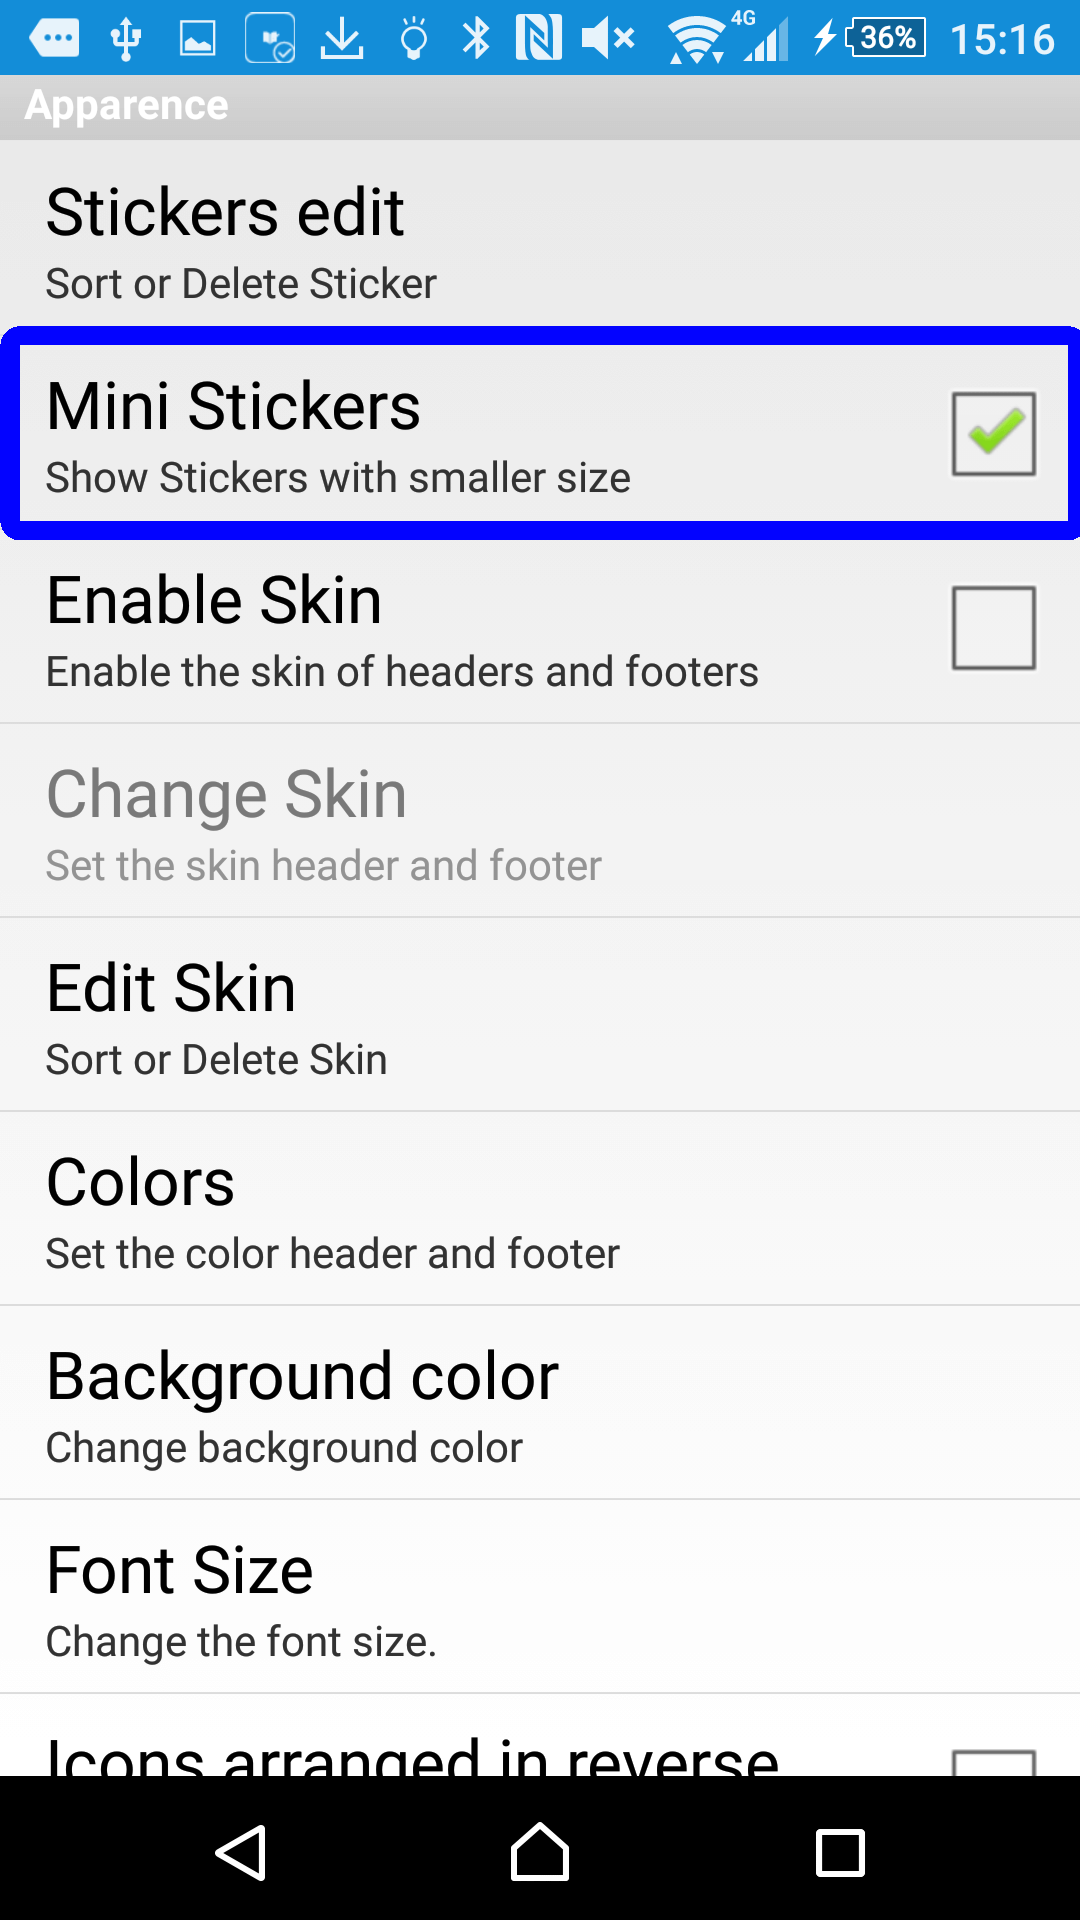
- Customise design -
- Design of the diary can be customised to what you like.
- You can change Colors (header and footer) / Background color / Character size / Icon / Calendar.
- From Setting, choose what you wish to change.
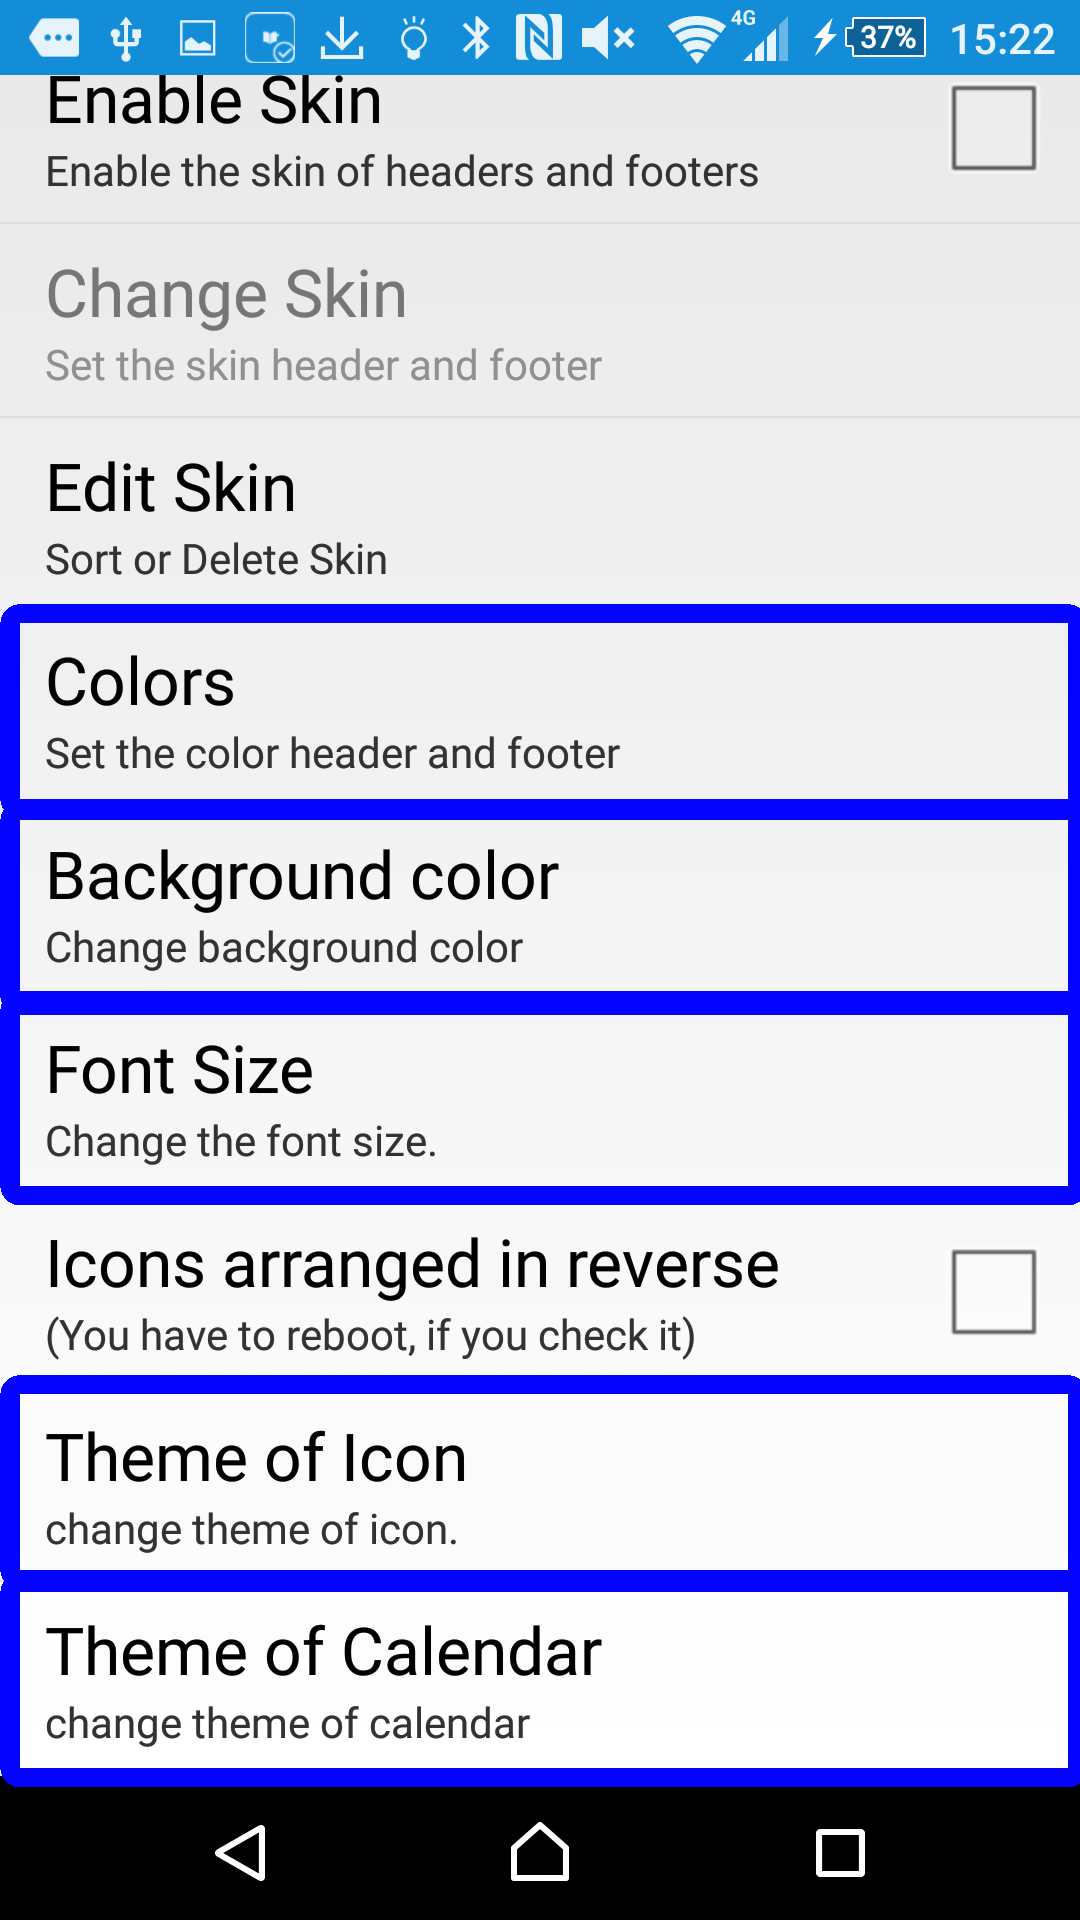
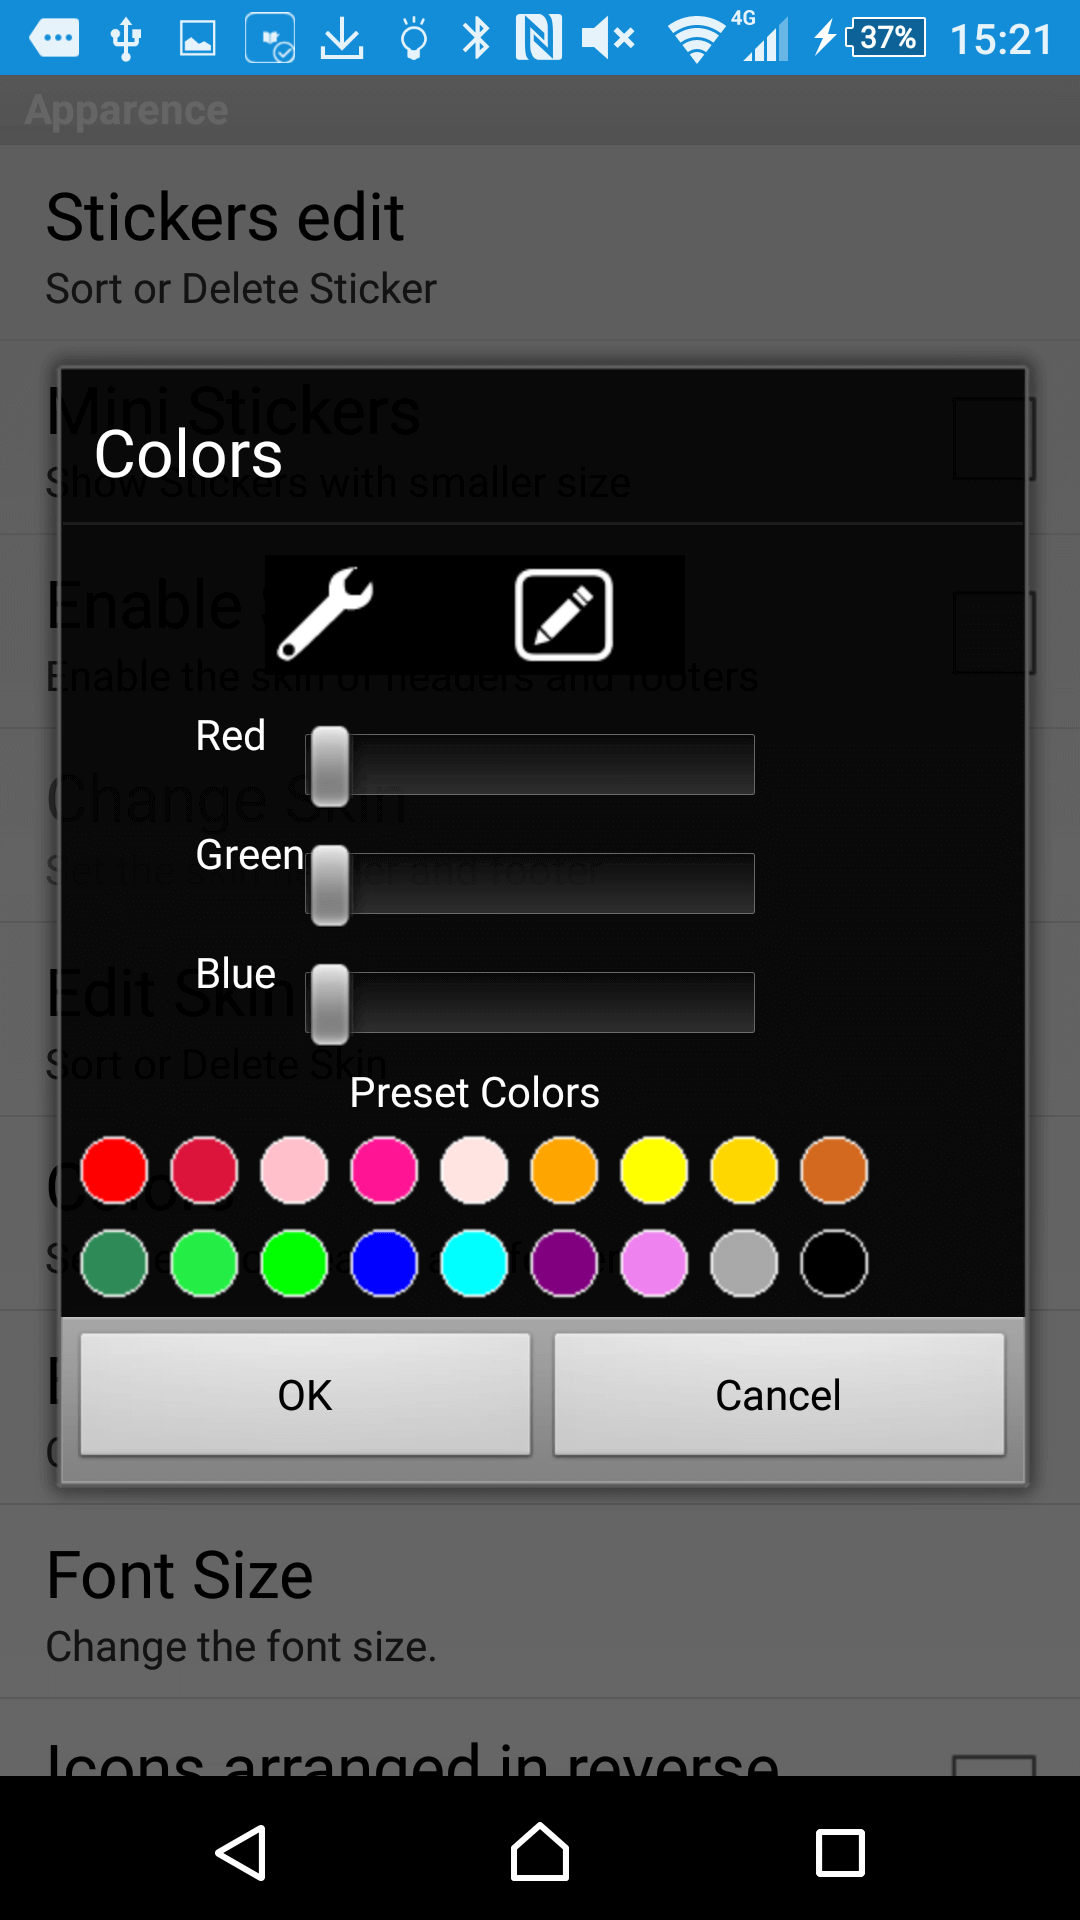
- ■Colors・・ Colors of header and footer can be changed. You can assign from RGB so find color for youself!
- ■Background color・・ Color of background can be changed. You can assign from RGB so find color for youself!
- ■Icon・・・ Primary setting is flat (white), but there are three kinds of icon styles including the primary setting. You can choose icons in the style of flat (blue), flat (White) or classic.
- ■Calendar・・・ The calendar is displayed in scroll style but you can also choose to display in classic calendar style.
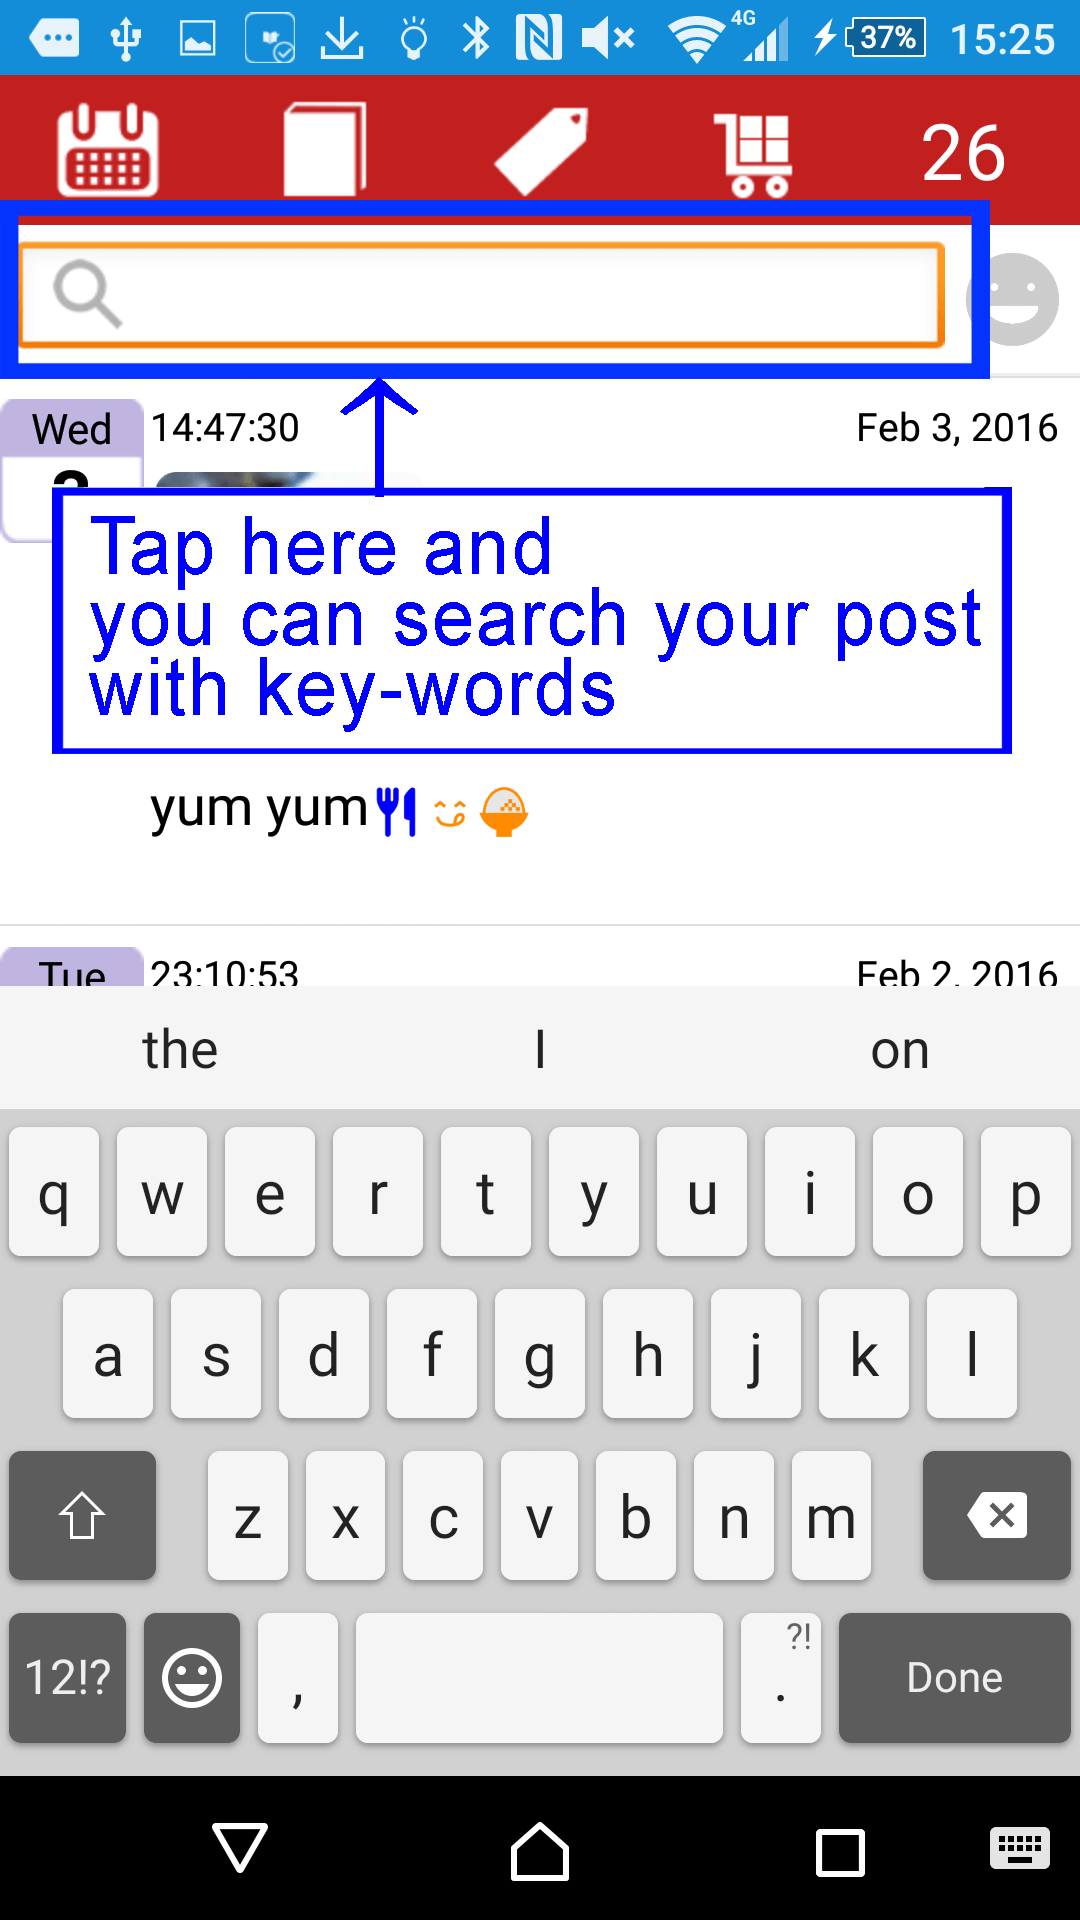
- Search Function -
- From the box above the diary screen, you can search your post with key-words.
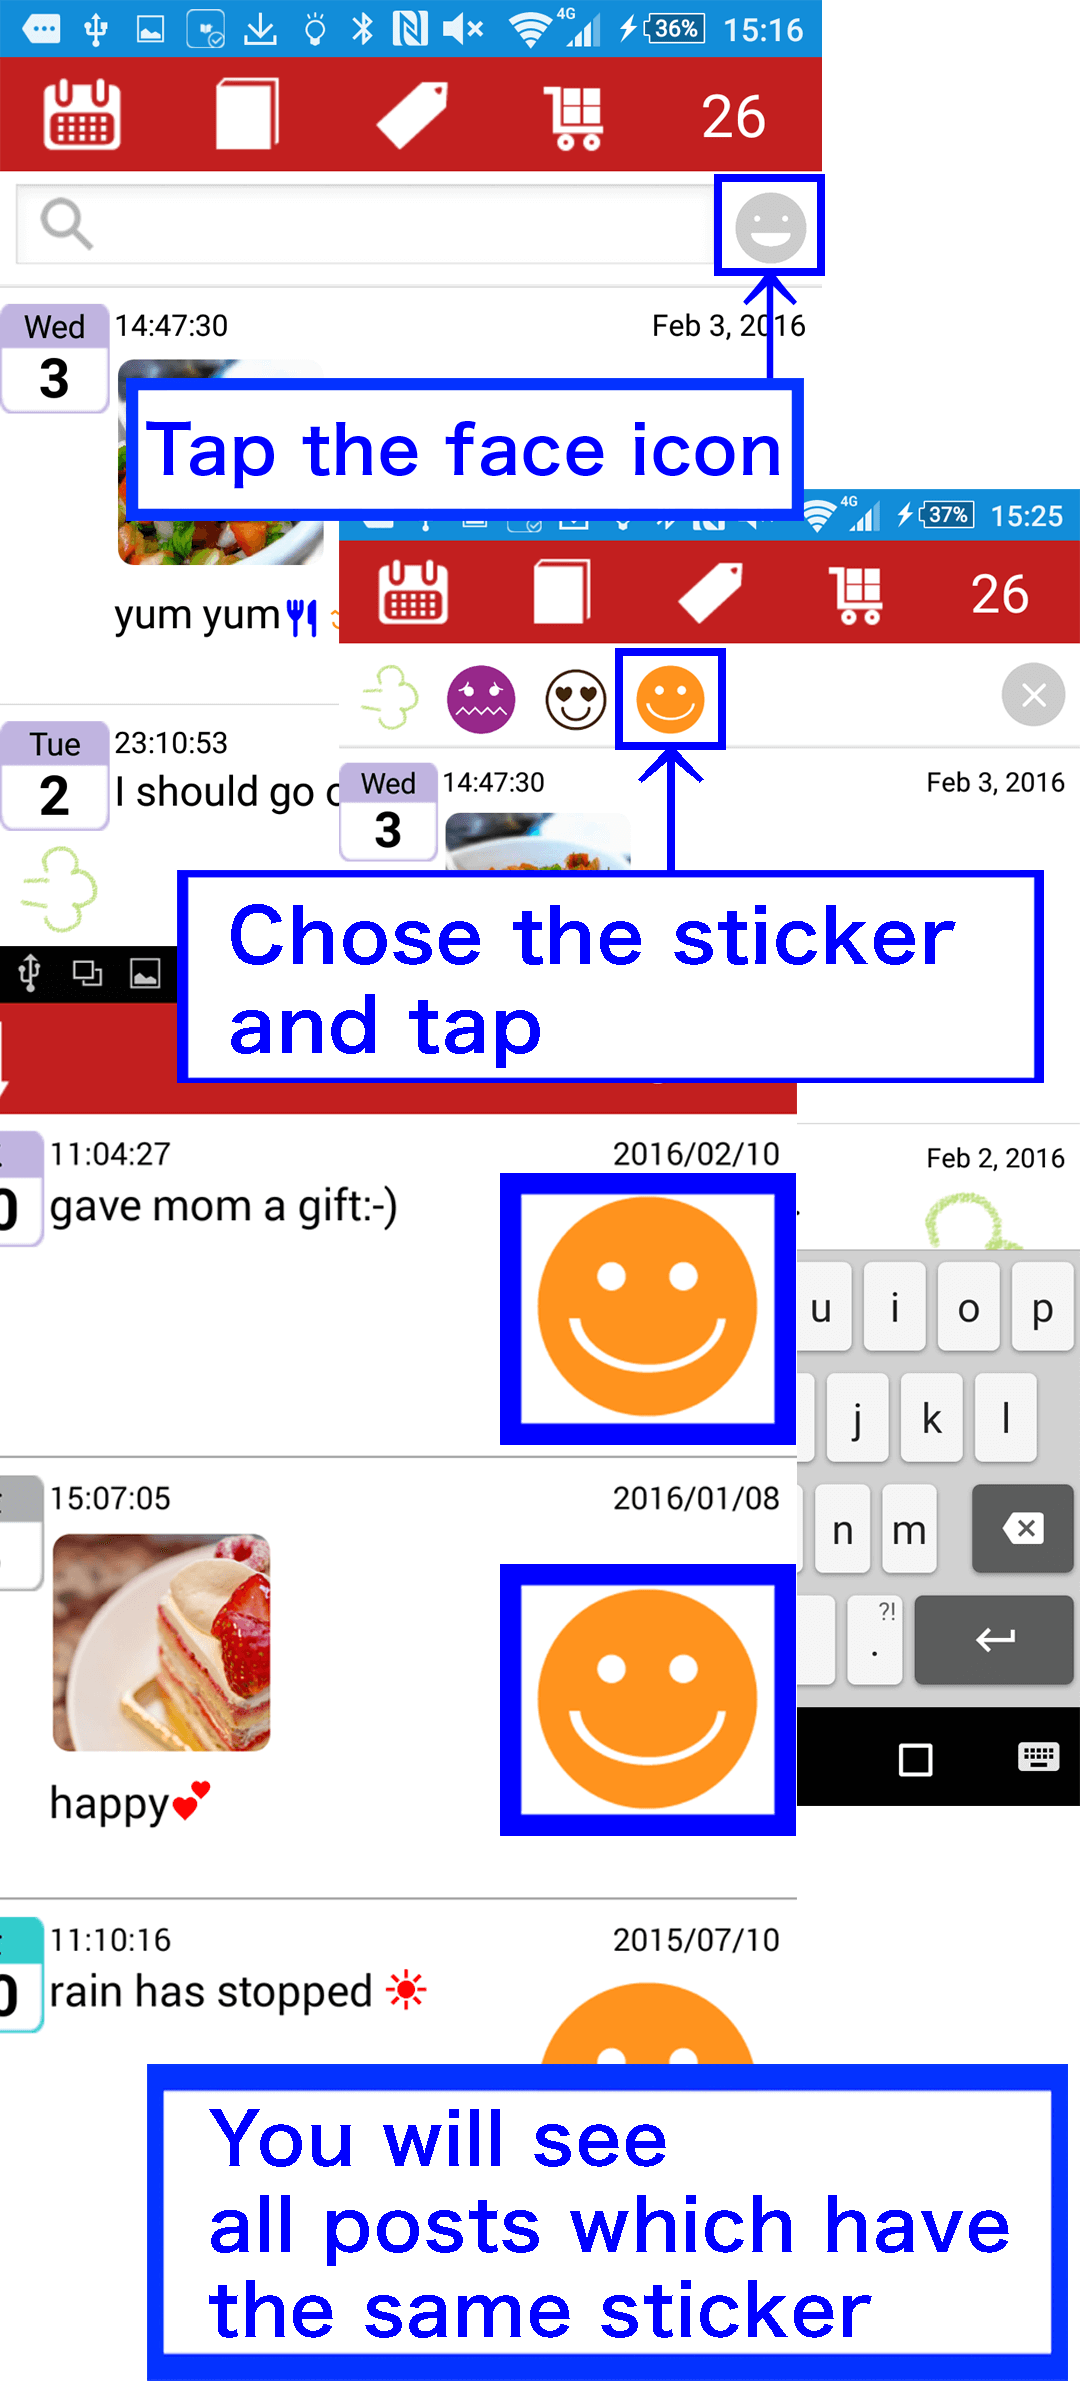
- Also your posts can be searched by stickers. Tap the face icon on the diary screen, then the list of stickers recently used is displyaed. chose the sticker from the list and tap, then you will see all posts which have the same sticker.
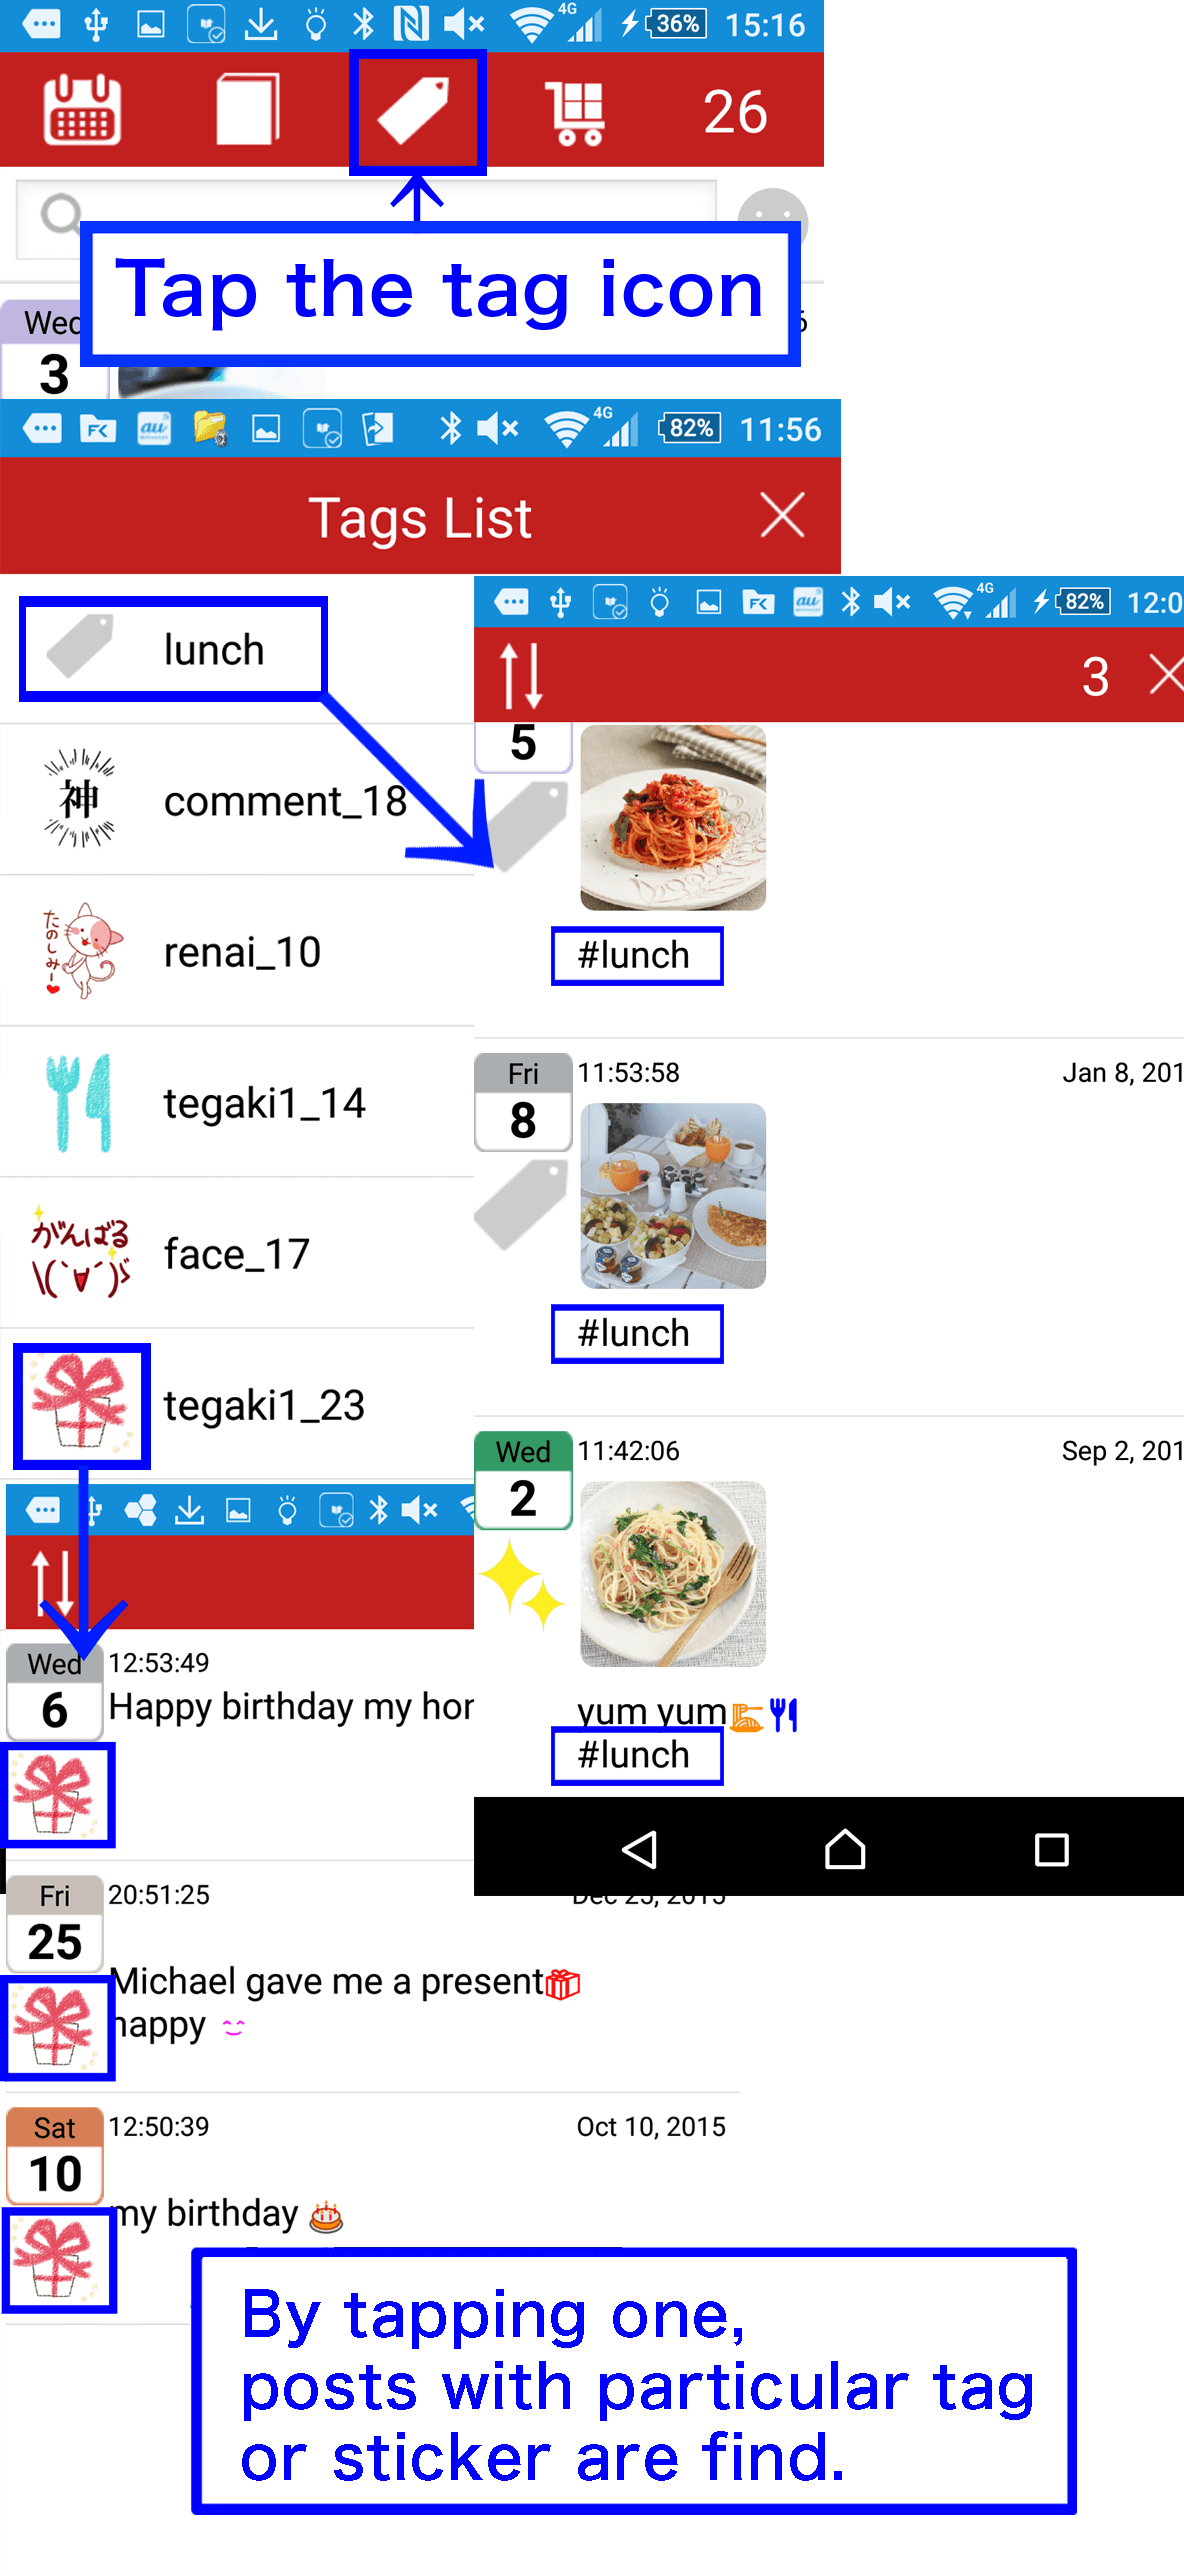
- From the tag icon, tags and stickers recently used are listed. By tapping one, posts with particular tag or sticker are find.
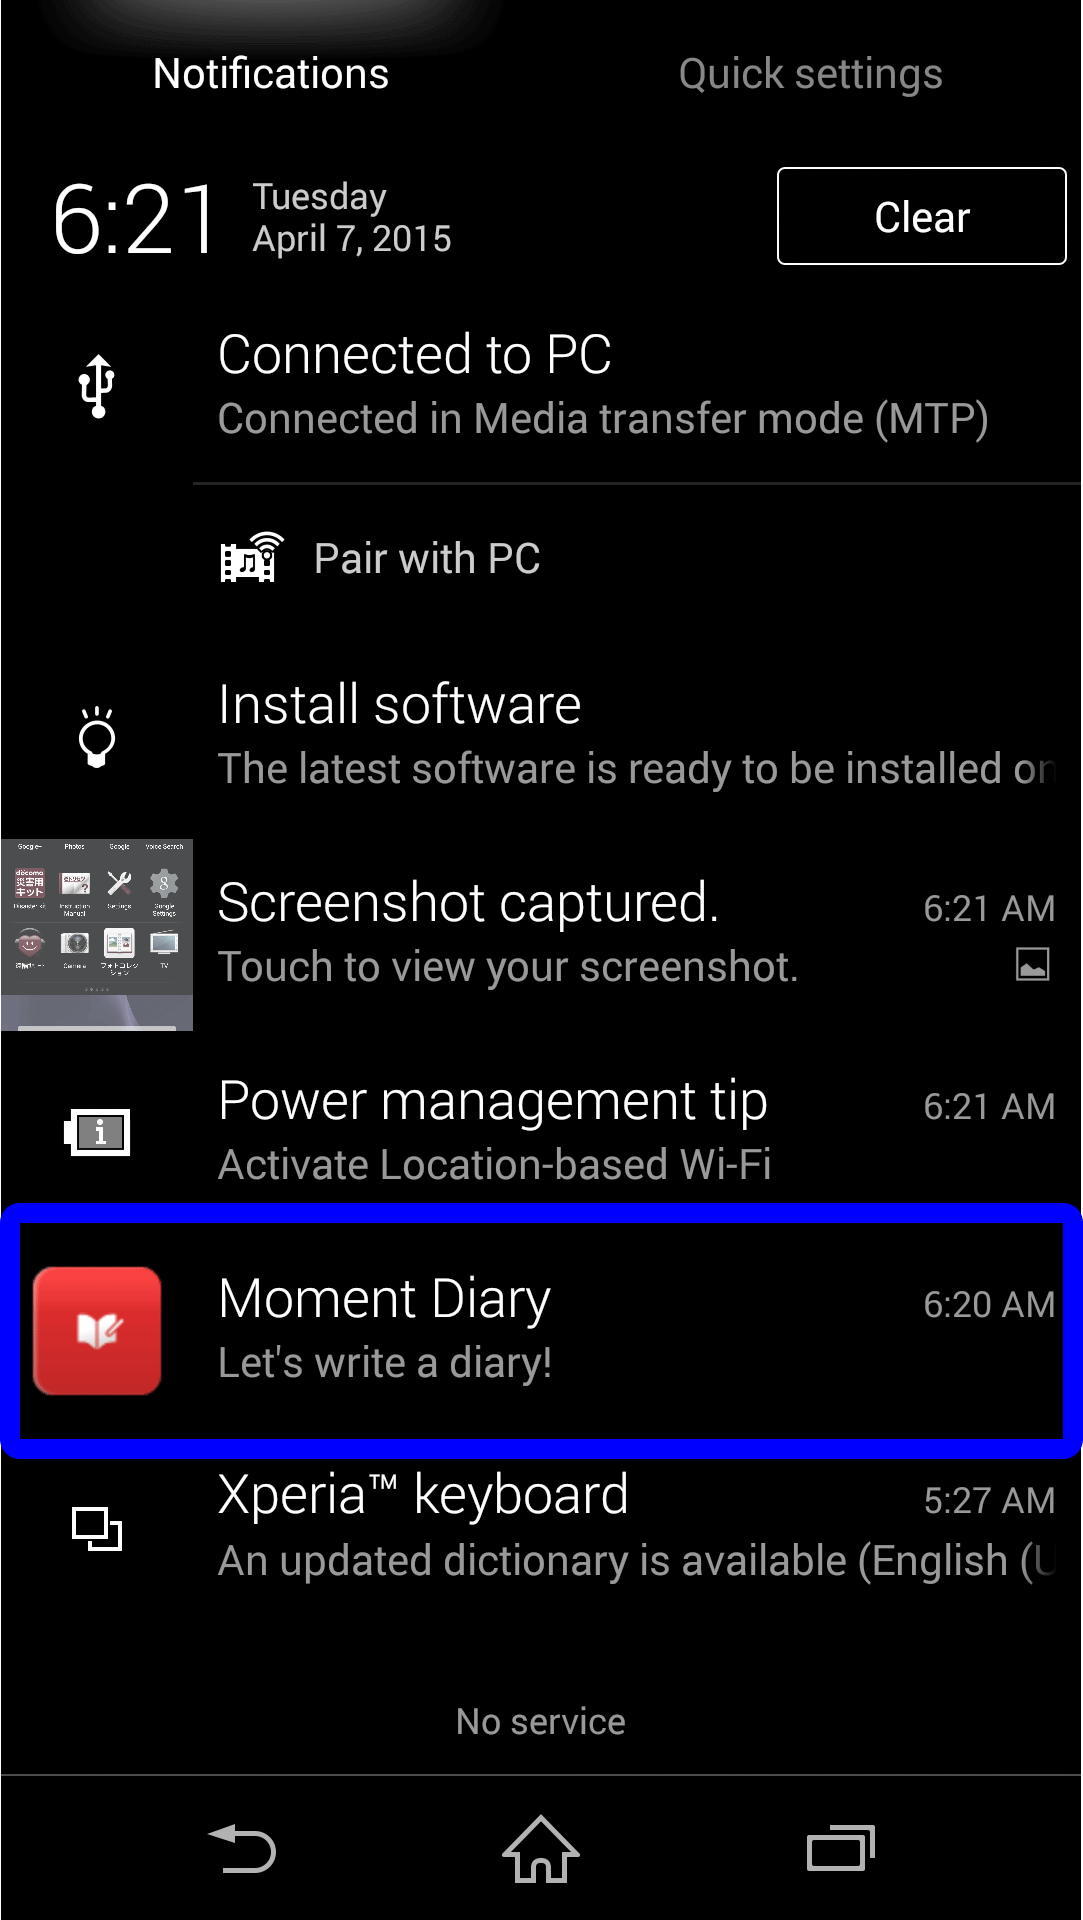
- Reminder function -
- Reminder function helps you to keep writing diary constantly.
- Tap the setting botton from the icon bar below.
- As you scroll down, you can find remindar setting so turn it on by tapping it.
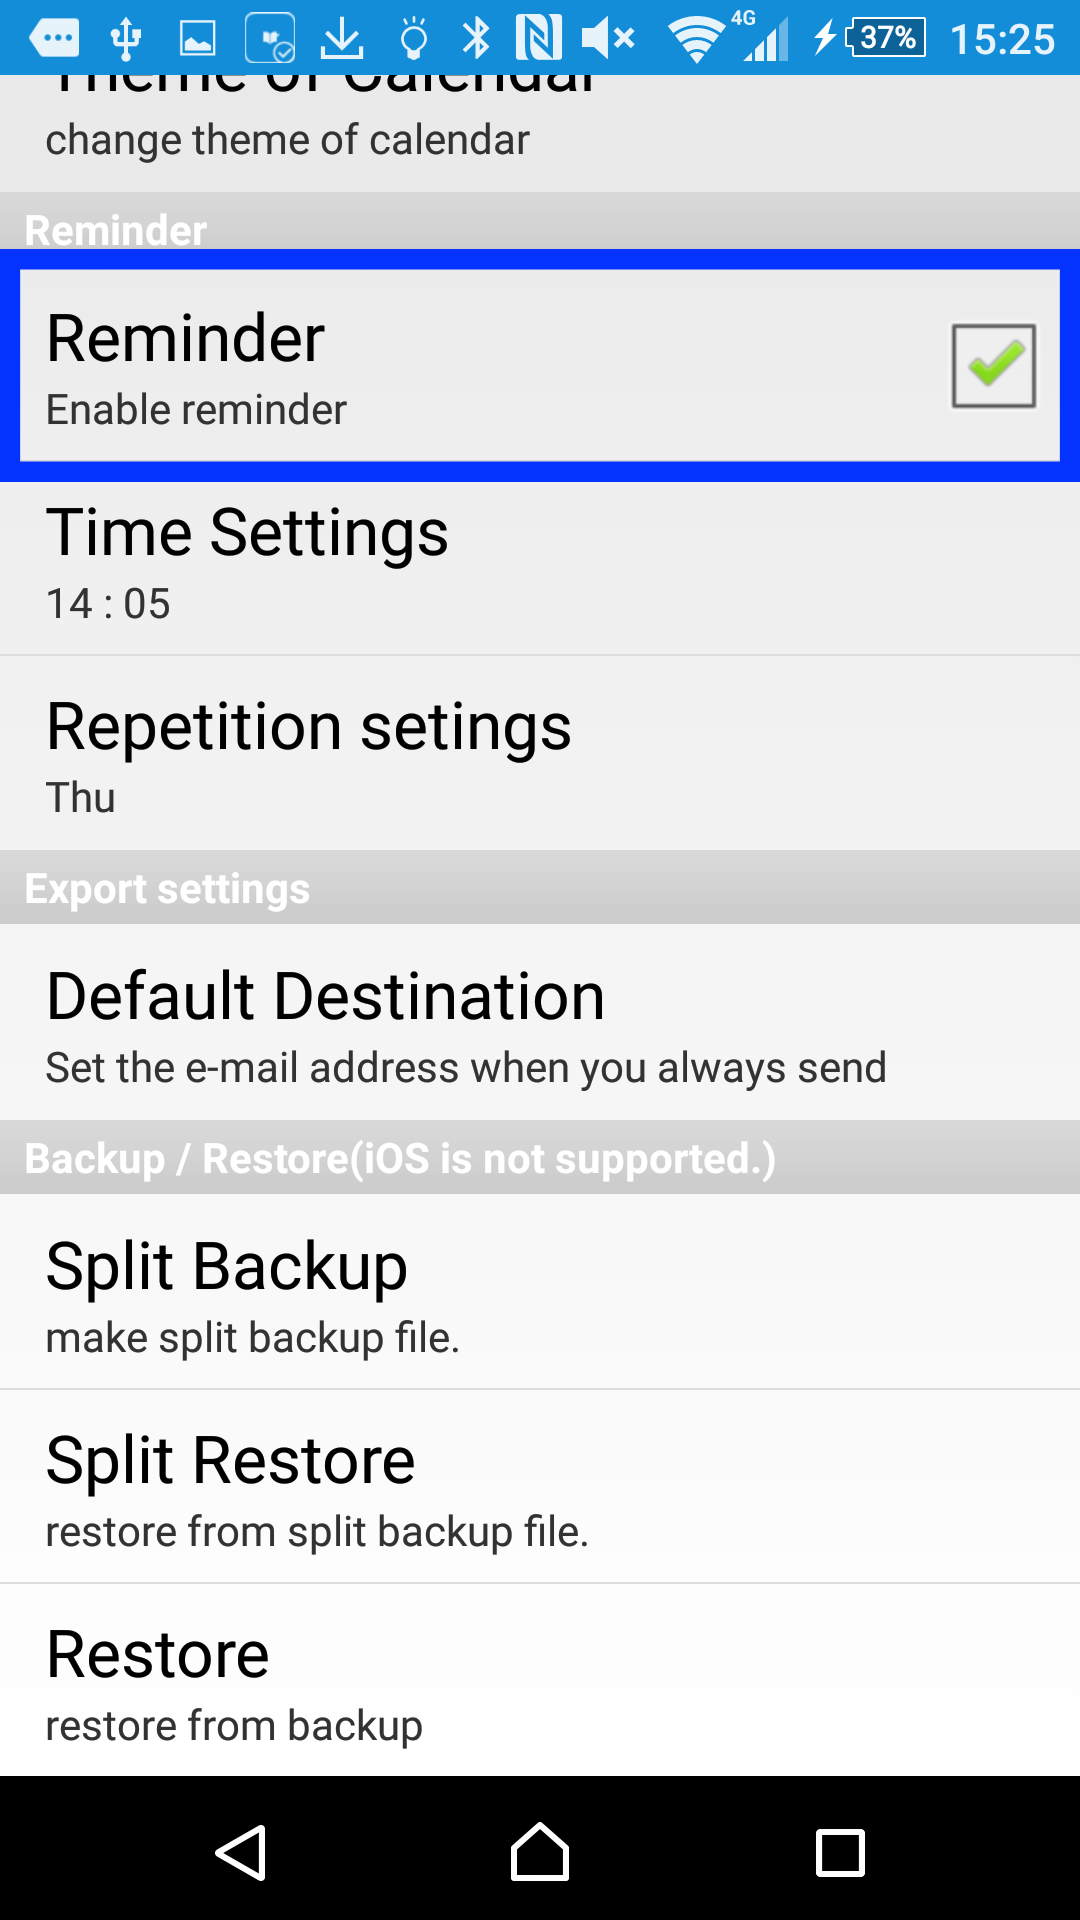
- Tap and set both time setting and repitition setting of reminder.
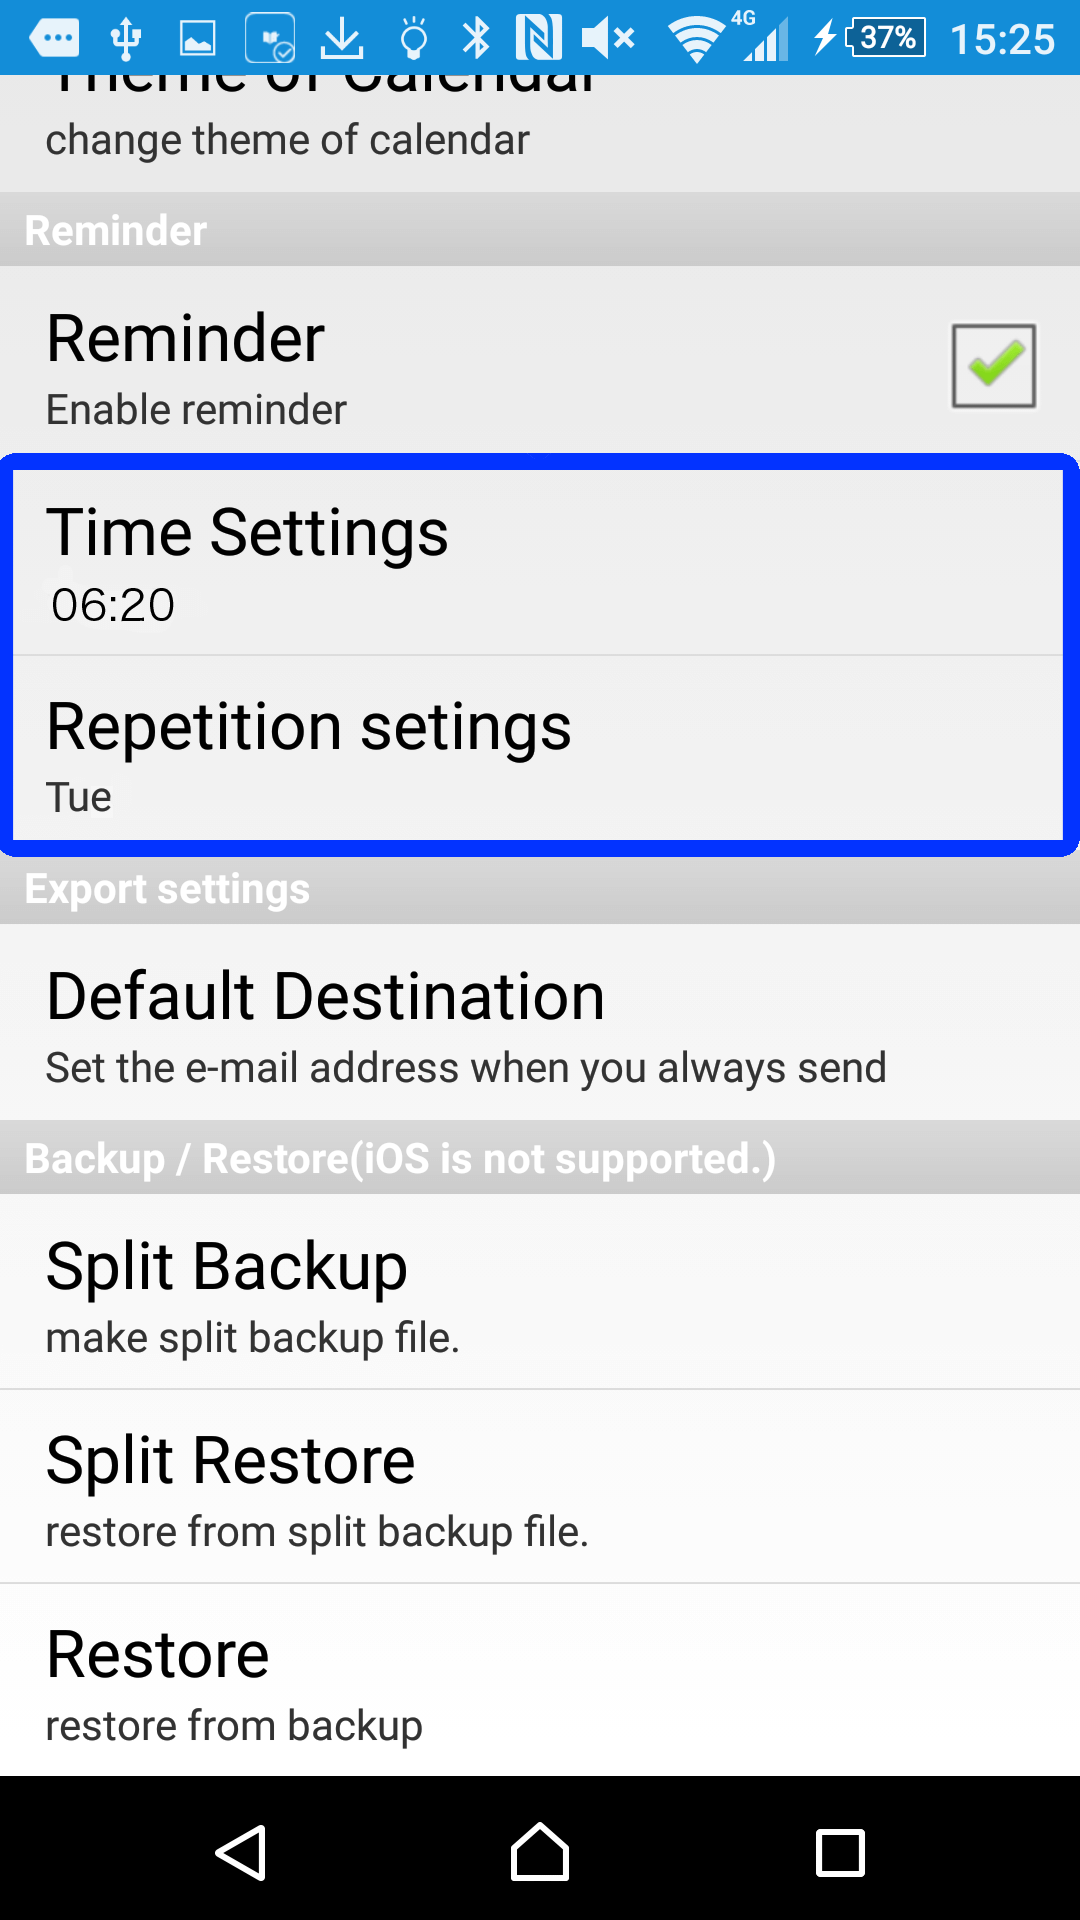
- MomentDiary reminds you on particular timing.
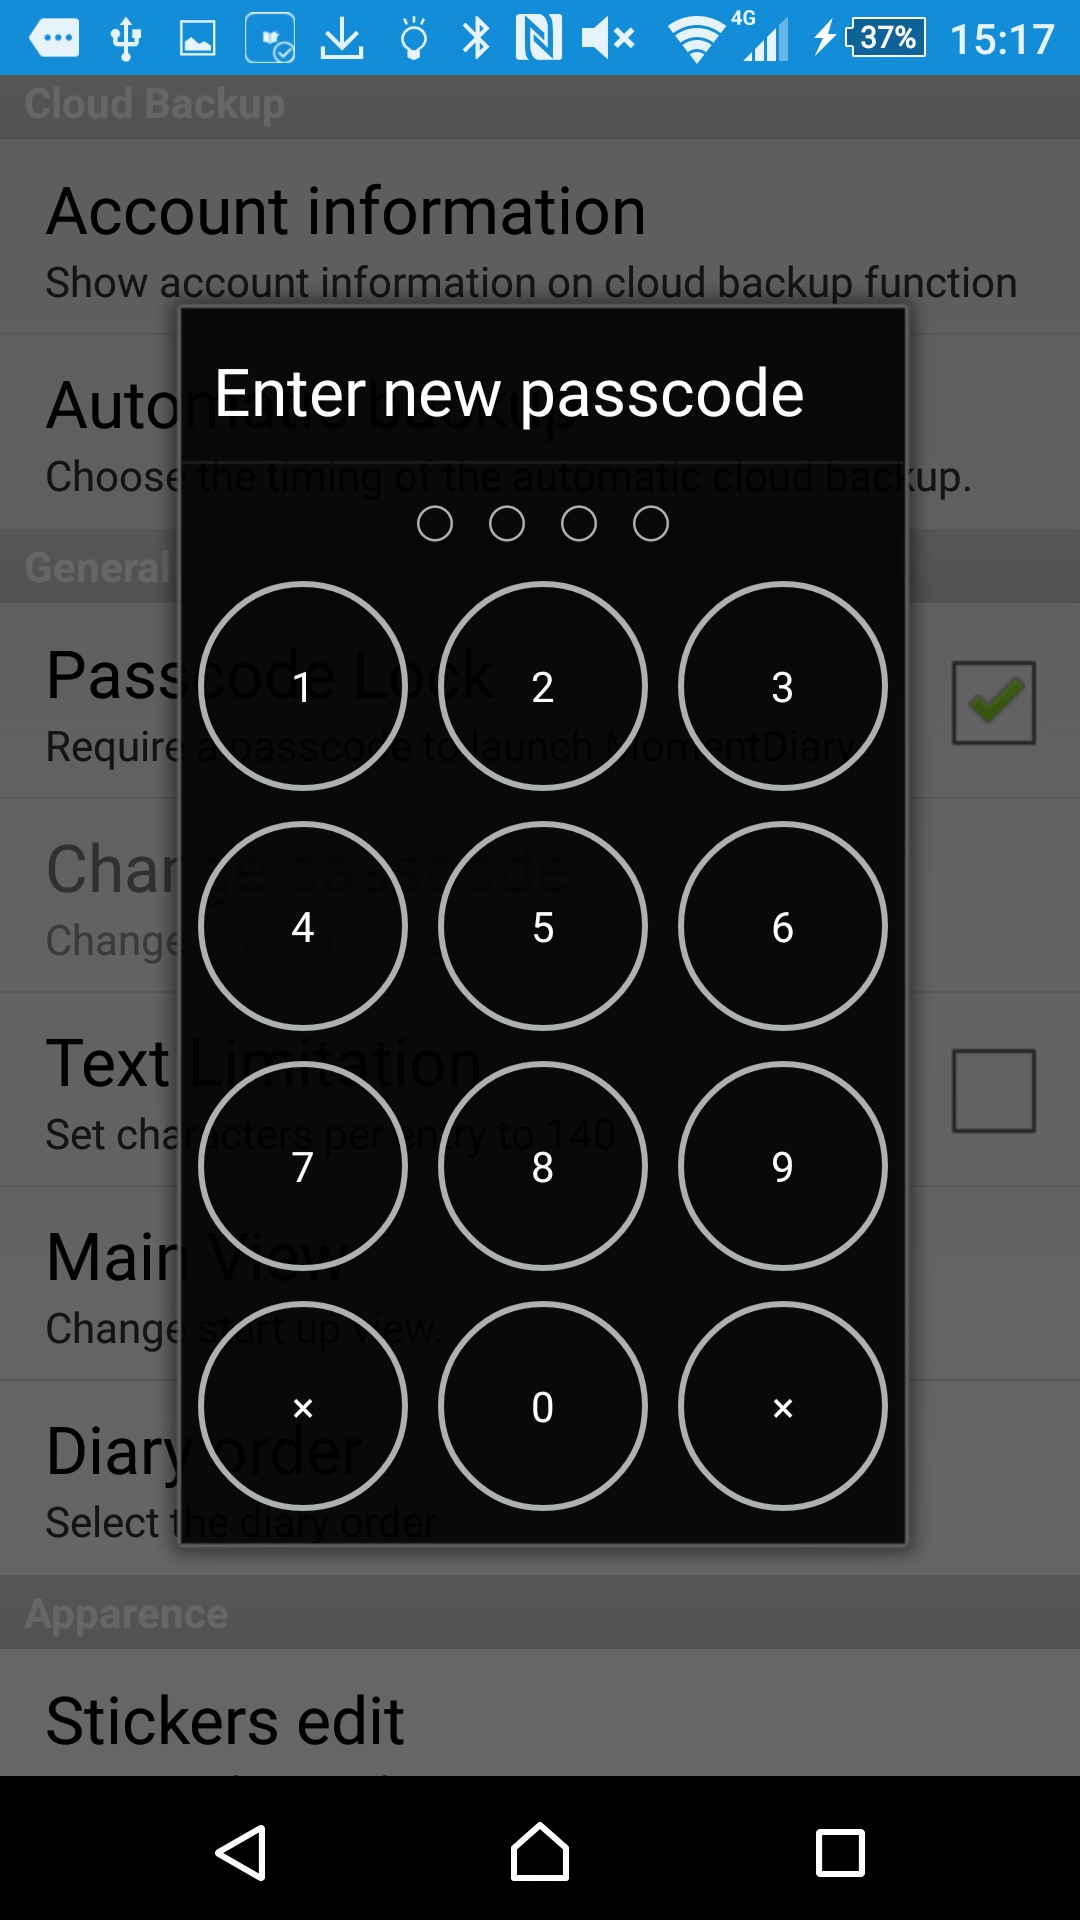
- Lock with passcode -
- Tap the setting button located bottom of the diary editing screen.
- Checkbox for pascode lock will be found as you scroll down. Check the checkbox by tapping it to activate passcode lock.
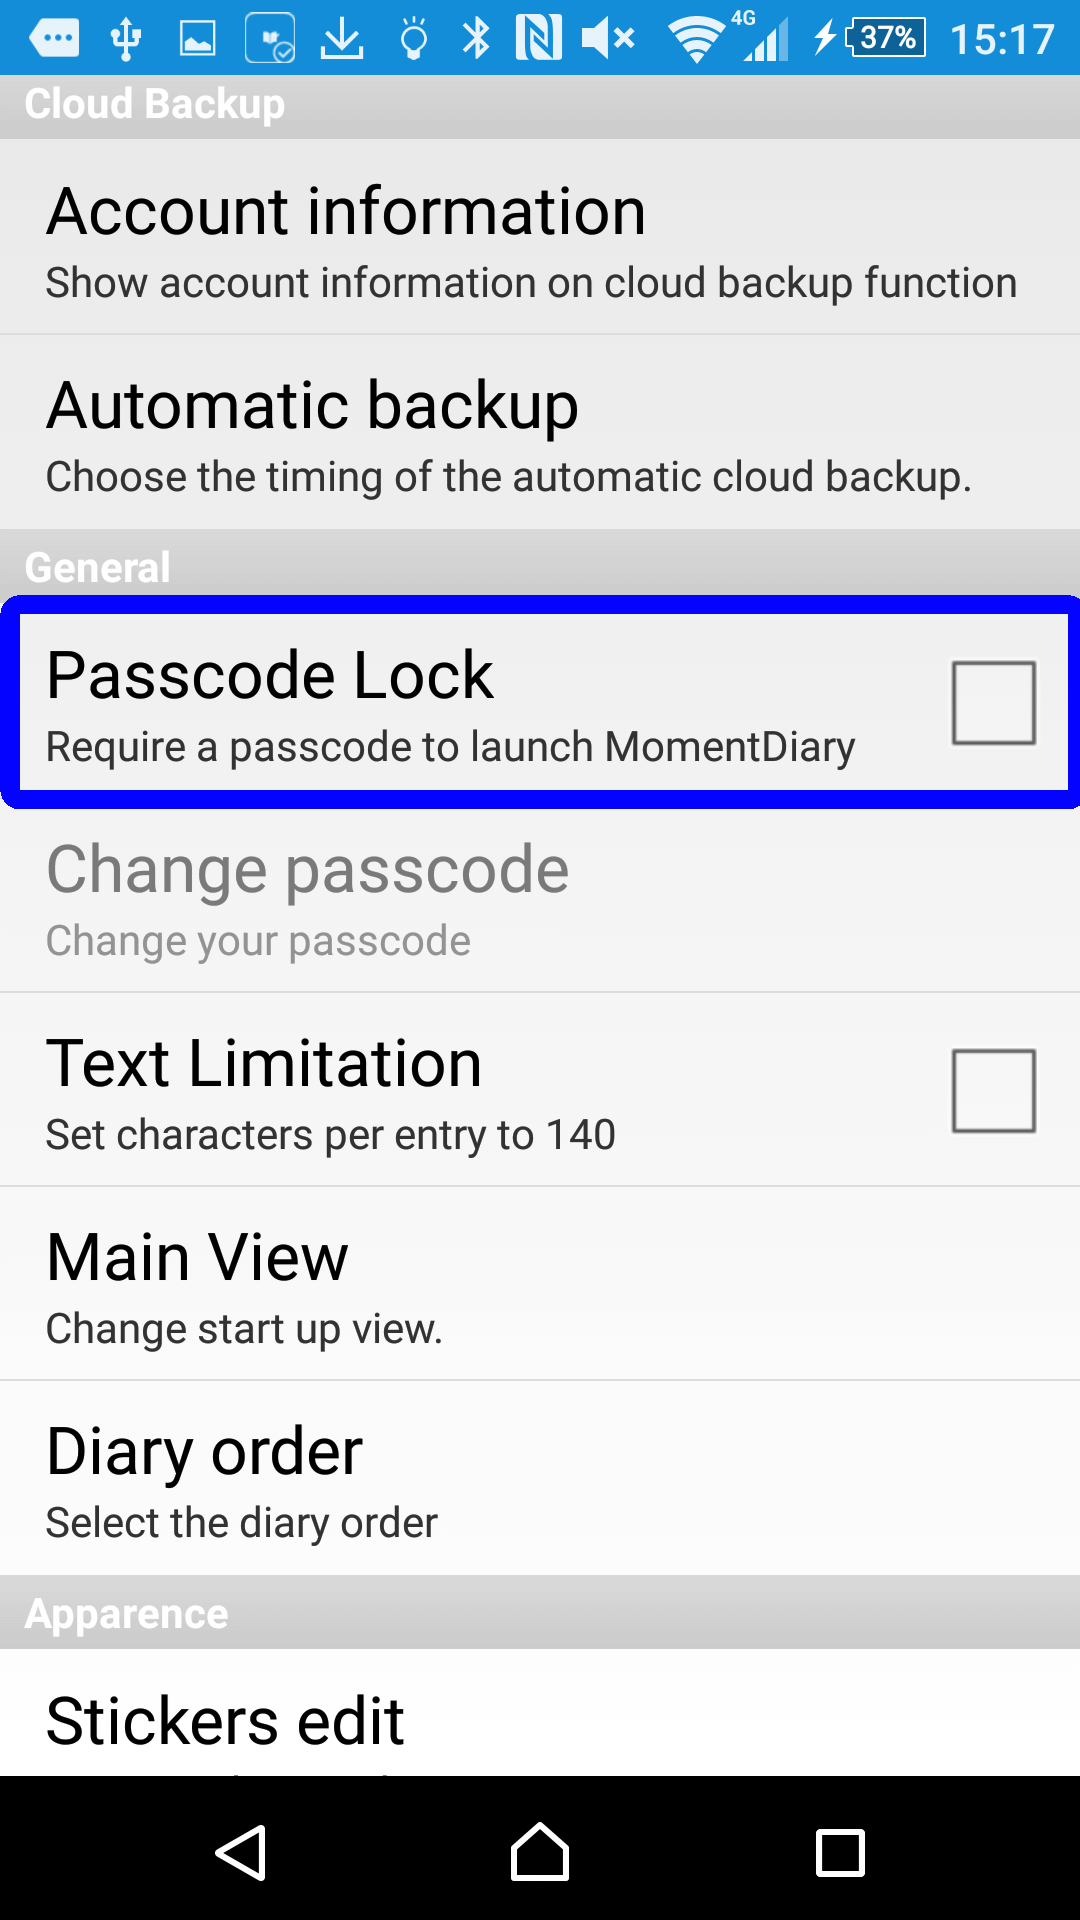
- The entry screen for the new passcode appears. Enter four numbers to set passcode.
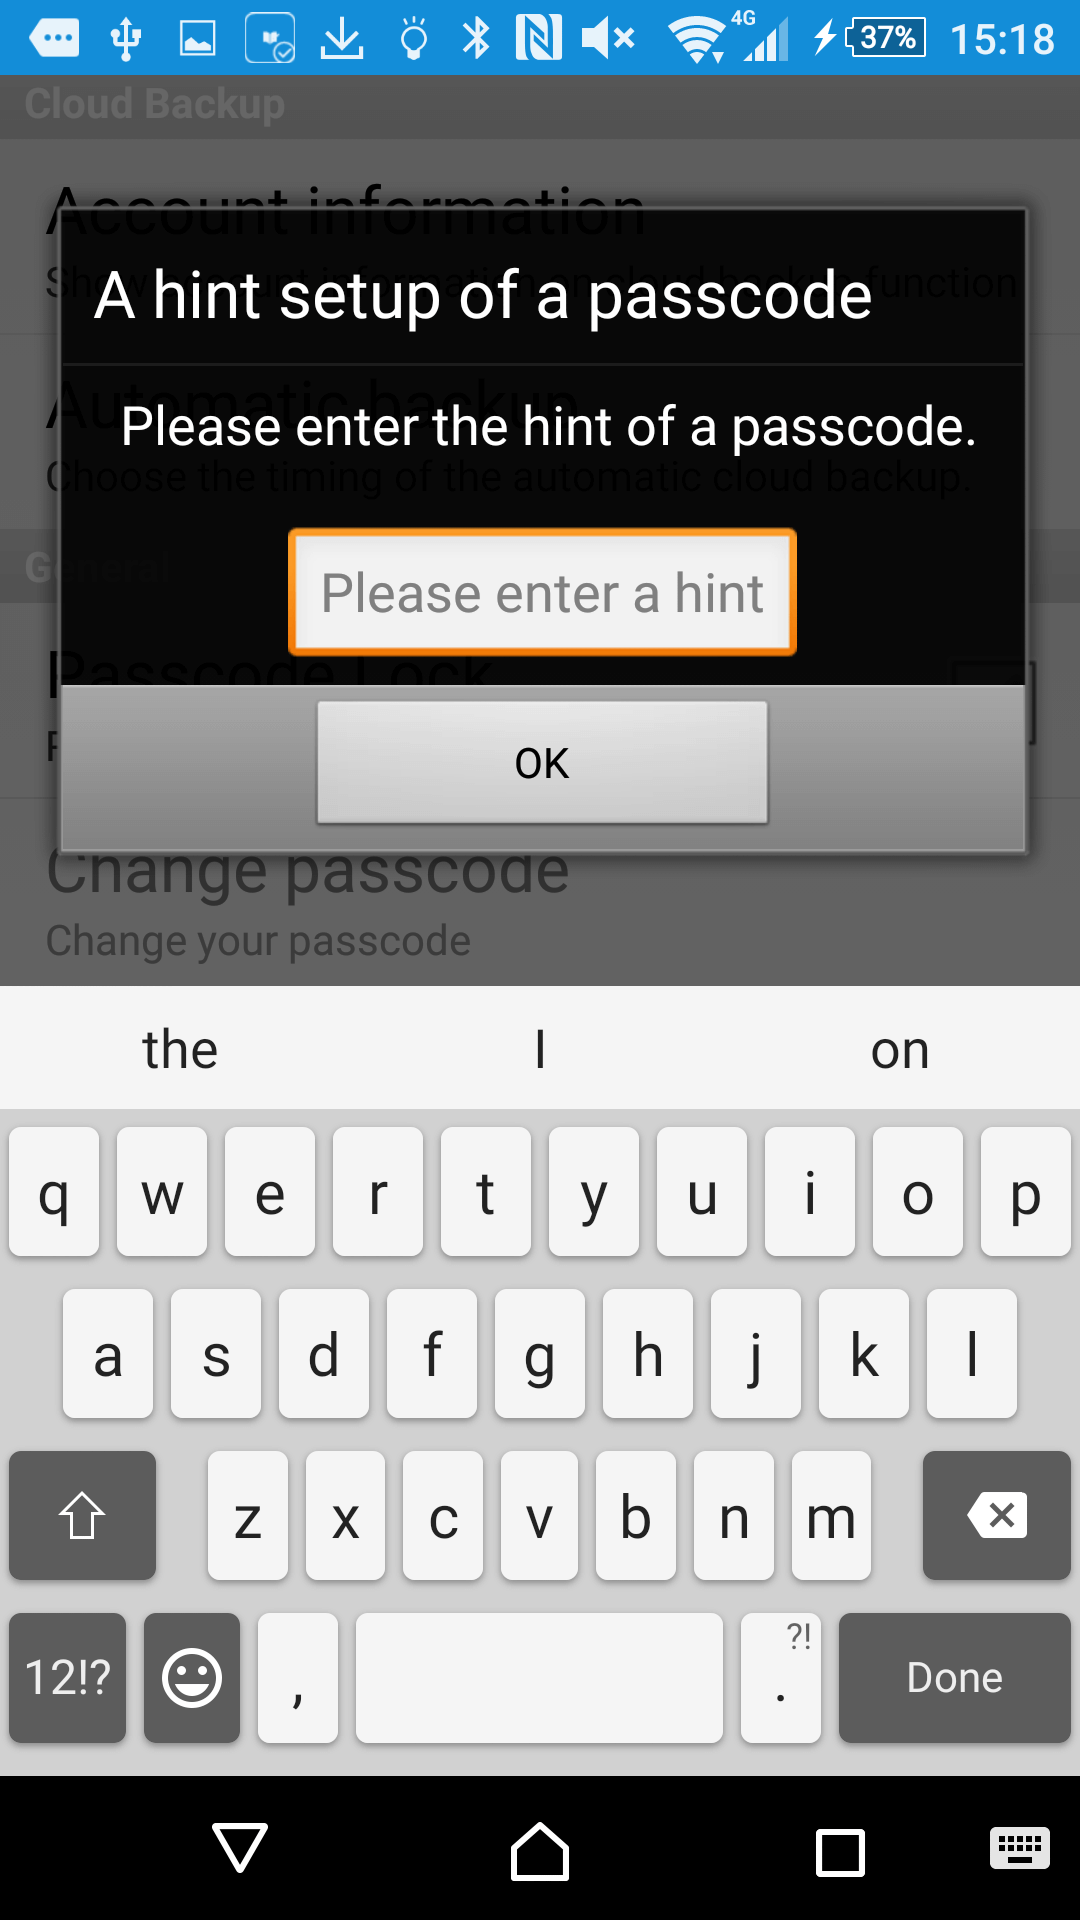
- Set the question to hint you the passcode, in the case of forgetting the code.
- Setting for passcode lock is done. To deactivate the passcode lock, uncheck the passcode lock check box from the setting.
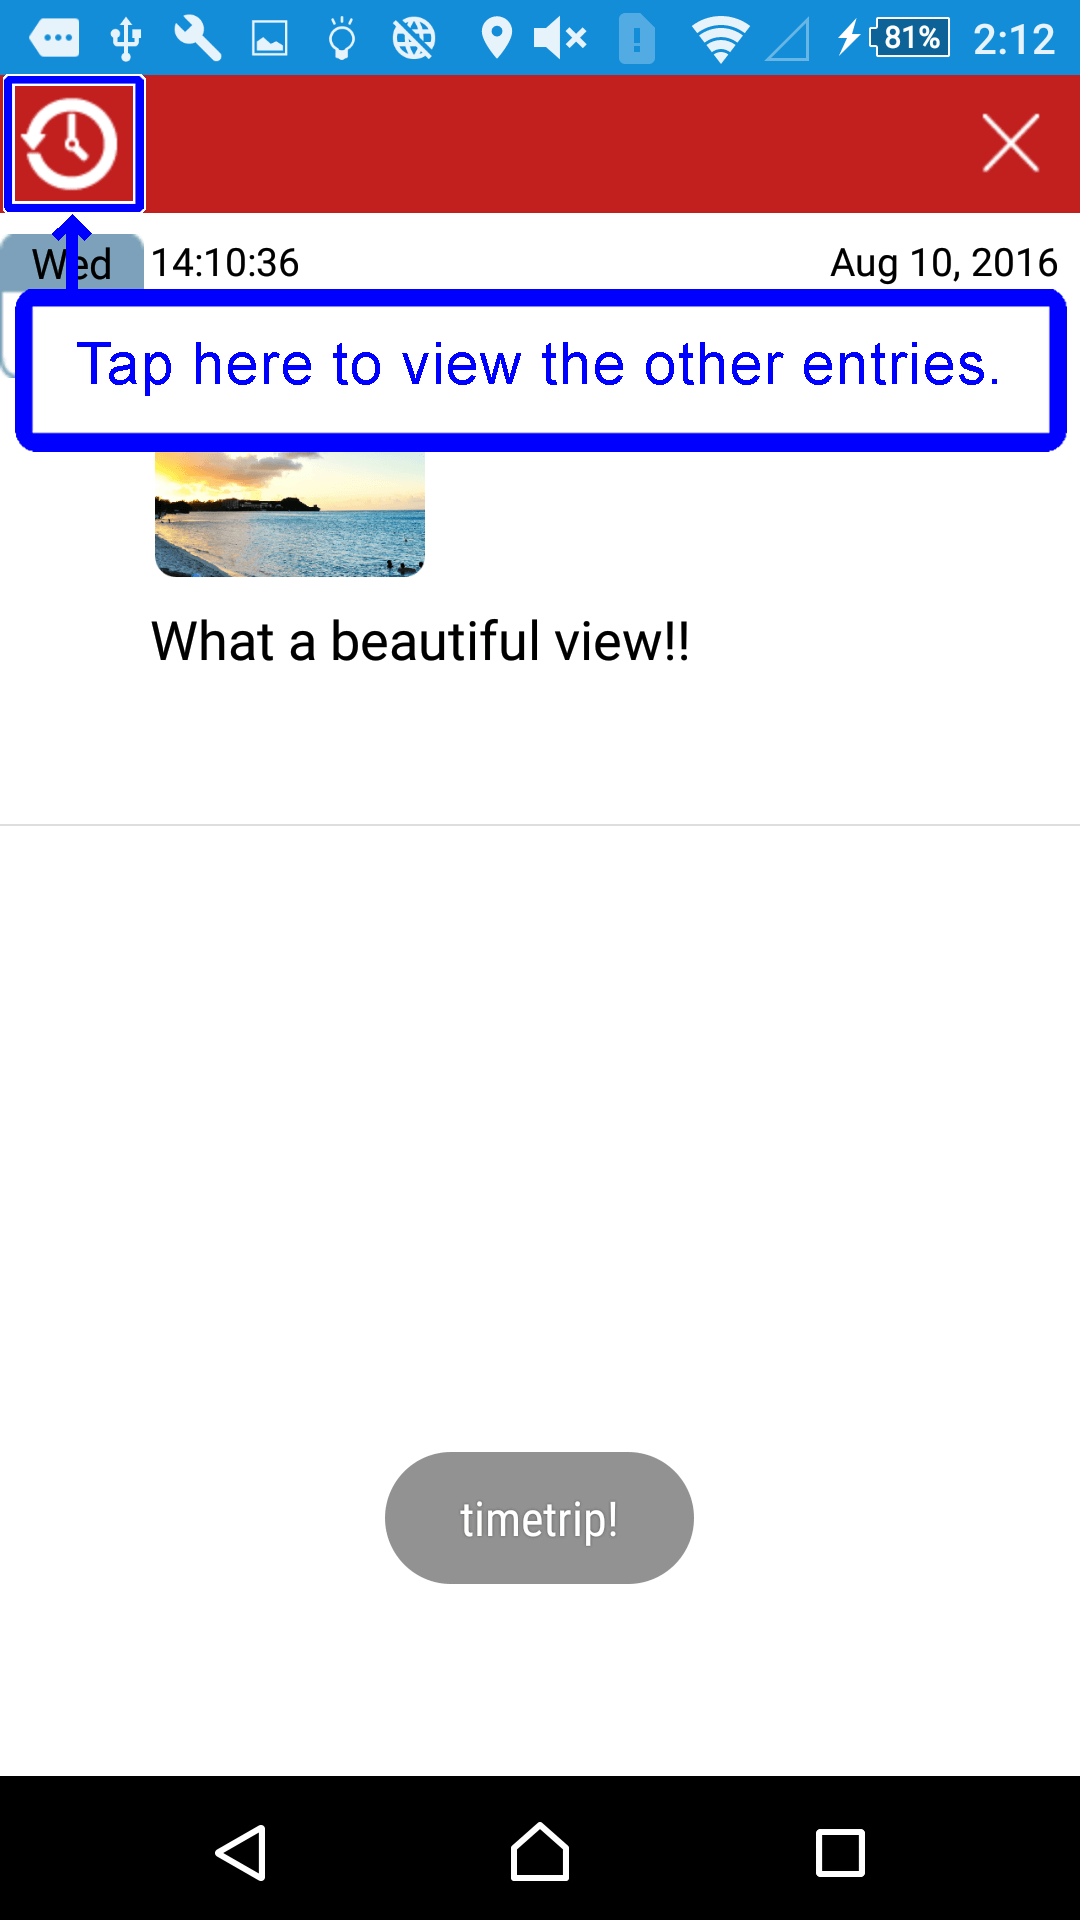
- Timetrip function-
- Timetrip function shows you one of your previous entries randomly as you tap the icon.
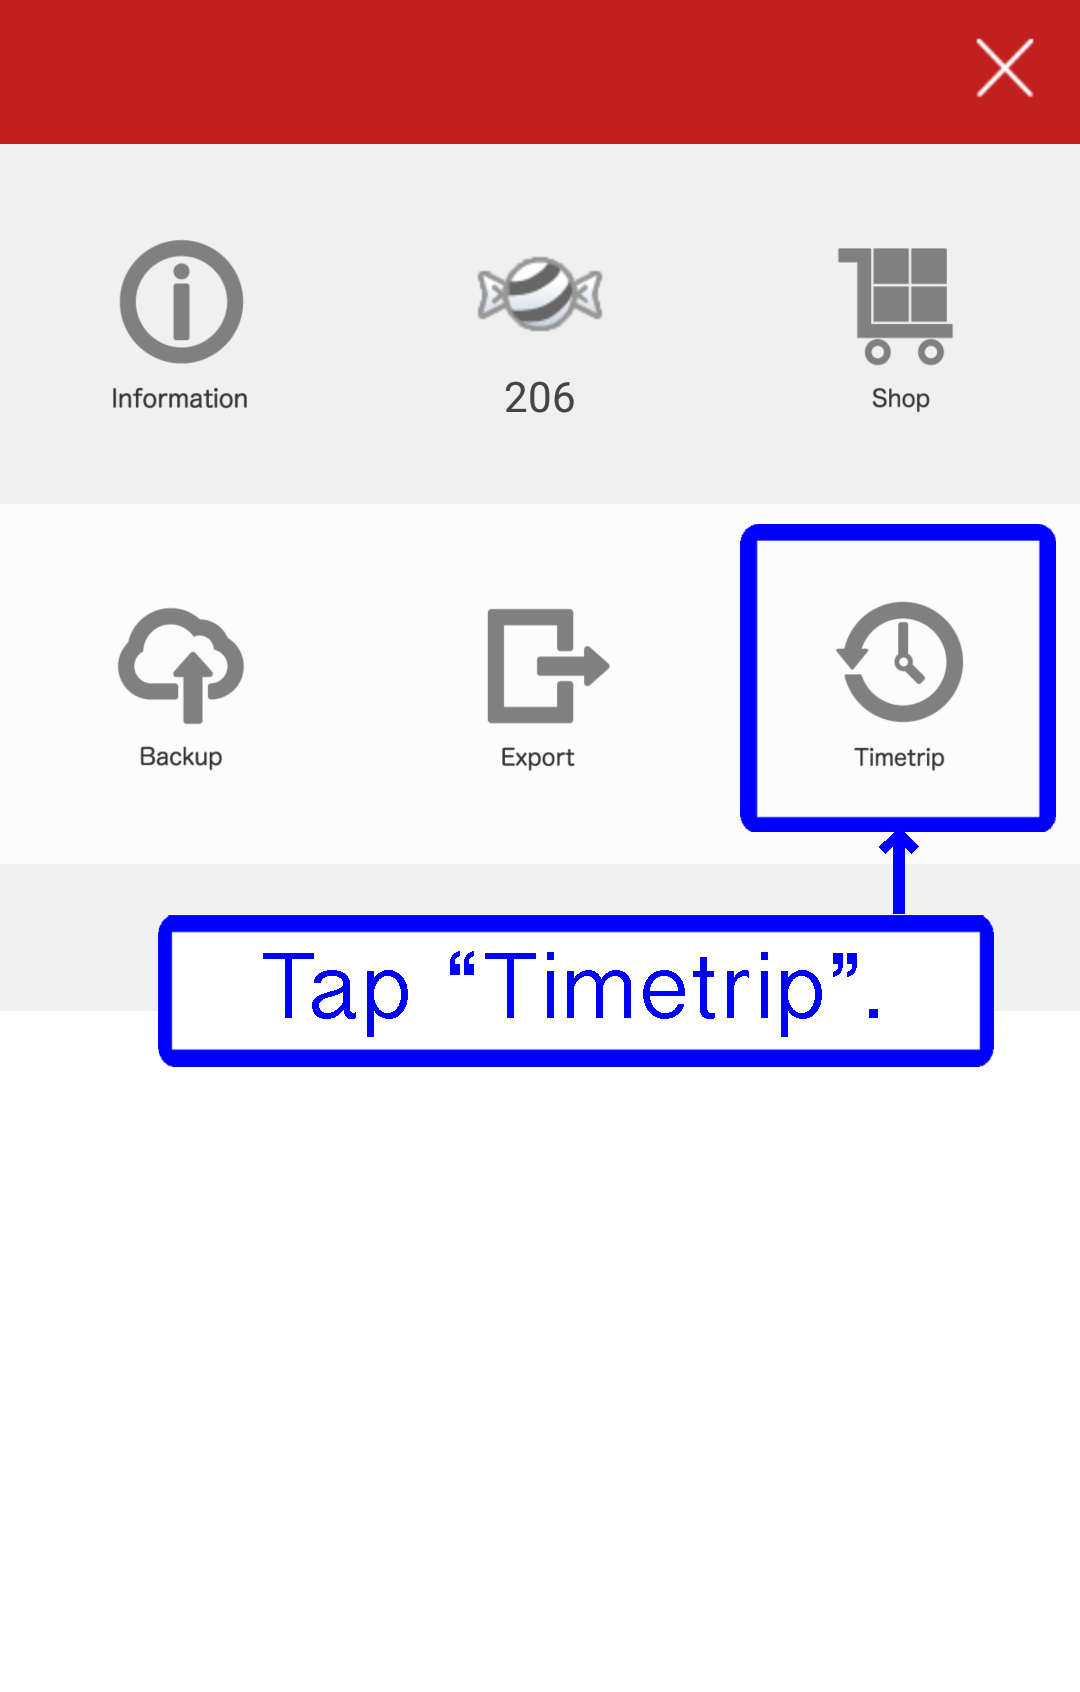
- Tap the Timetrip button in the tile menu.
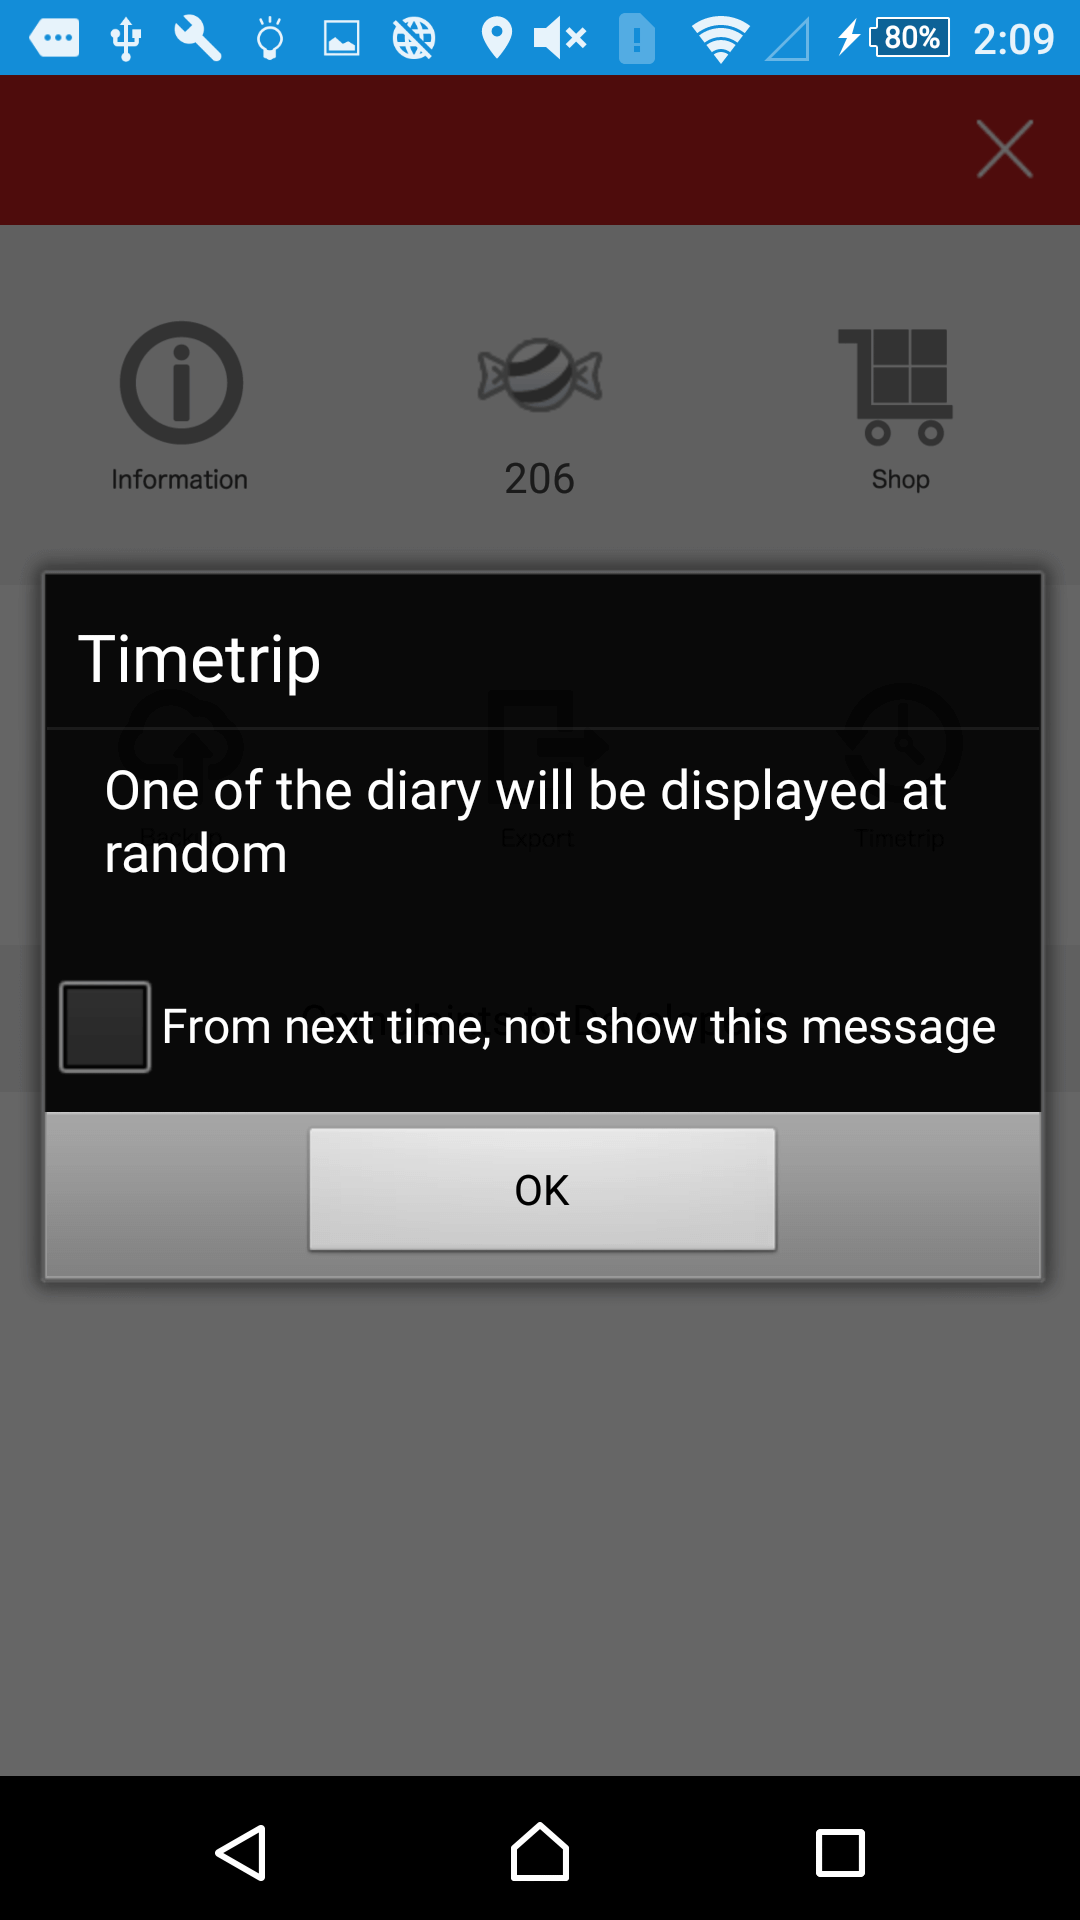
- Tap “OK” button, one of the previous entries is displayed.
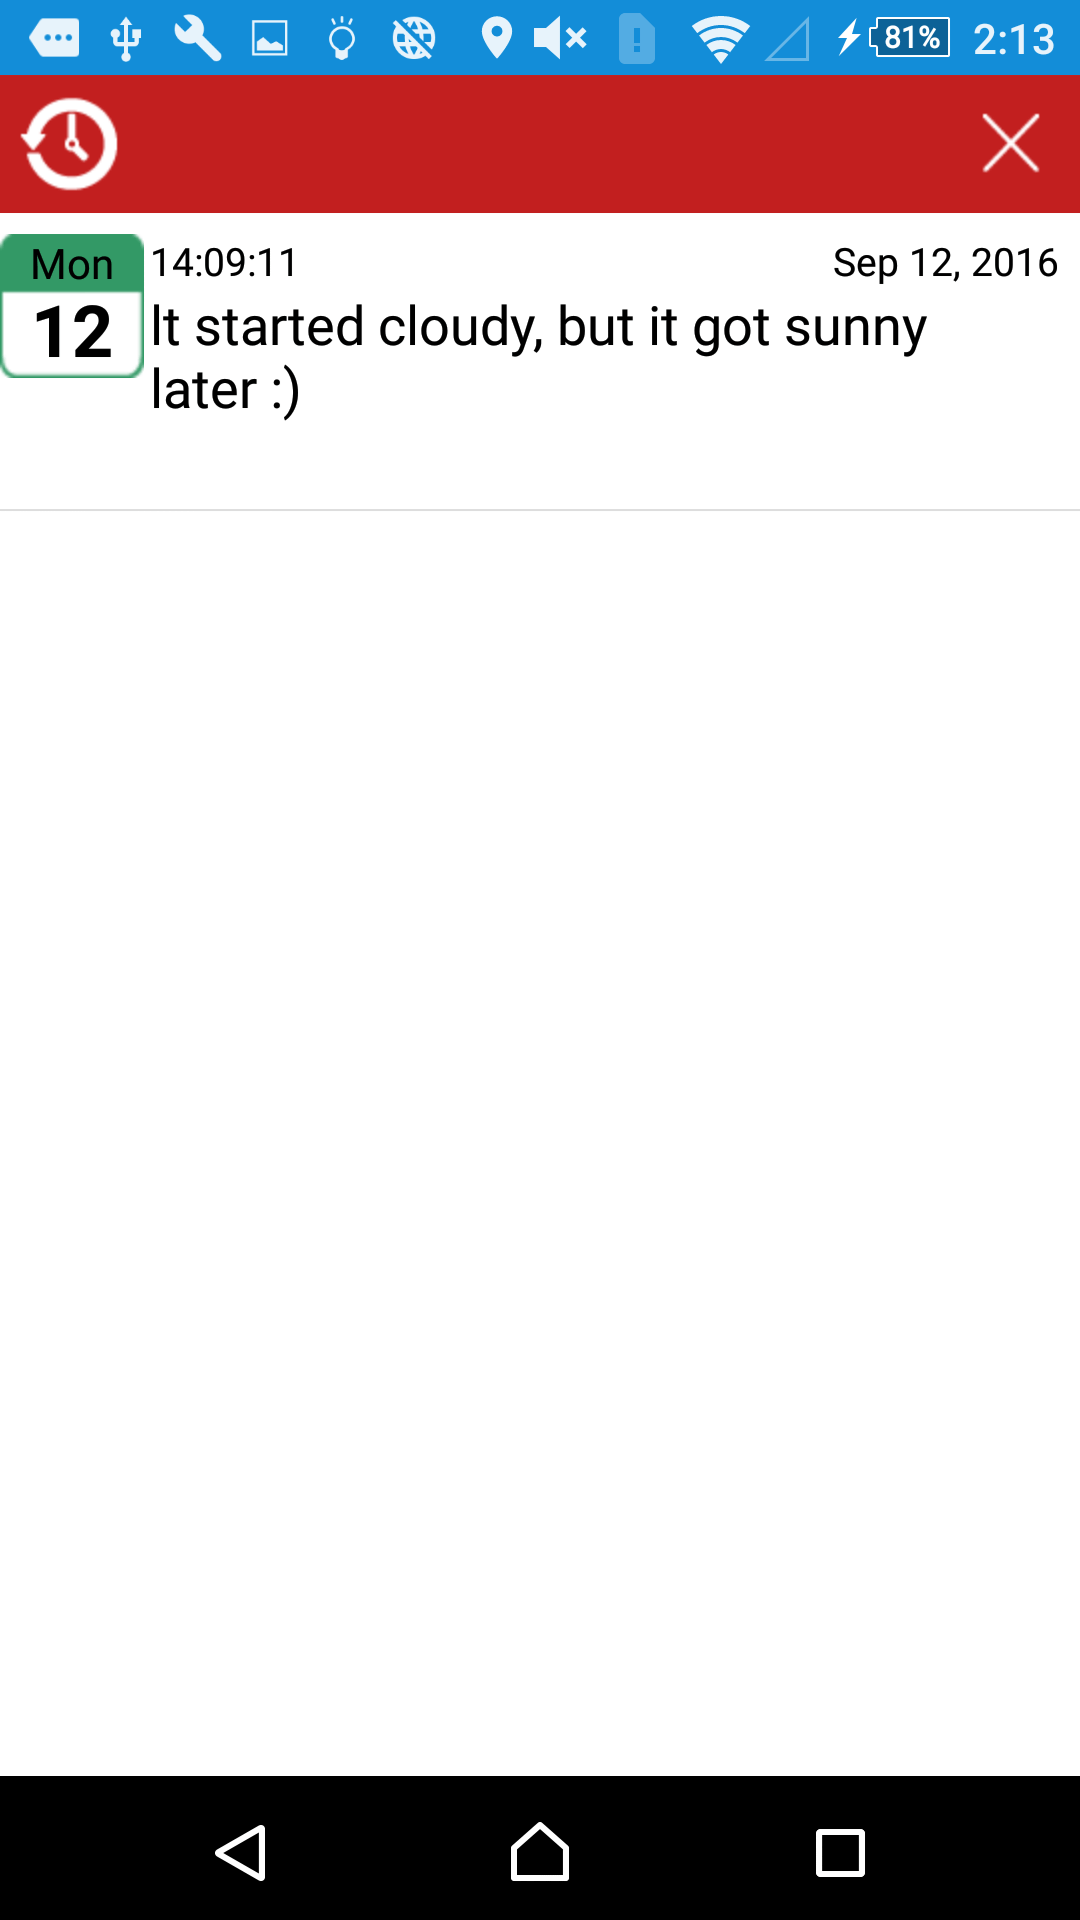
- Tap the clock icon, then you can read other entries.
 TOP
TOP